
01Steps
Open Add Watermark in Process
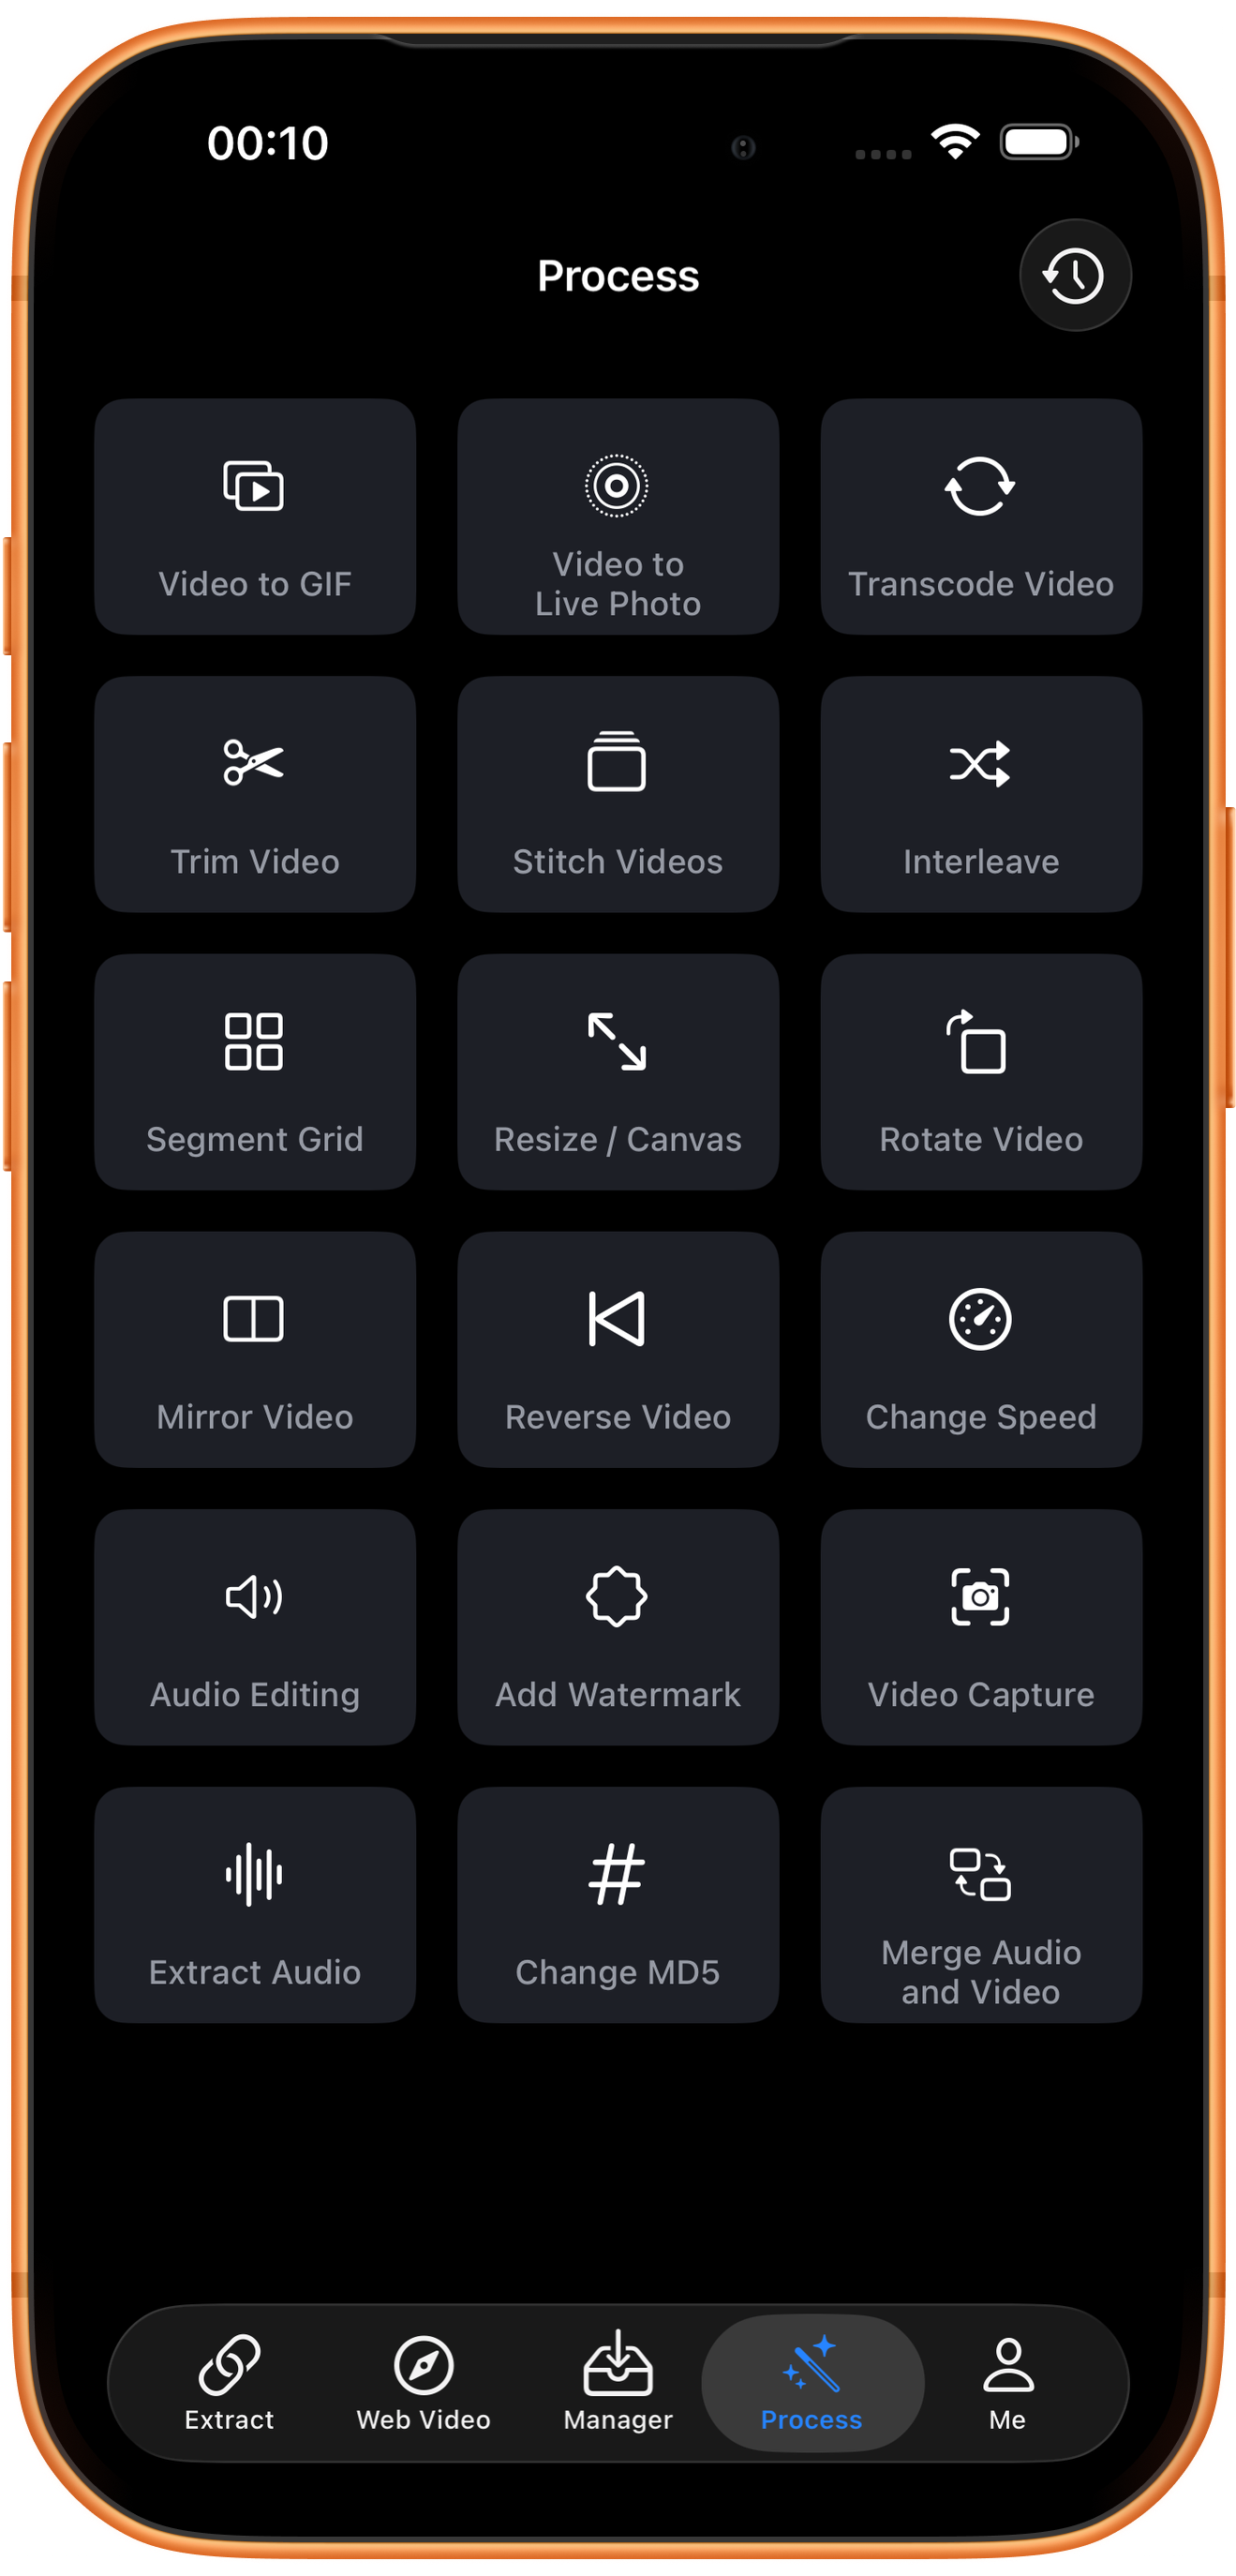
Tap Process in the bottom navigation. Find Add Watermark in row 5, in the middle column, and tap the entry marked by the arrow.
02Steps
Choose the video to process
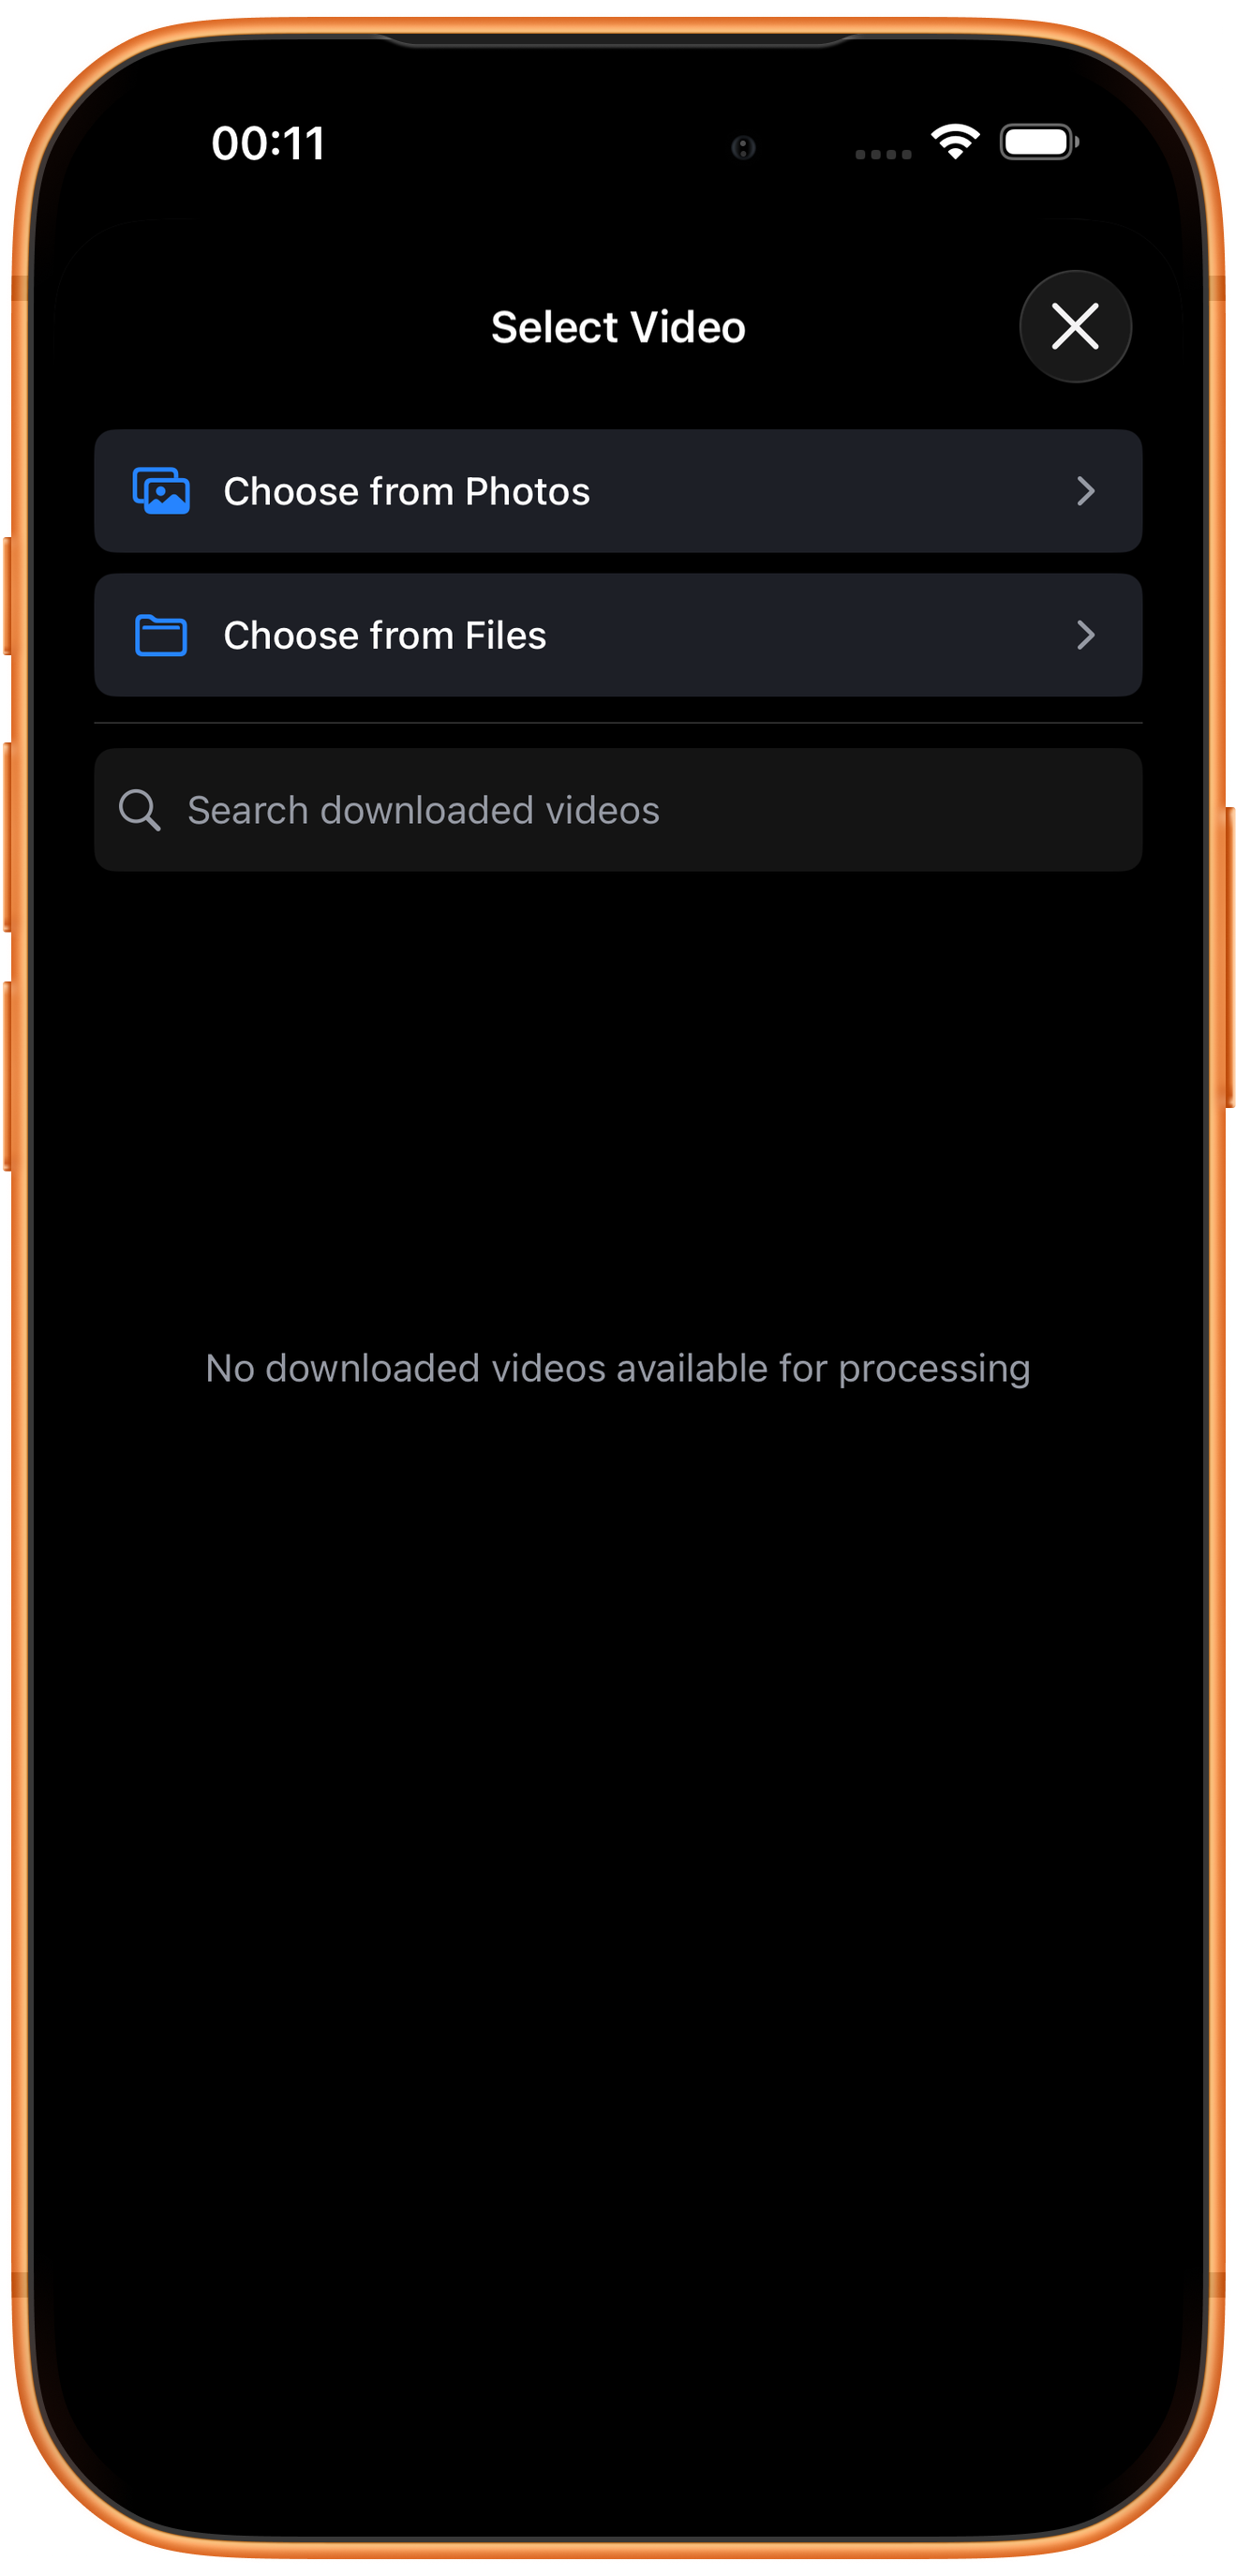
In Select Video, tap Choose from Photos and pick your source. Use Choose from Files for media stored in Files. An empty download list does not prevent importing from Photos. Some examples reuse a previously trimmed clip of about six seconds; you can prepare a short sample with Trim Video.
03Steps
Set the watermark text and size
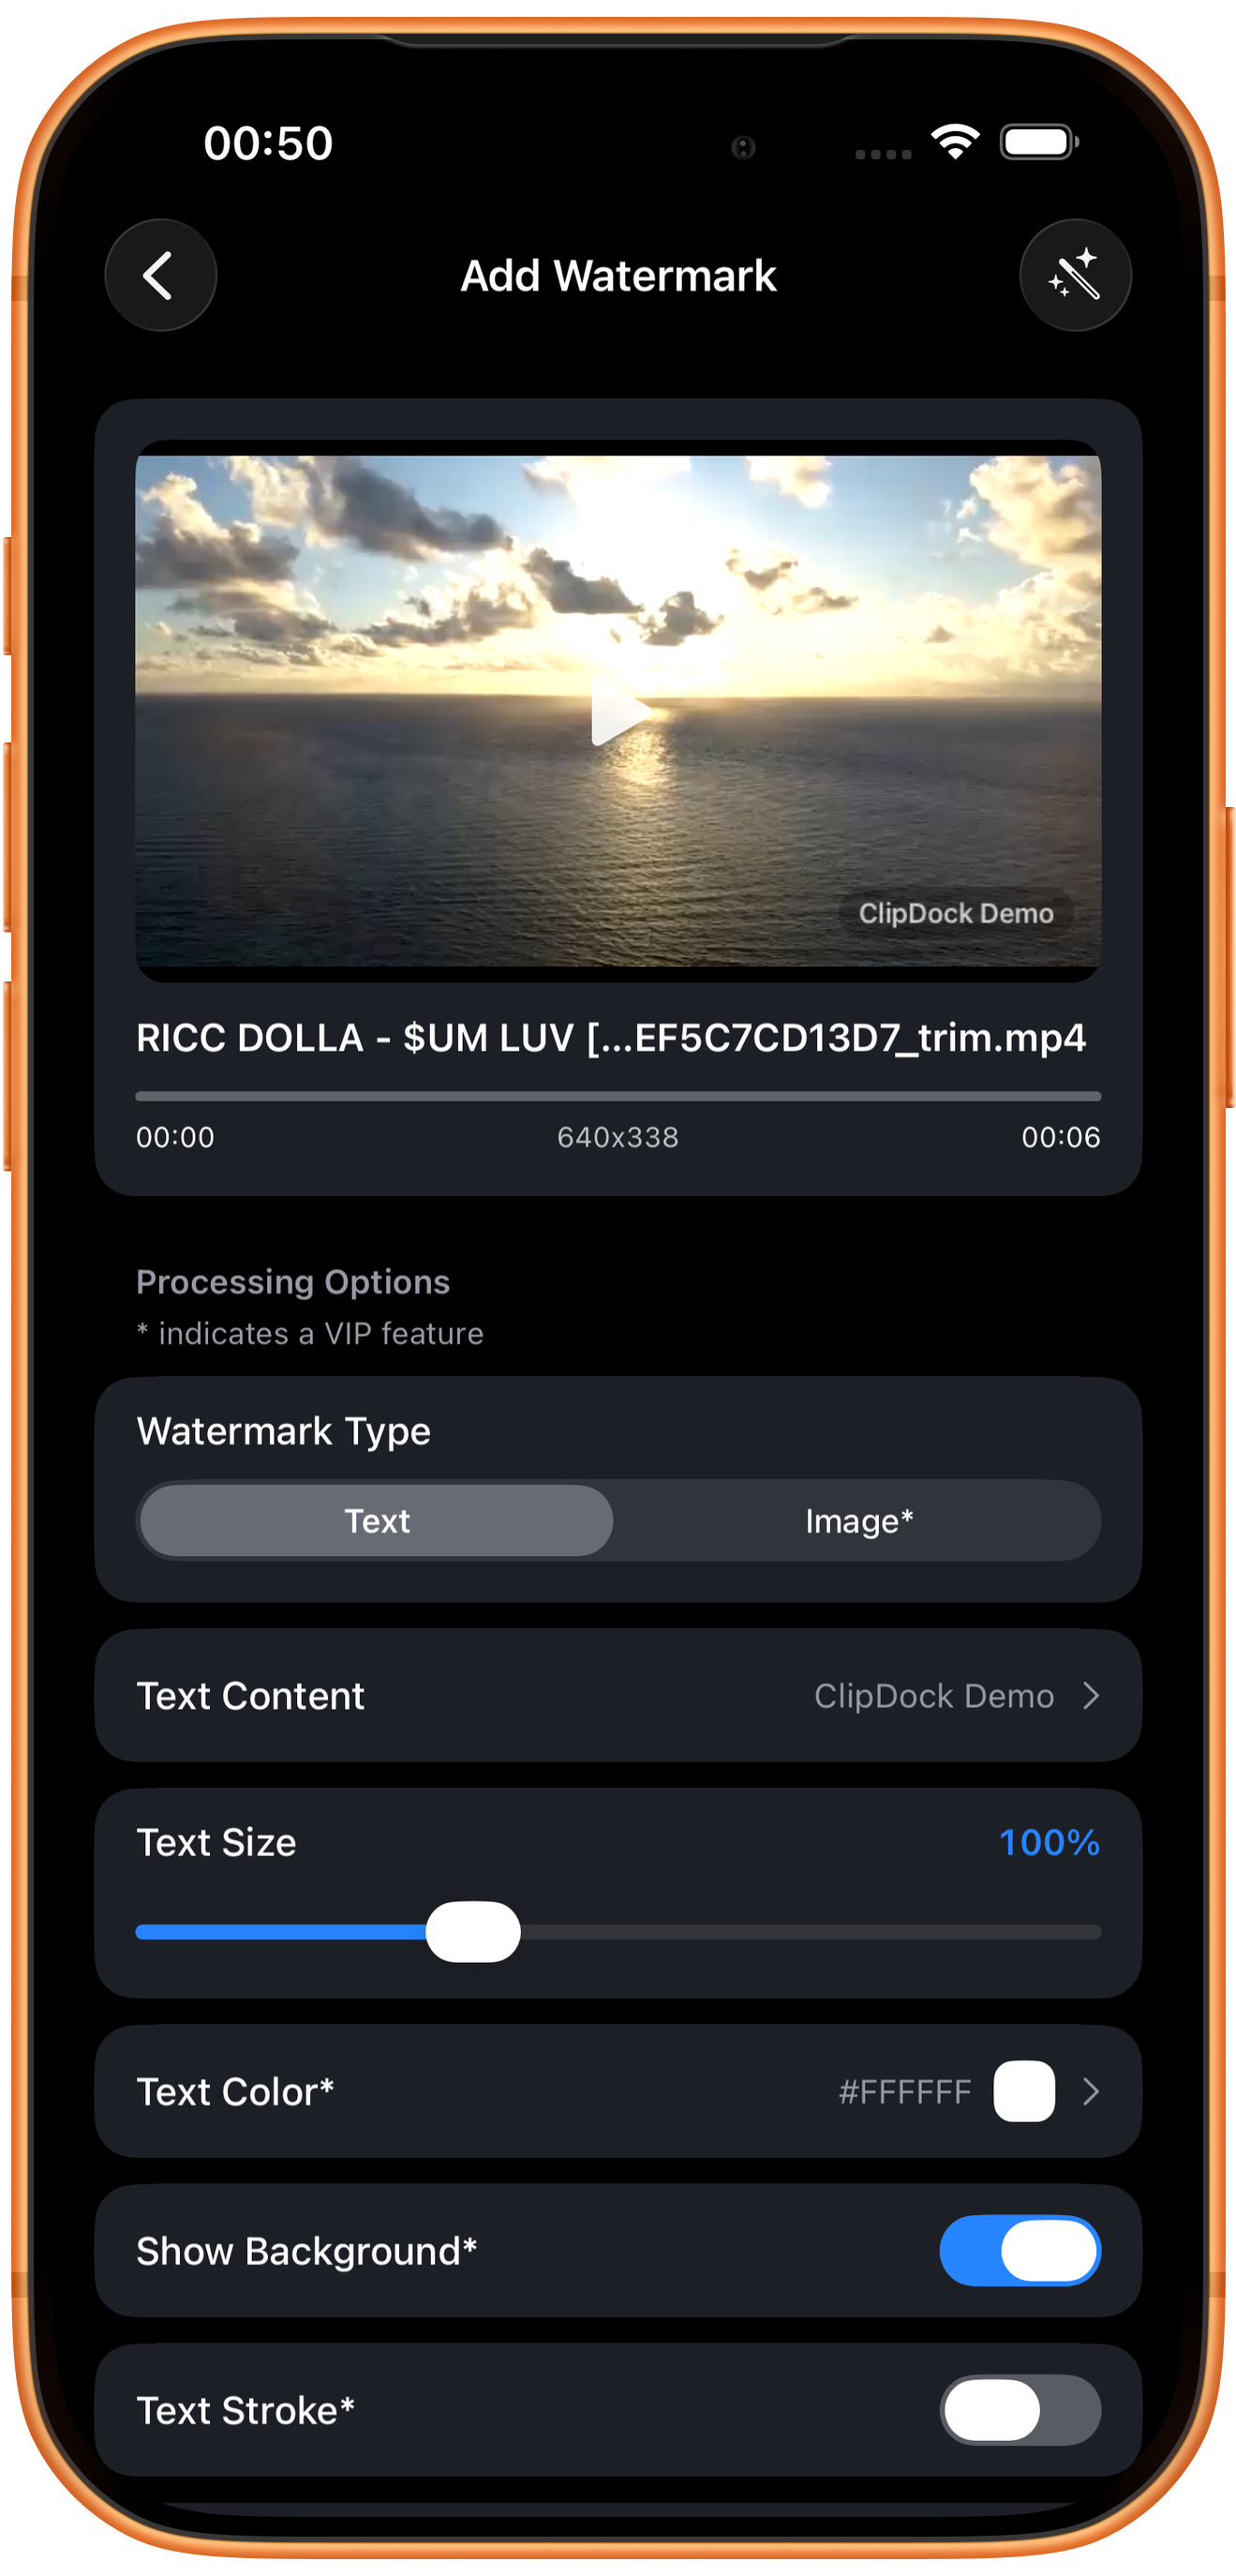
Choose Text under Watermark Type, then enter and confirm the text in Text Content. This settings example uses ClipDock Demo. The preview shows its position and approximate appearance.
Text and Image*
Text adds a text watermark. Image is the VIP image-watermark option. Only text was configured here.
Text Size
The slider’s size percentage is 100% in this example. Check the preview to avoid covering the subject, subtitles, or important details.
04Steps
Adjust position and appearance
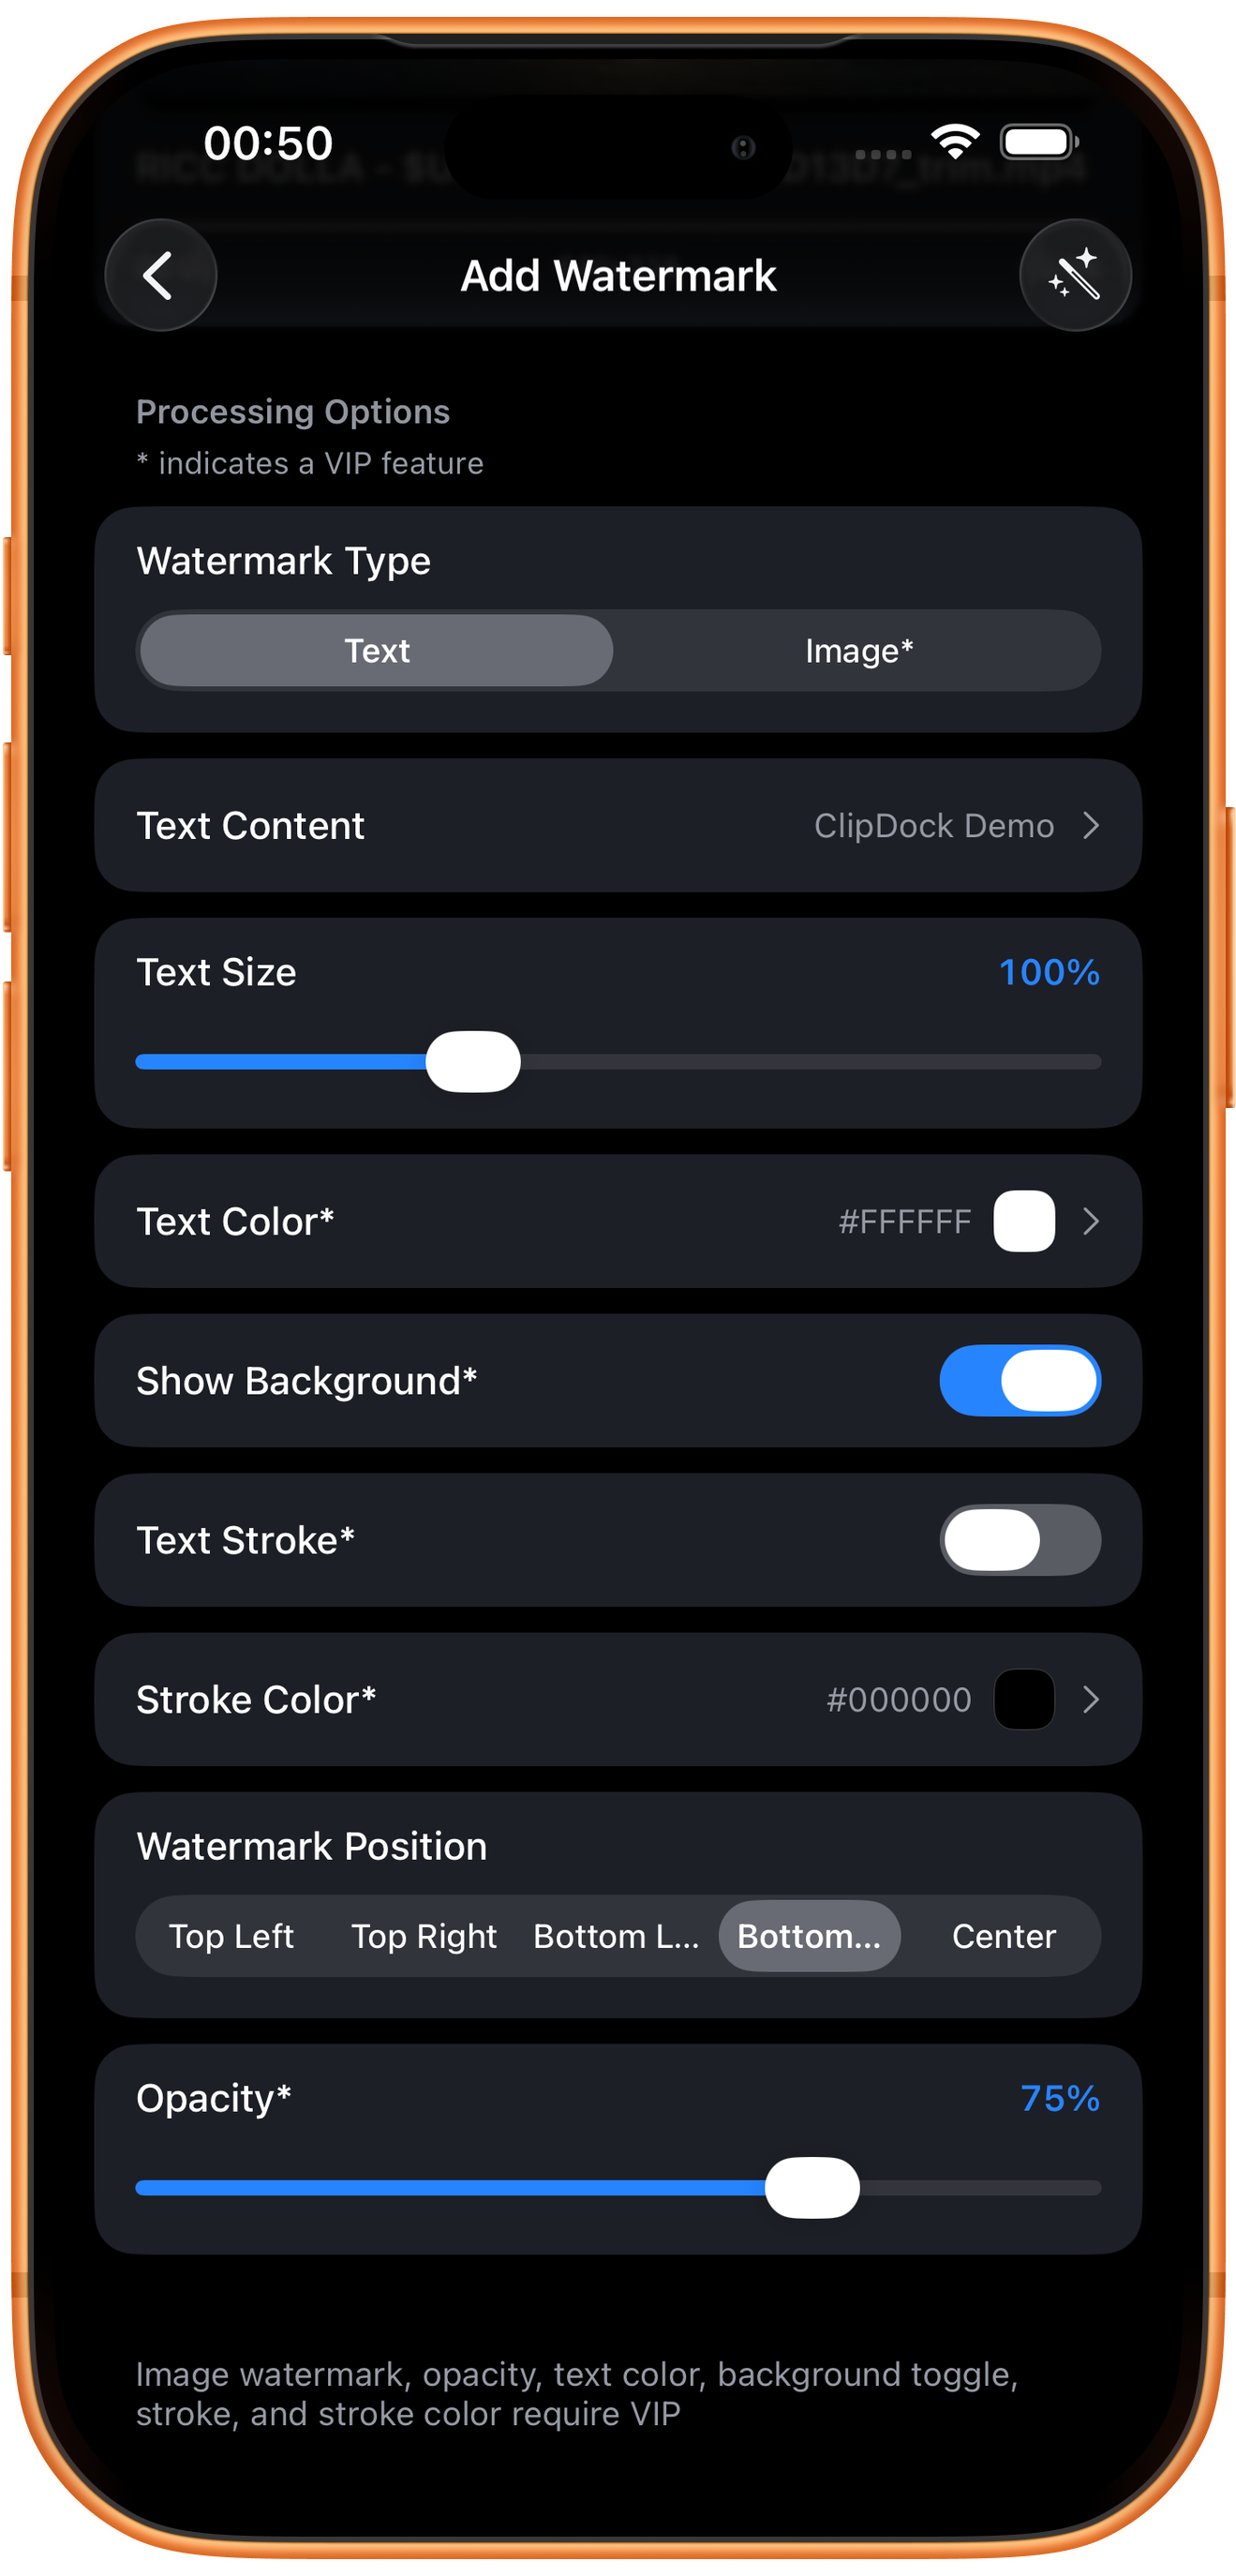
Scroll to Watermark Position, color, background, stroke, and Opacity. Starred settings require VIP; seeing a default value does not mean it can be changed for free.
Watermark Position
Available positions include all four corners and center. The example uses bottom right. Choose a place clear of the subject and subtitles, checking landscape and portrait sources separately.
Color, background, and stroke
Text Color changes the lettering; Show Background controls its backing; Text Stroke and Stroke Color control the outline. These entries are marked VIP. Check contrast across bright and dark scenes.
Opacity*
The example shows 75%. Lower opacity makes the watermark fainter and potentially harder to read. This parameter requires VIP; the test keeps its default.
05Steps
Preview and save the watermarked output
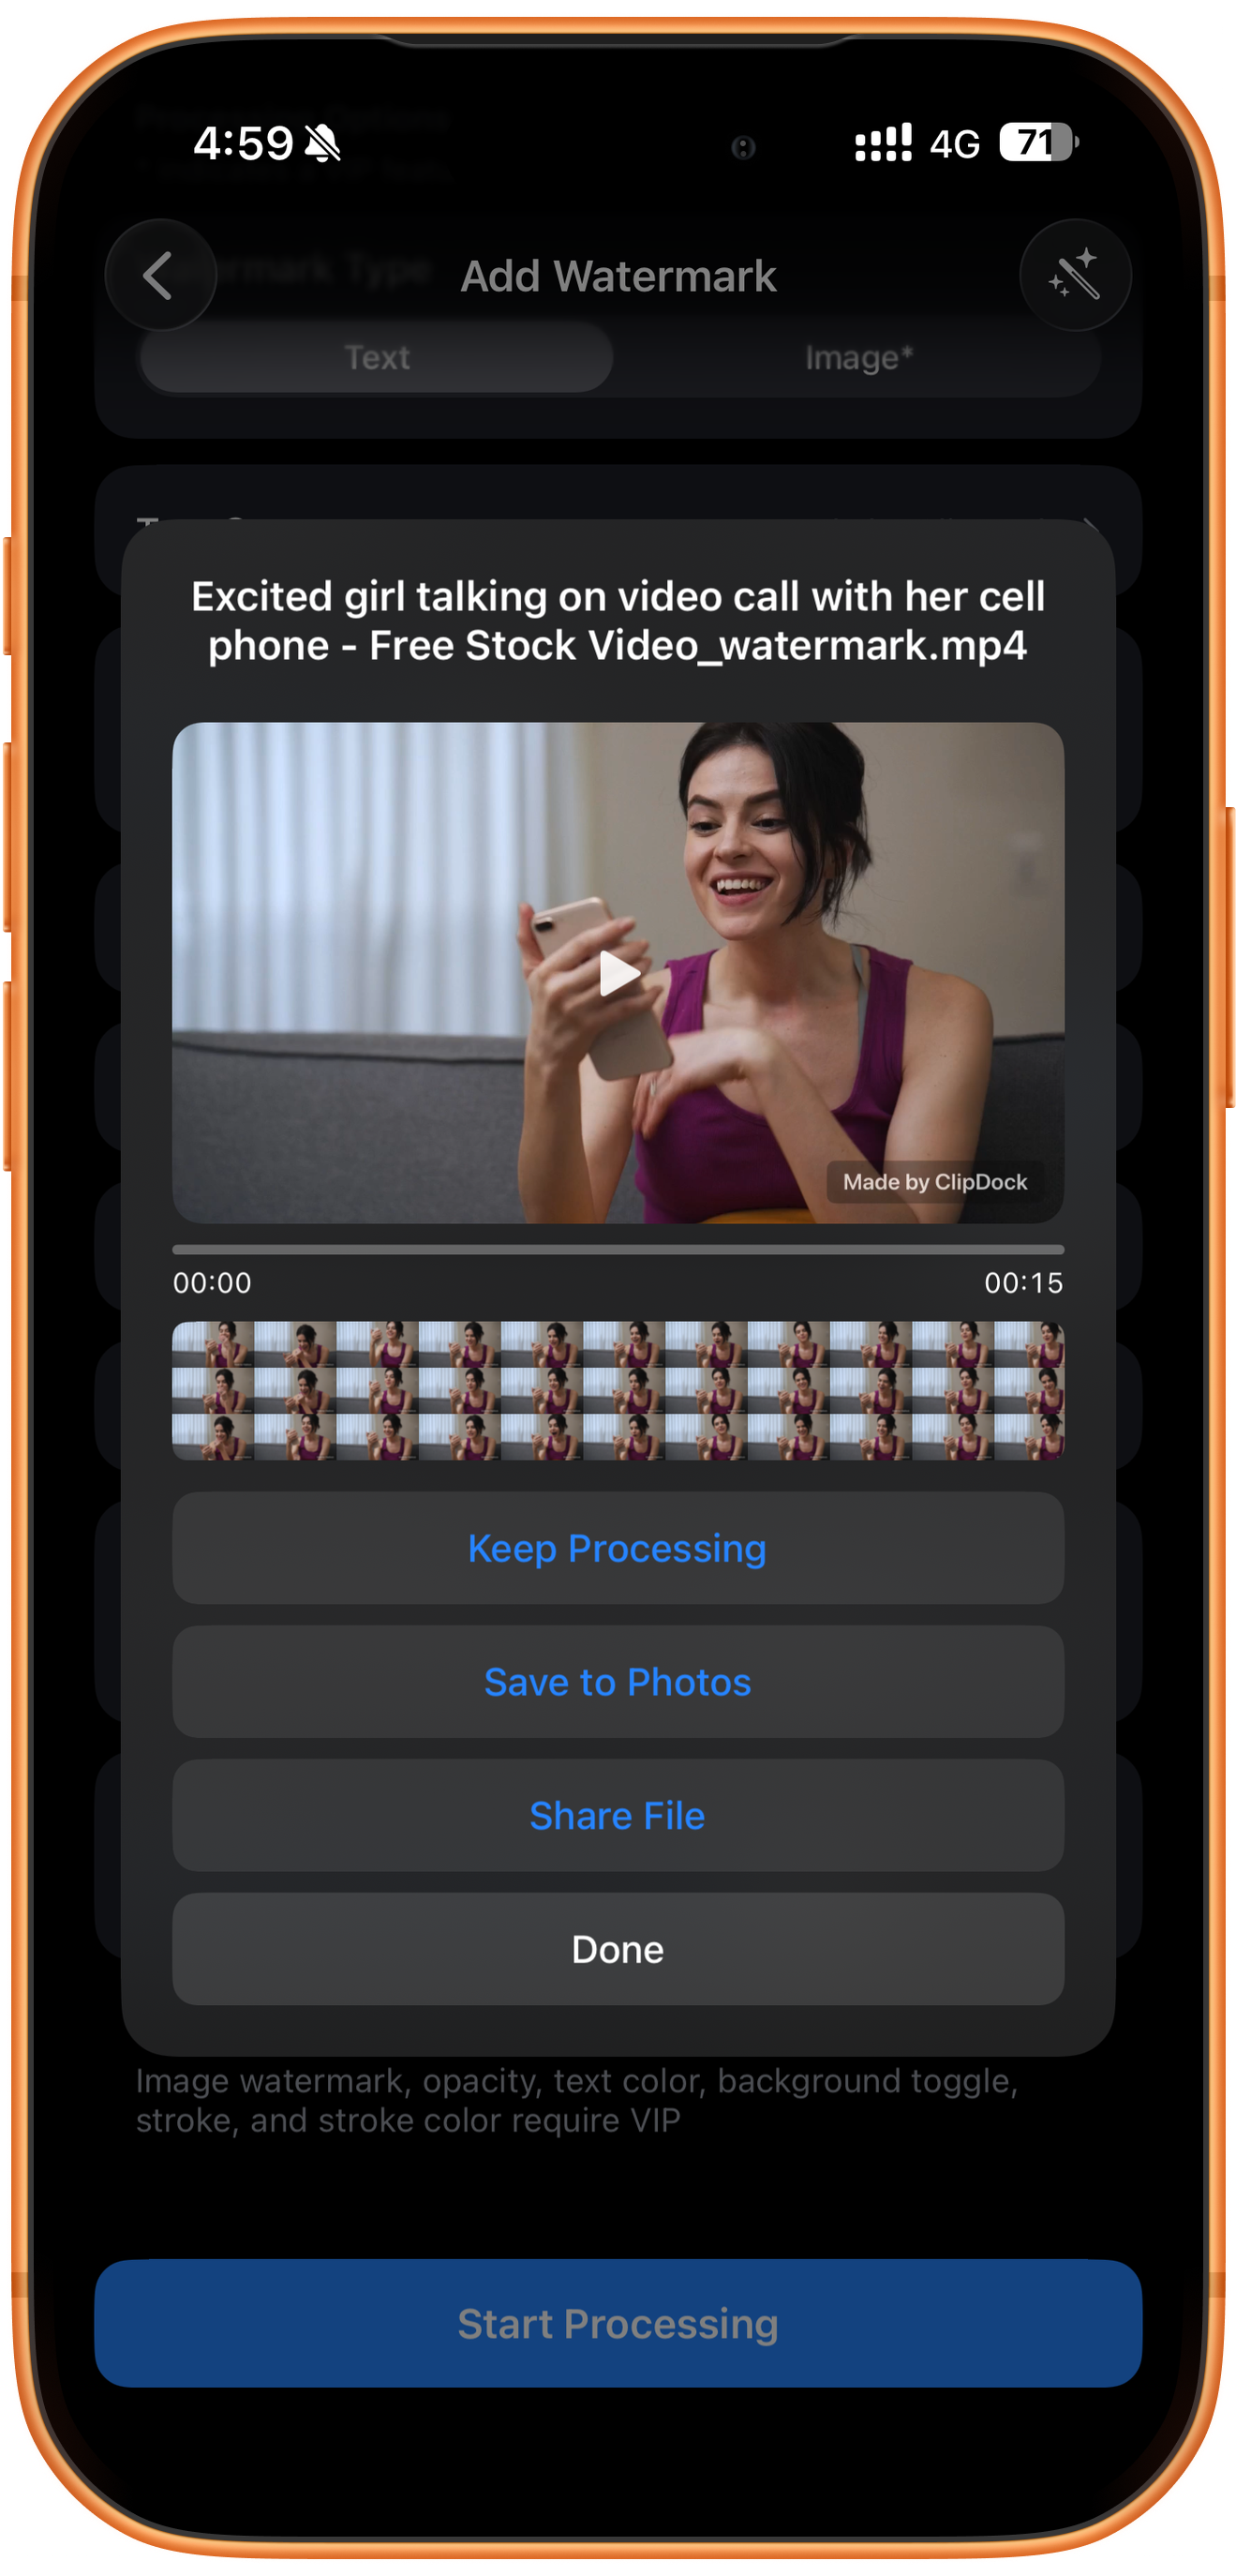
Tap Start Processing after checking settings. The physical-iPhone result is a 15-second file ending in _watermark.mp4, with Made by ClipDock visible at bottom right.
Check the watermark
Play the result and check legibility, position, and overlap with subjects or subtitles. The result screenshot uses different source footage and wording from the settings example, but demonstrates the same text-watermark workflow.
Save to Photos or share
Tap Save to Photos and check Photos after the success message. Share File opens sharing options.
Continue or finish
Keep Processing carries the result into further editing. Done closes the result page and does not save to Photos.
Troubleshooting
Preview before saving
Keep the watermark readable without hiding important content. Retain the original so that text, position, or style can be changed in another export.
Frequently asked questions
Is an image watermark free?
Image* is marked VIP in the shown version. This example demonstrates text.
Why does the output have different wording from the settings?
The settings use ClipDock Demo. The physical-device result uses Made by ClipDock and another video. Both illustrate the same text-watermark workflow.
Try it on your device
ClipDock is free to download, with in-app purchases. Features and available options depend on the current app version.
Download on the App Store