
01Steps
Open Transcode Video in Process
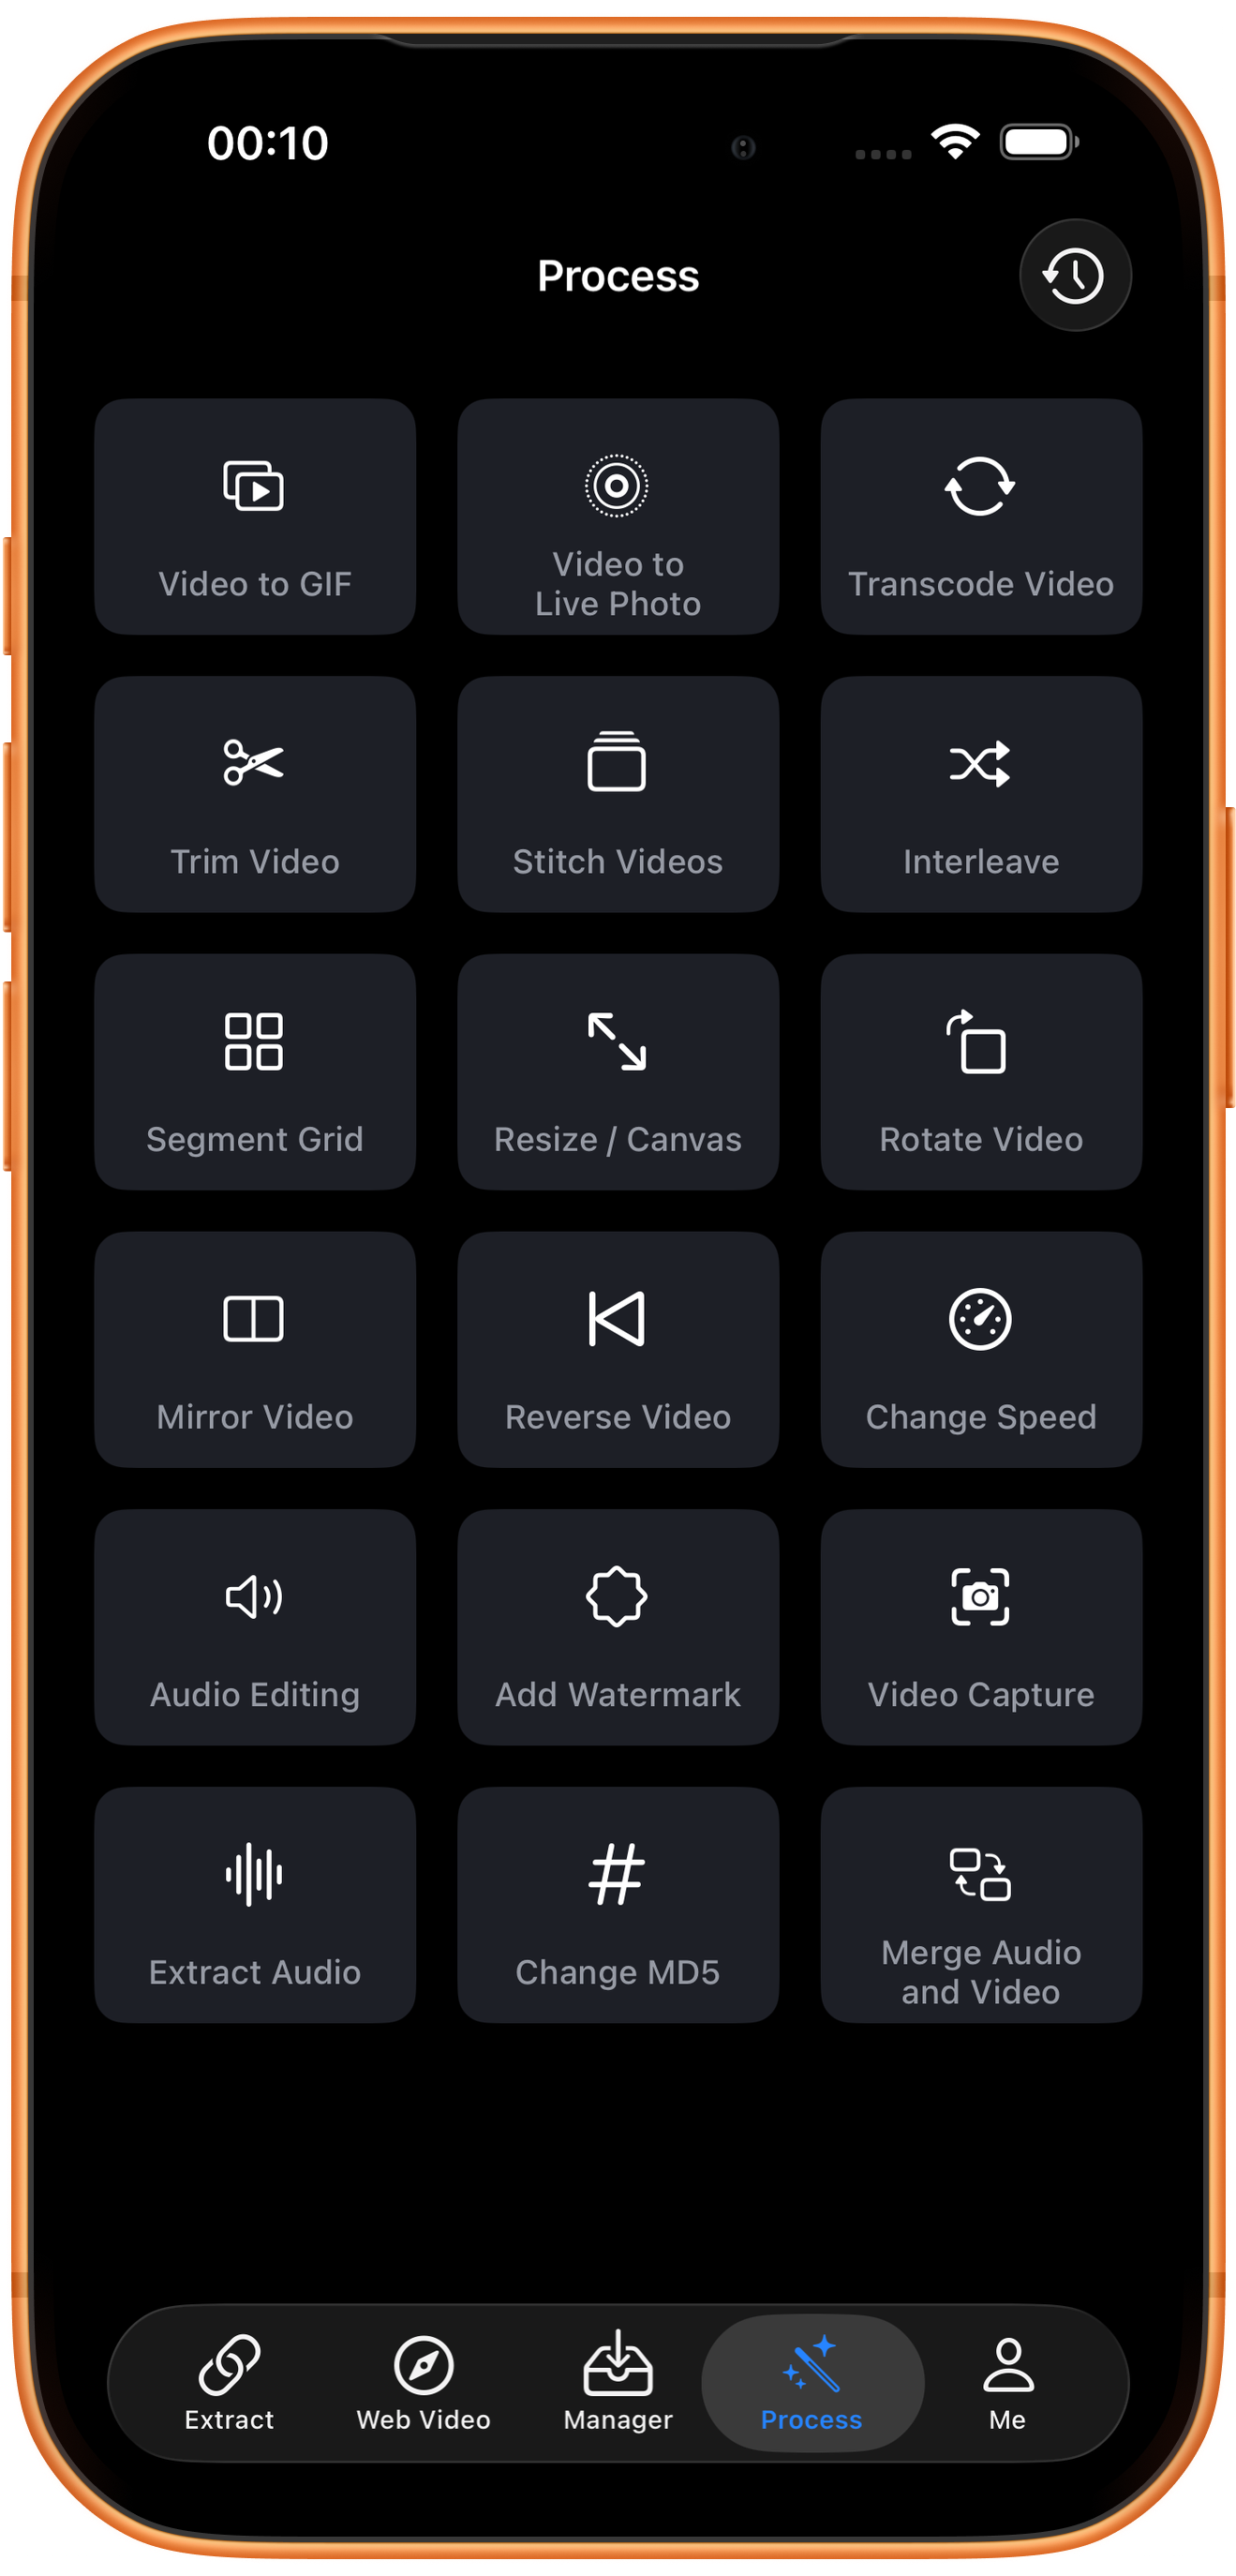
Tap Process in the bottom navigation. Find Transcode Video in row 1, in the right column, and tap the entry marked by the arrow.
02Steps
Choose the video to process
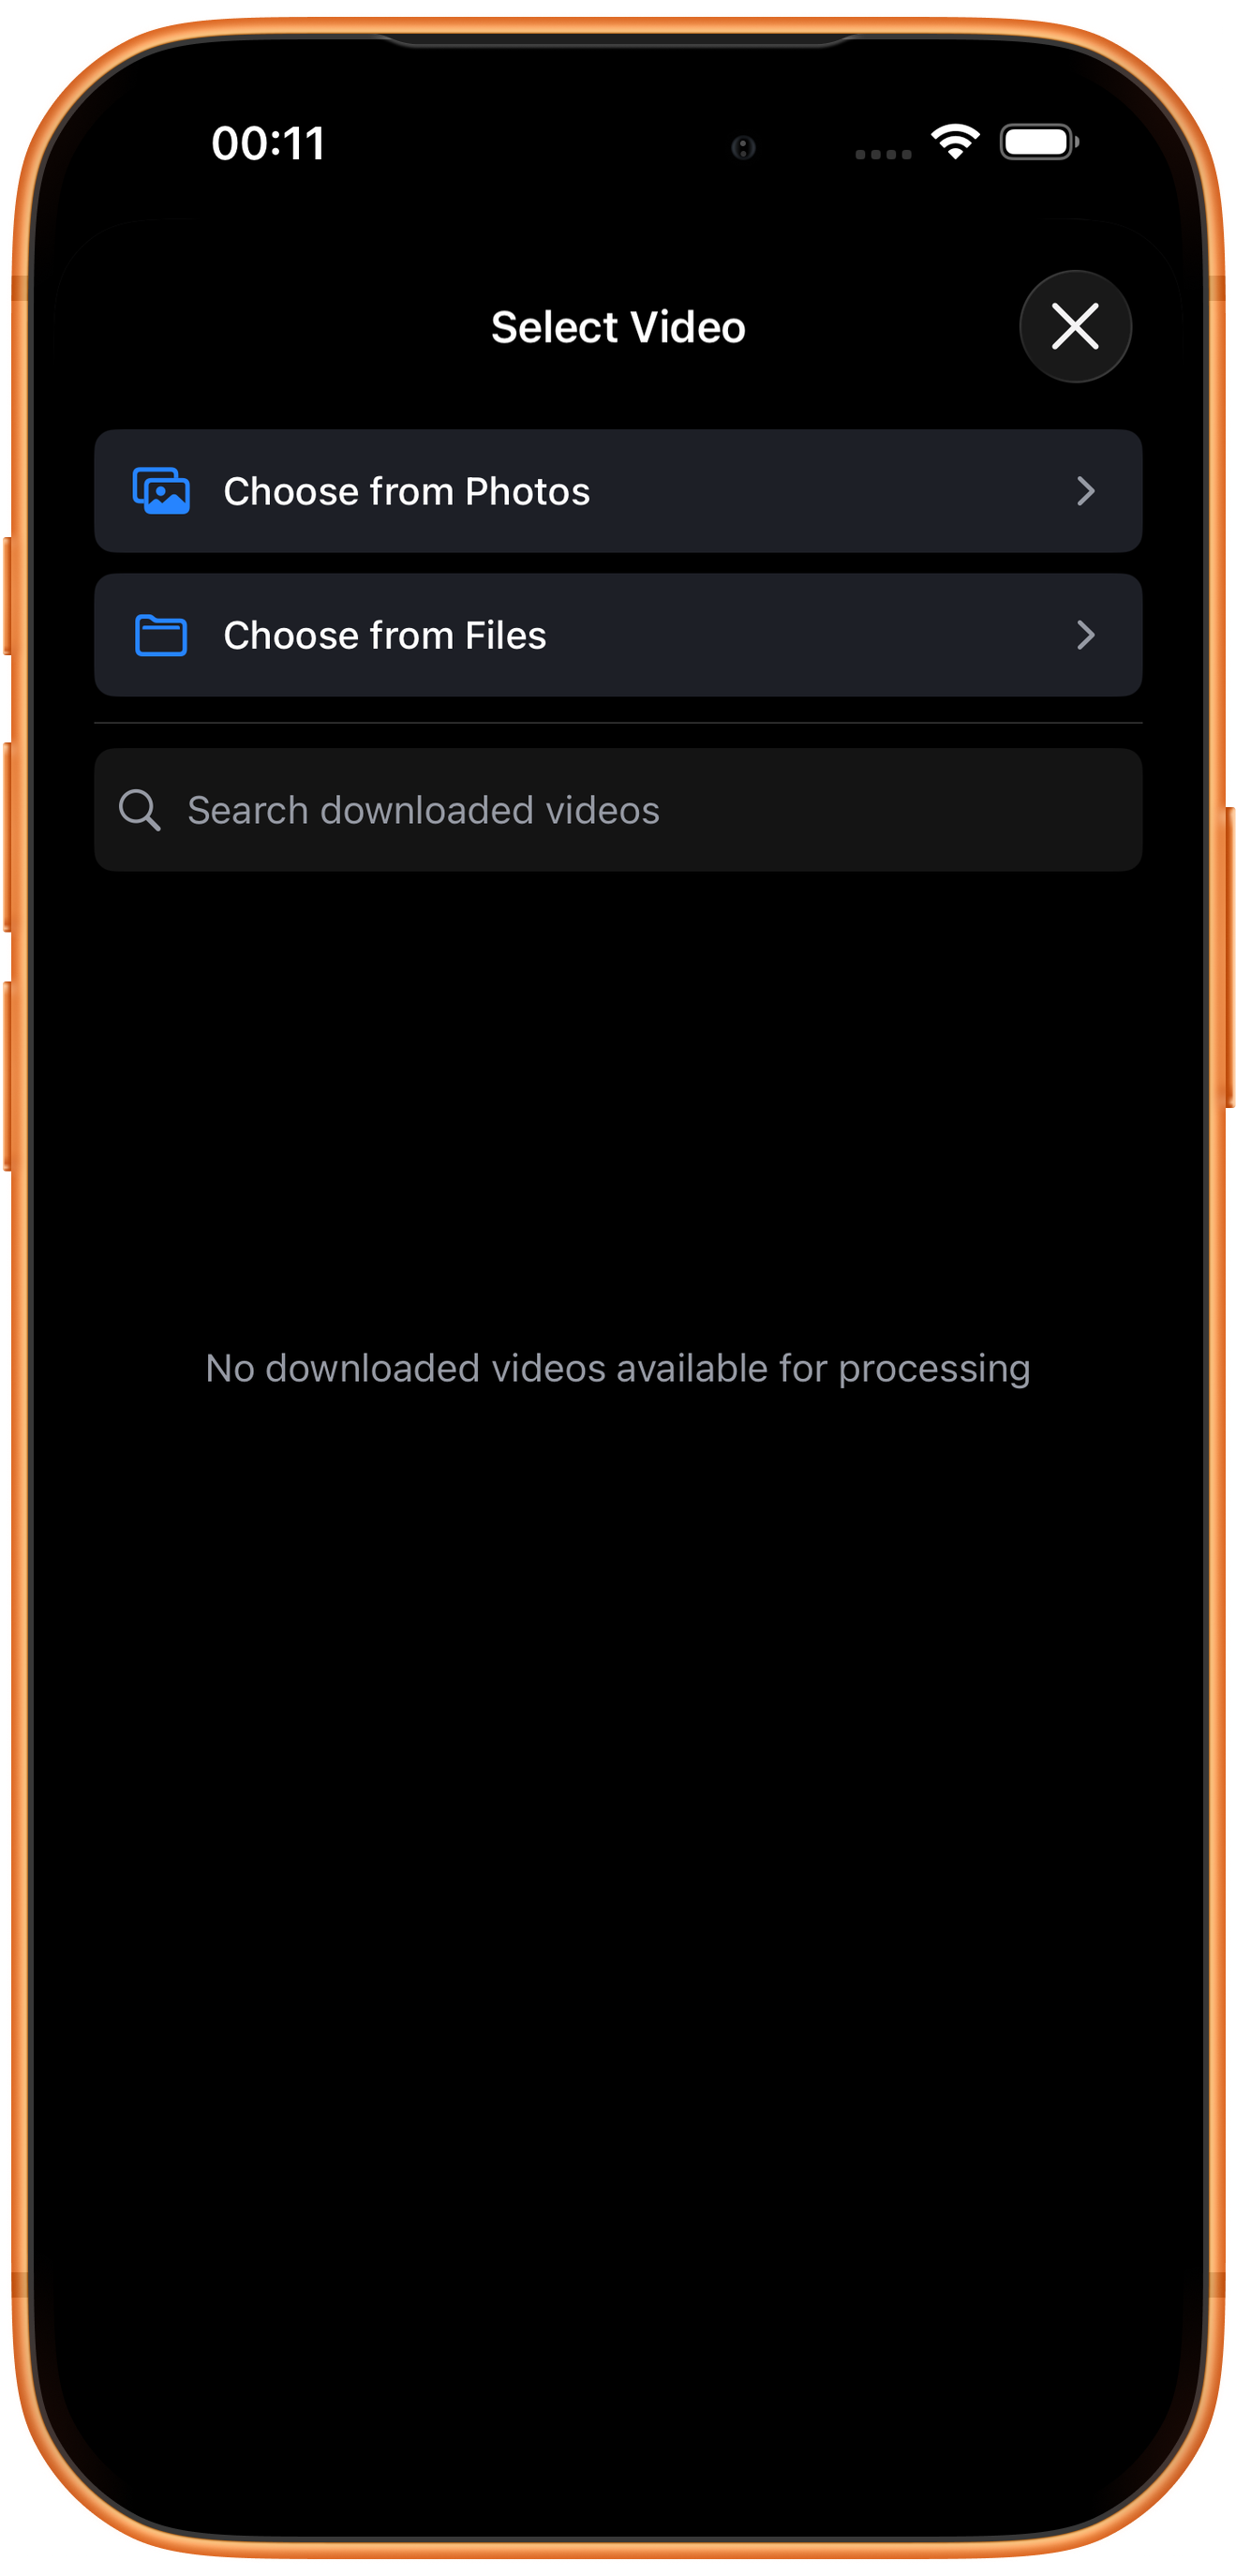
In Select Video, tap Choose from Photos and pick your source. Use Choose from Files for media stored in Files. An empty download list does not prevent importing from Photos. Some examples reuse a previously trimmed clip of about six seconds; you can prepare a short sample with Trim Video.
03Steps
Choose format, quality, and resolution
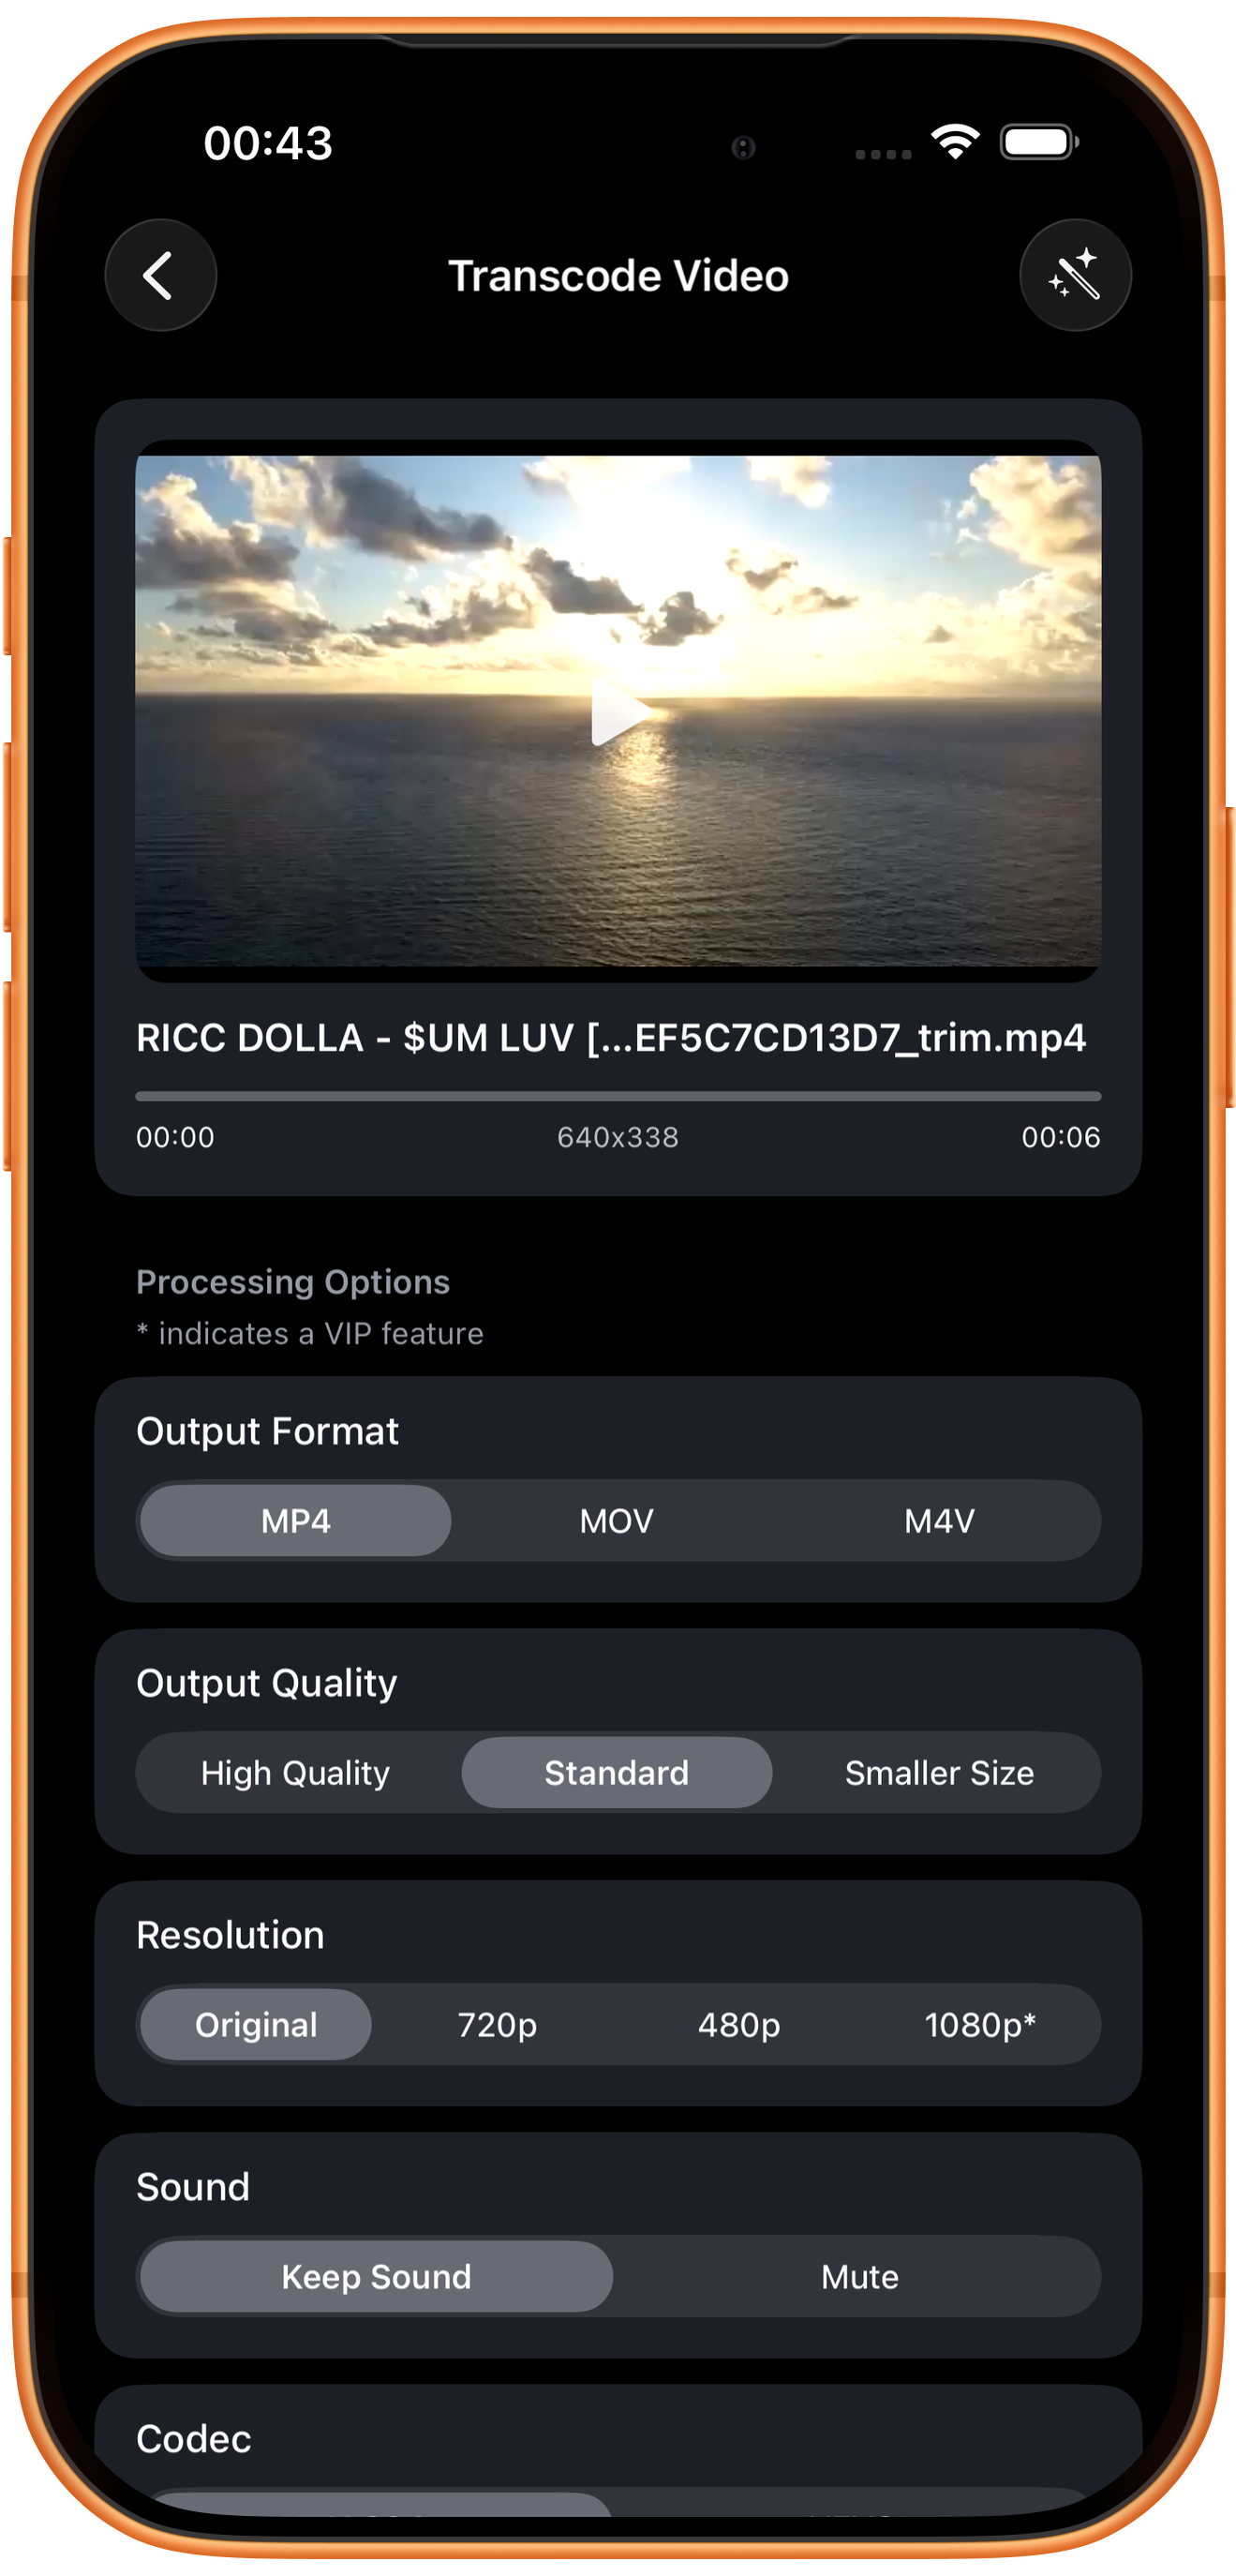
Inspect Output Format, Output Quality, and Resolution, then decide whether to retain sound.
Output Format: MP4, MOV, and M4V
These are file containers. Start with MP4 for everyday sharing, or use MOV or M4V if the receiving software requires it. The extension and the codec inside it are different concepts.
Output Quality: detail versus size
High Quality favors detail, Standard balances the choices, and Smaller Size favors a smaller file. Content and other settings still affect the result, so do not rely on the preset name alone.
Resolution and Sound
Options include Original, 720p, 480p, and 1080p*. Original keeps the source dimensions; this example is 640×338. Sound offers Keep Sound and Mute. Reducing resolution may reduce size; increasing it cannot recover missing detail.
04Steps
Understand codec and bitrate
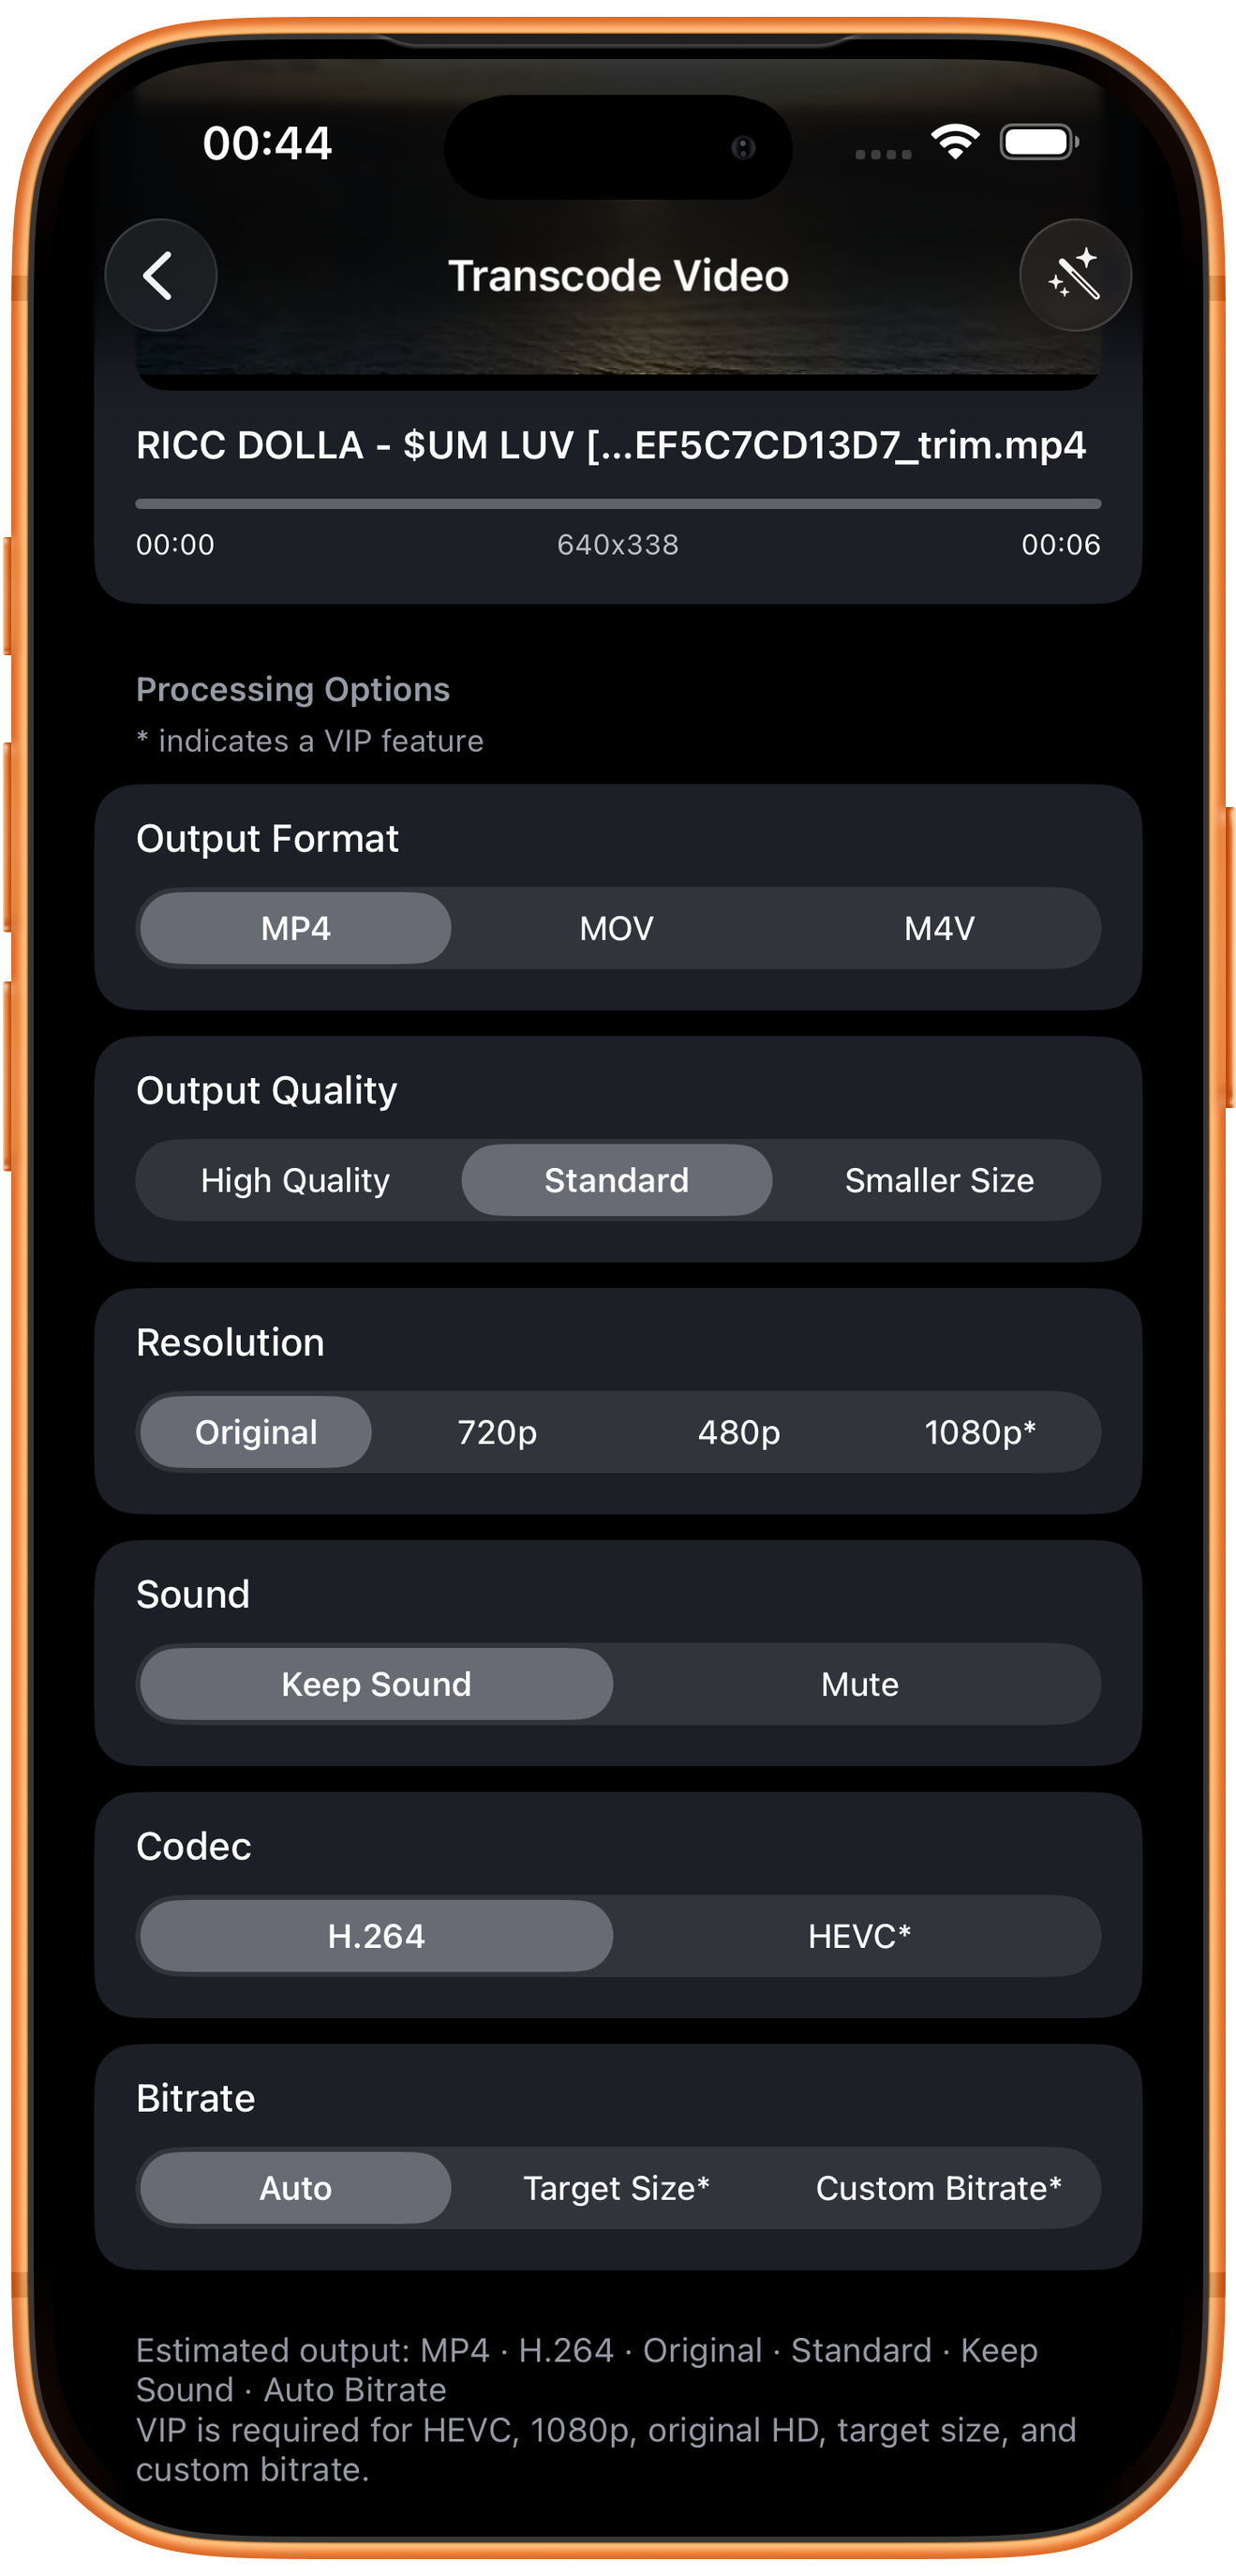
Scroll to Codec, Bitrate, and the output summary. Confirm it matches your choices before tapping Start Processing.
Codec: H.264 and HEVC*
This example uses H.264. HEVC is marked VIP and can offer efficient compression, but check receiving-device and software support. MP4 is not restricted to one codec.
Bitrate: Auto, Target Size*, and Custom Bitrate*
Auto lets the tool choose. Target Size and Custom Bitrate require VIP. Under comparable conditions, a lower bitrate often makes a smaller file but can introduce more visible compression artifacts.
VIP options in the illustrated version
The page lists HEVC, 1080p, original high resolution, target size, and custom bitrate as VIP. This example exports low-resolution source media using Original, Standard, Keep Sound, and Auto.
05Steps
Check the result, then save or keep processing
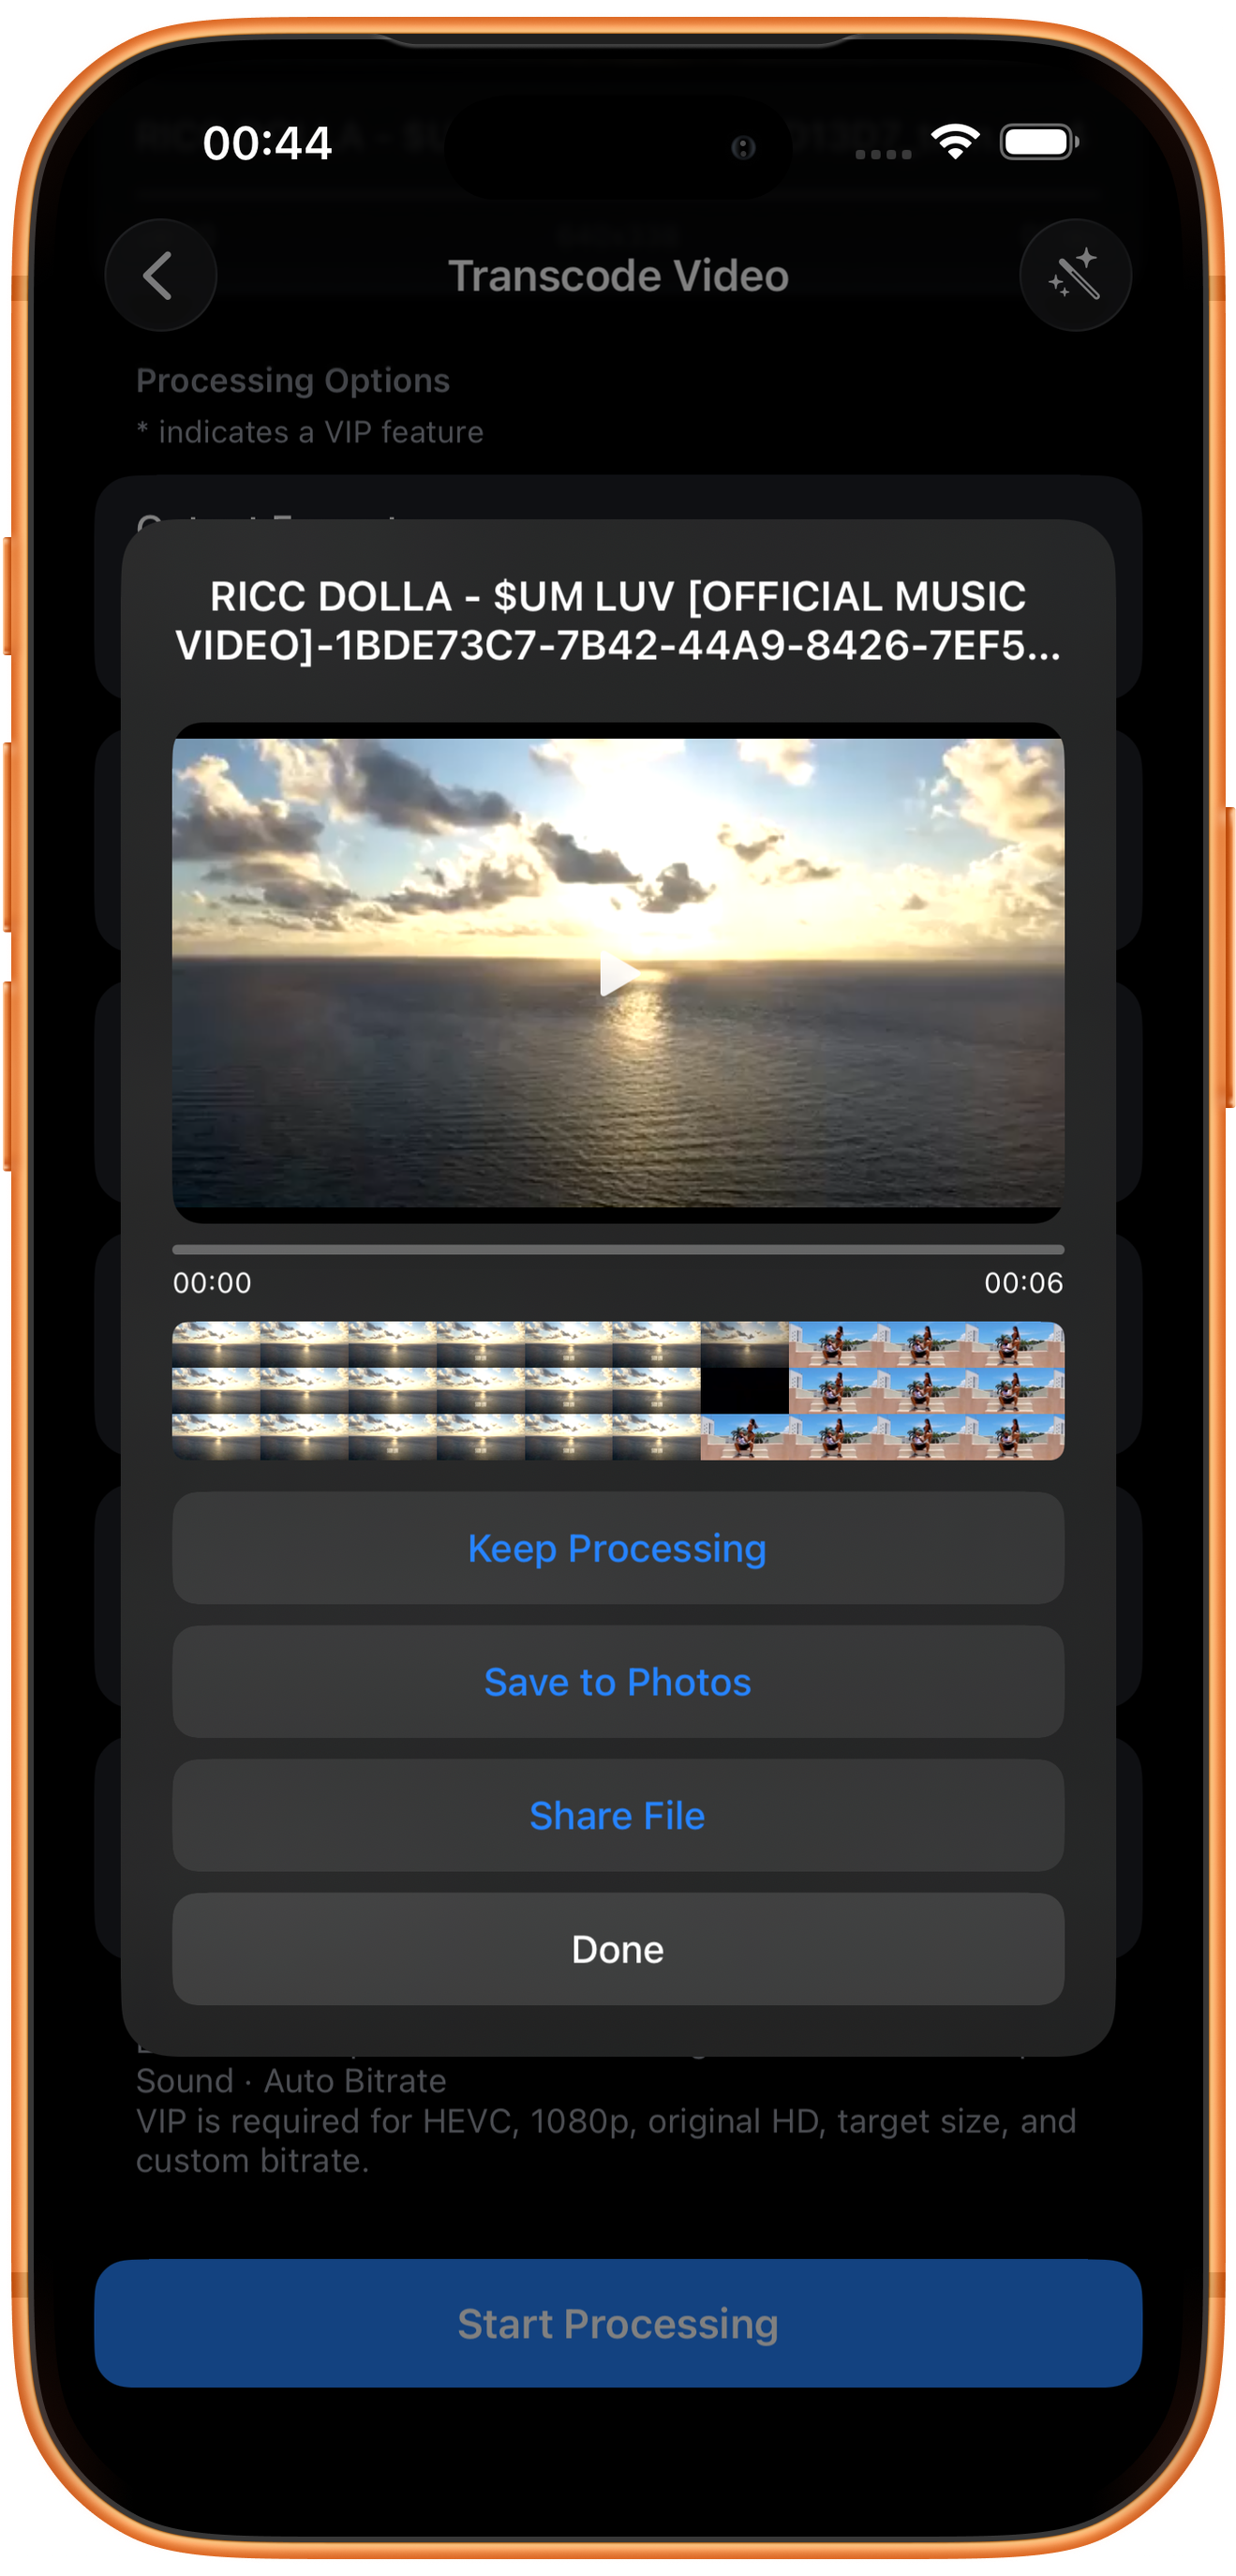
The output ends in _transcode.mp4 and is about six seconds long. Compare size and picture quality, especially text edges, dark areas, and fast movement.
Preview and save
Play the result and check picture, duration, and sound, then tap Save to Photos. The first save may require permission to add photos and videos. After the success message, check the file in Photos.
What the other buttons do
Keep Processing takes the result into tool selection. Share File opens sharing options. Done closes the result page; it does not save to Photos.
Troubleshooting
Unhappy with the compression?
Keep the original and compare settings on a short clip. Avoid repeatedly compressing an already compressed result.
Frequently asked questions
Why is the file not much smaller?
The input may already be small, or output settings may preserve more quality. Duration, dimensions, codec, and bitrate all affect size.
Will choosing 1080p make a low-resolution video clearer?
Upscaling does not create source detail that was never present. Judge the actual viewing result.
Try it on your device
ClipDock is free to download, with in-app purchases. Features and available options depend on the current app version.
Download on the App Store