
01Steps
Open Segment Grid in Process
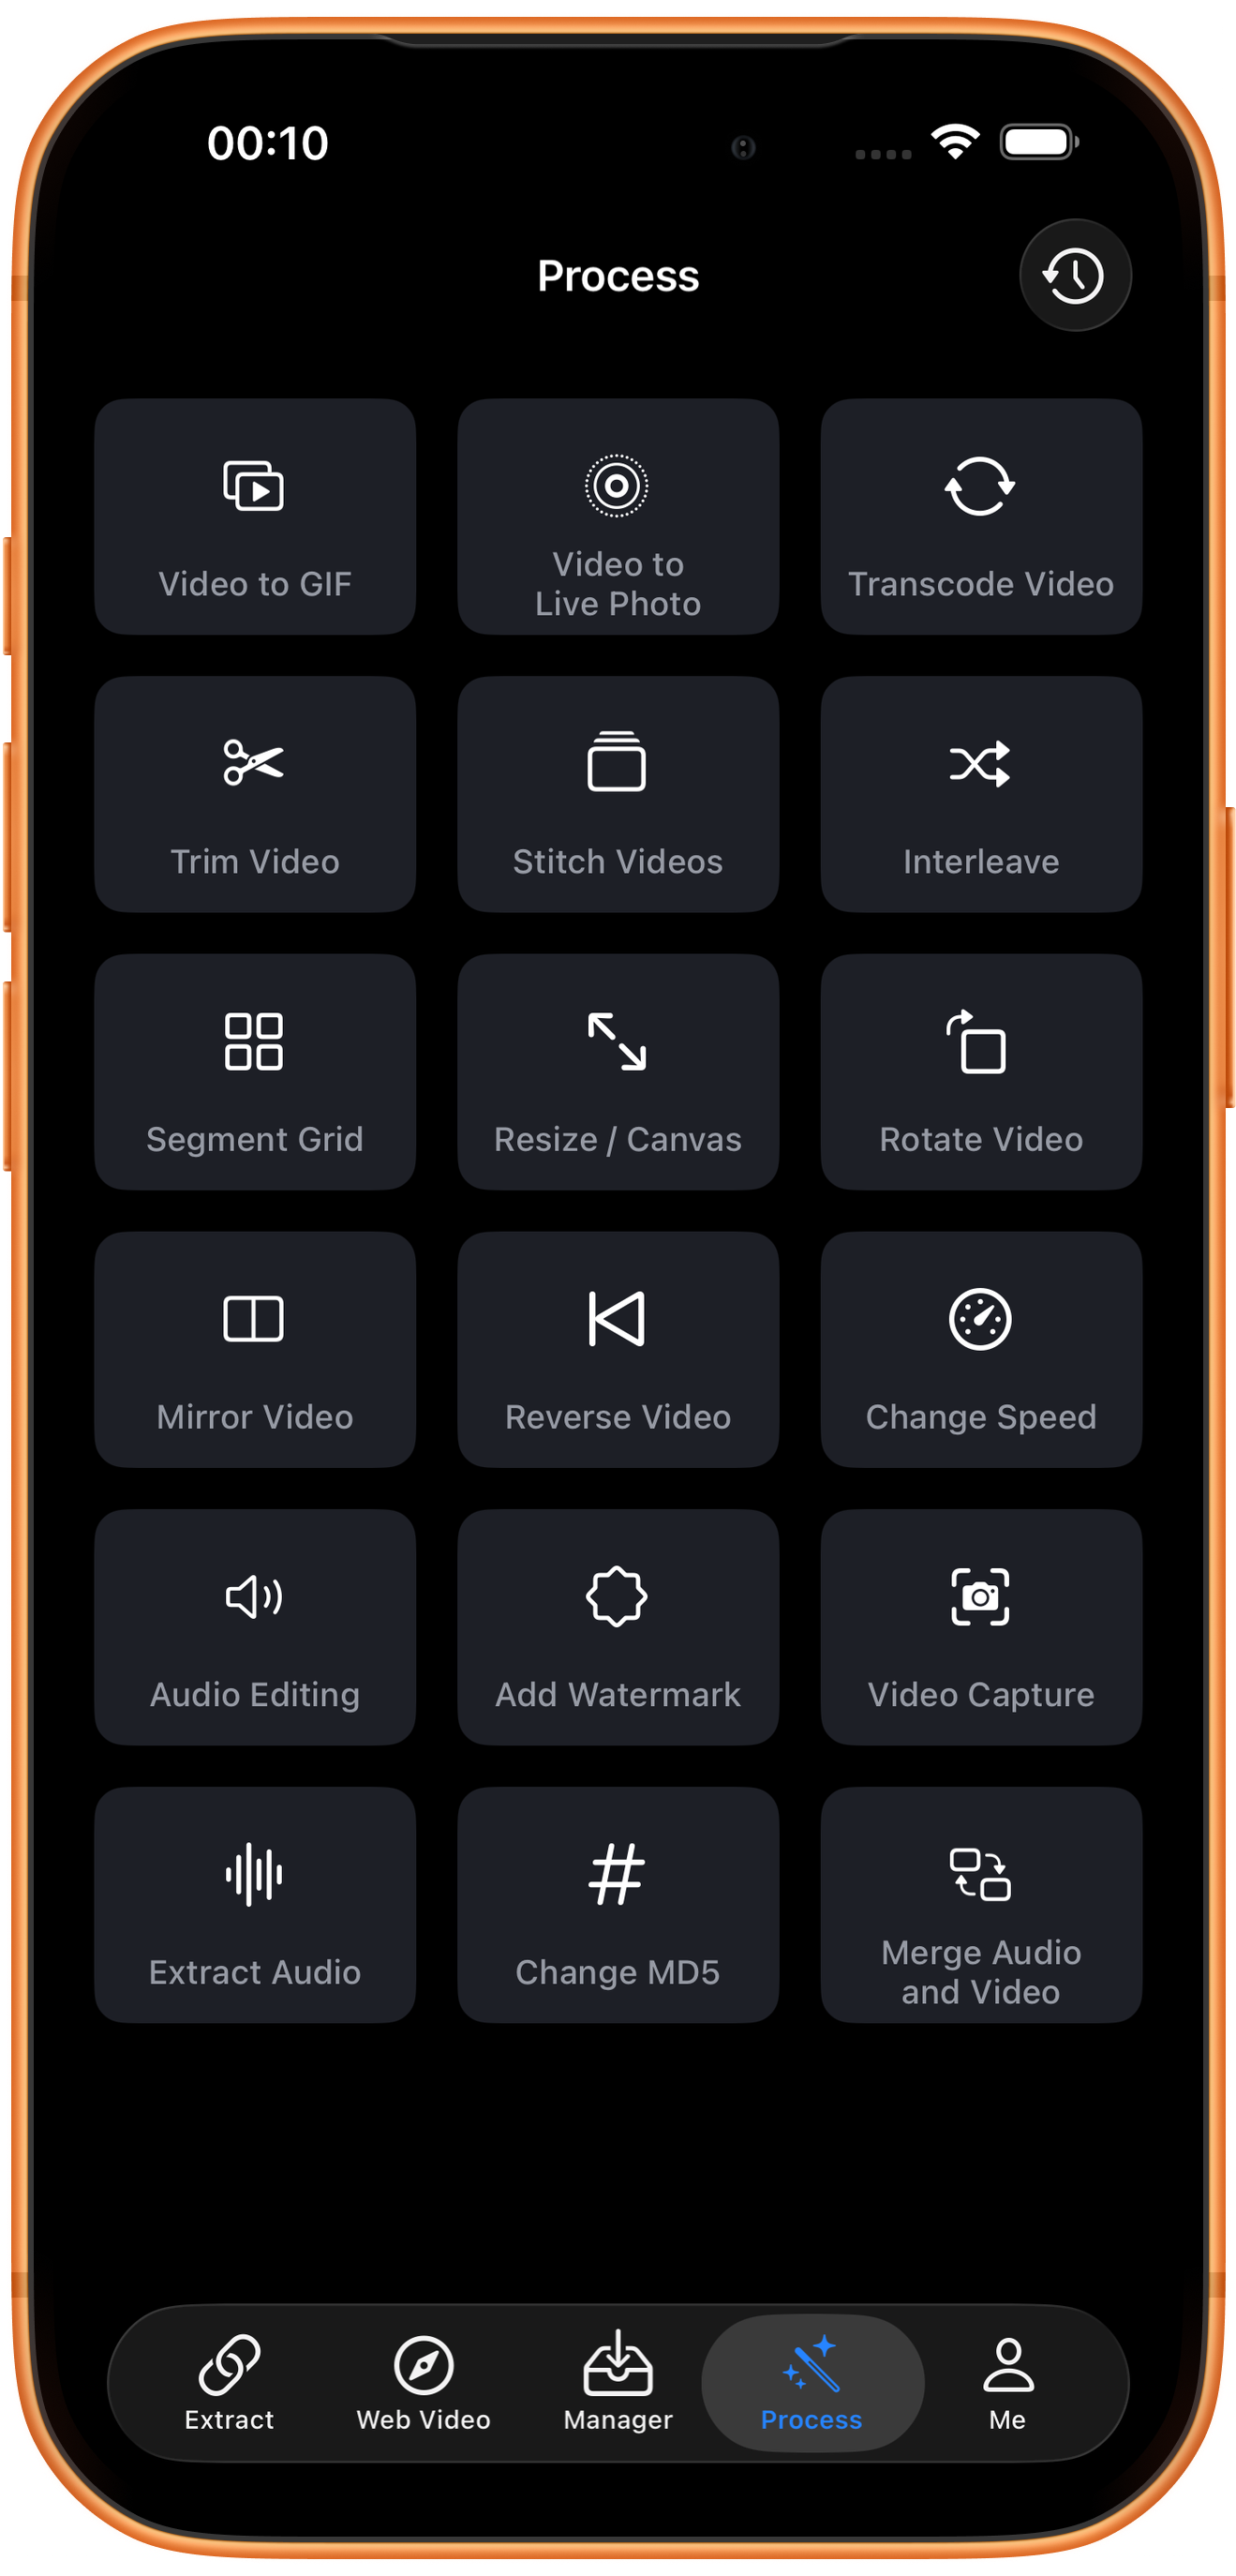
Tap Process in the bottom navigation. Find Segment Grid in row 3, in the left column, and tap the entry marked by the arrow.
02Steps
Choose the video to process
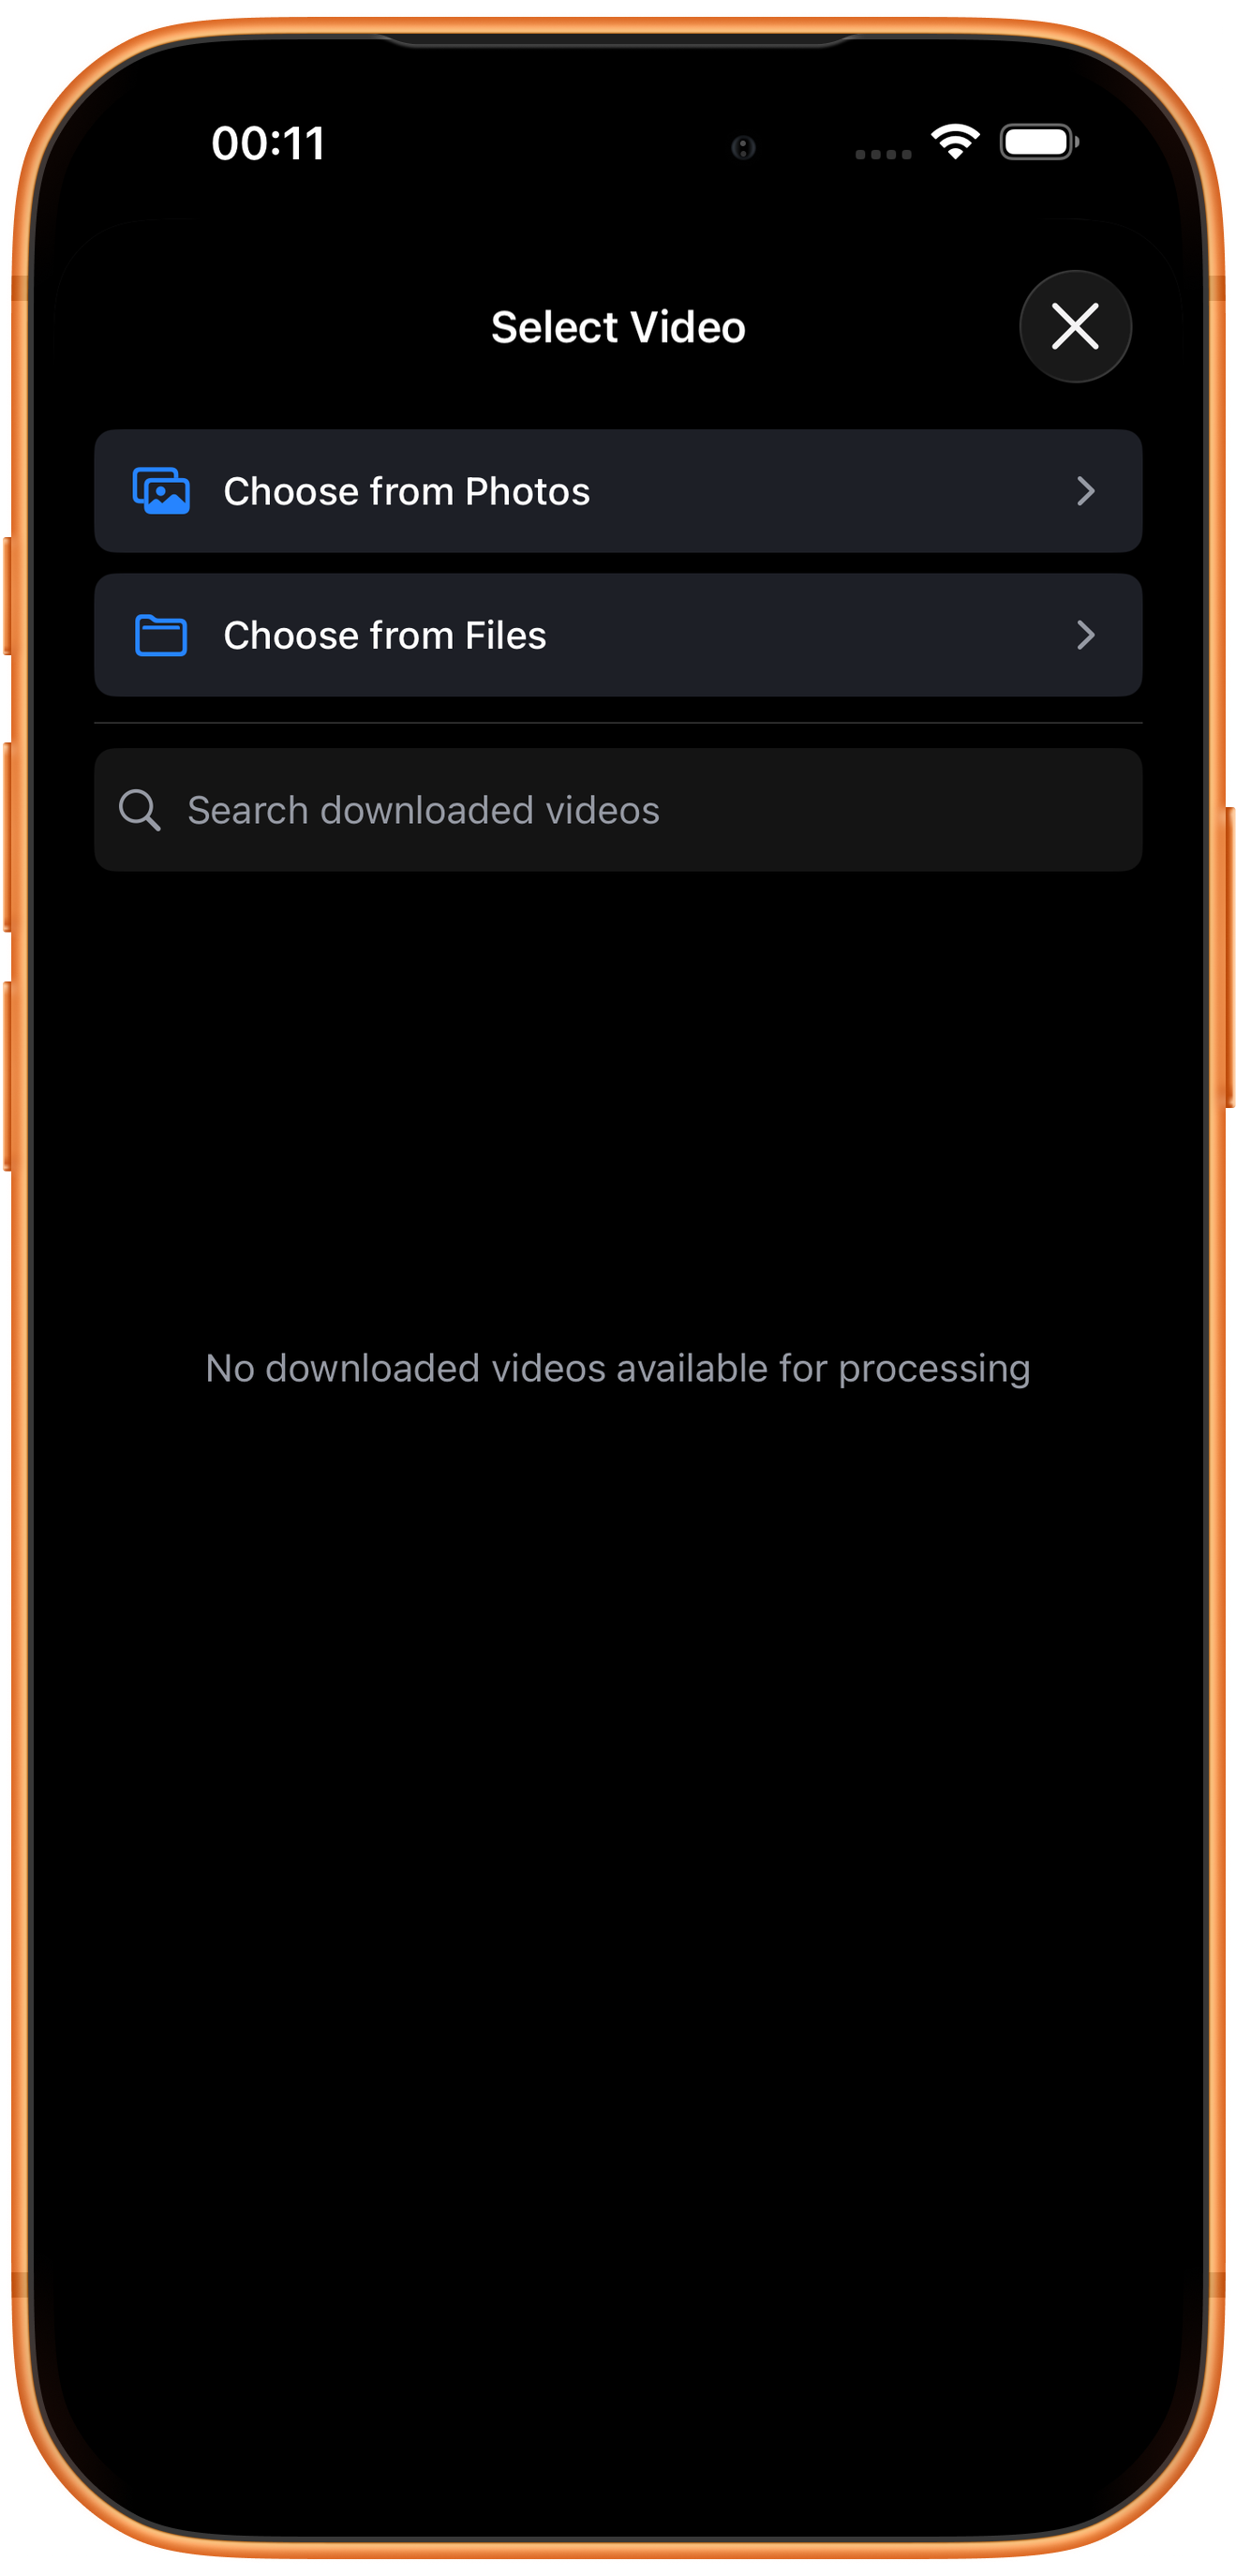
In Select Video, tap Choose from Photos and pick your source. Use Choose from Files for media stored in Files. An empty download list does not prevent importing from Photos. Some examples reuse a previously trimmed clip of about six seconds; you can prepare a short sample with Trim Video.
03Steps
Set rows, columns, and sound
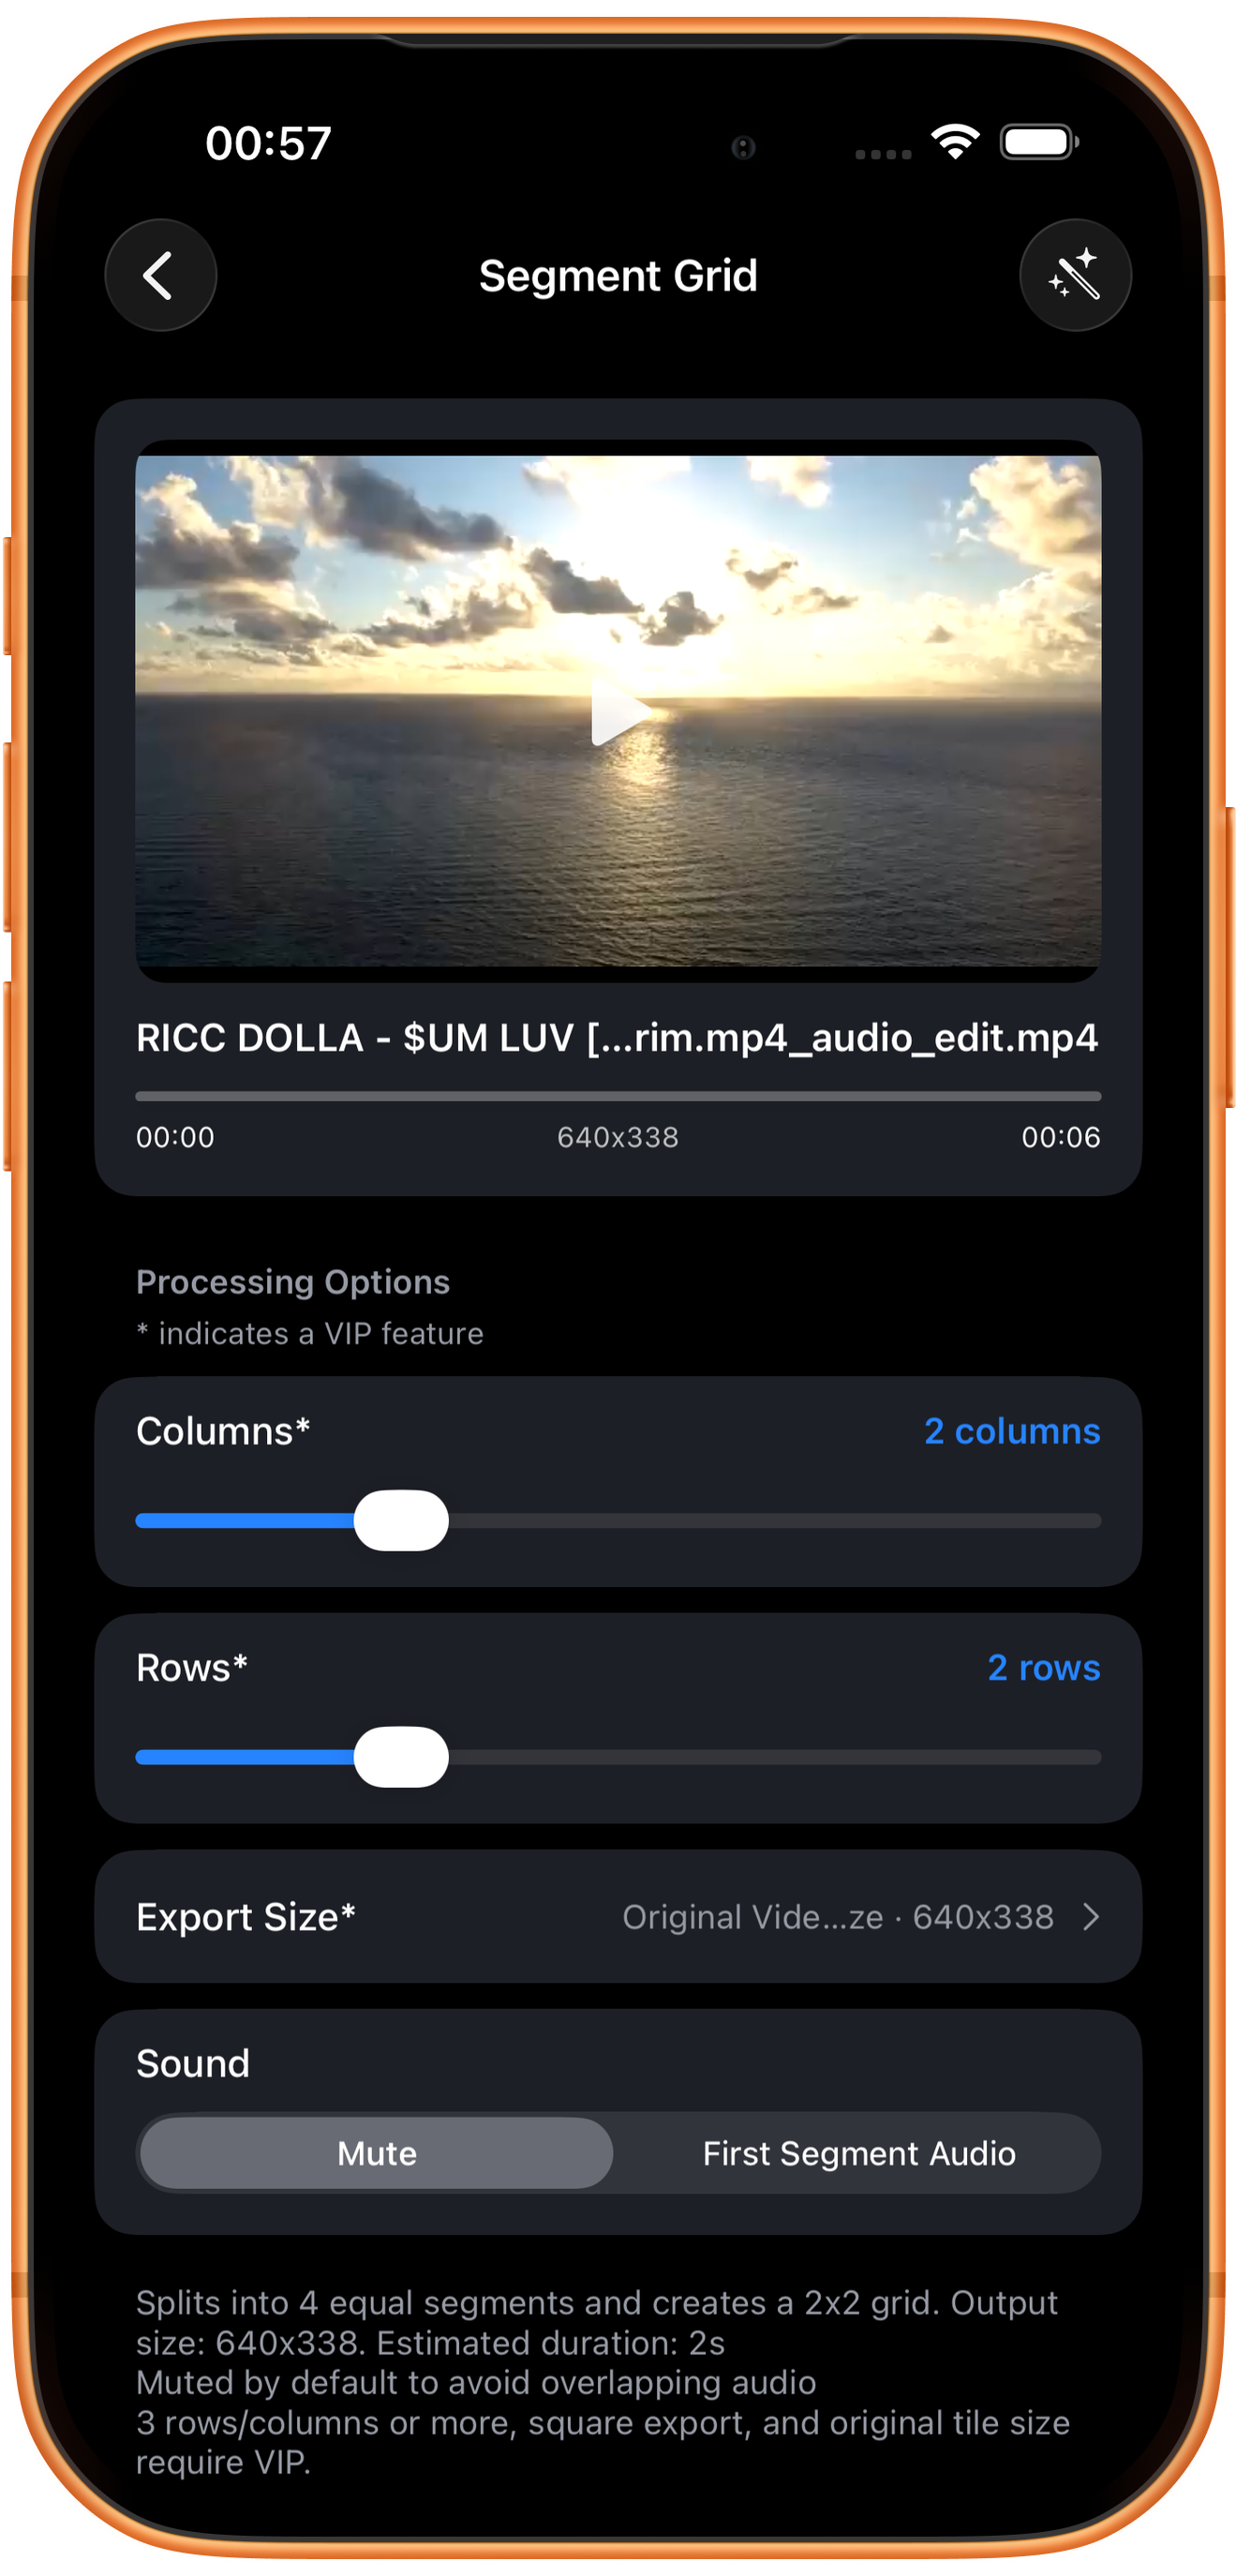
After importing one video, inspect Columns, Rows, and Sound. The example uses two columns, two rows, and default mute.
Rows × columns determines the tile count
2×2 creates four tiles and divides the source into four equal time segments. They play simultaneously, so the result is shorter. The displayed estimate may differ from the actual output.
Mute and First Segment Audio
Mute avoids overlapping audio. First Segment Audio uses the first segment’s sound; check whether it suits the whole grid.
Free settings and starred options
The page marks three or more rows or columns, square output, and retaining each tile’s original size as VIP. The default 2×2 with original-video-size output exported successfully.
04Steps
Choose the output dimensions
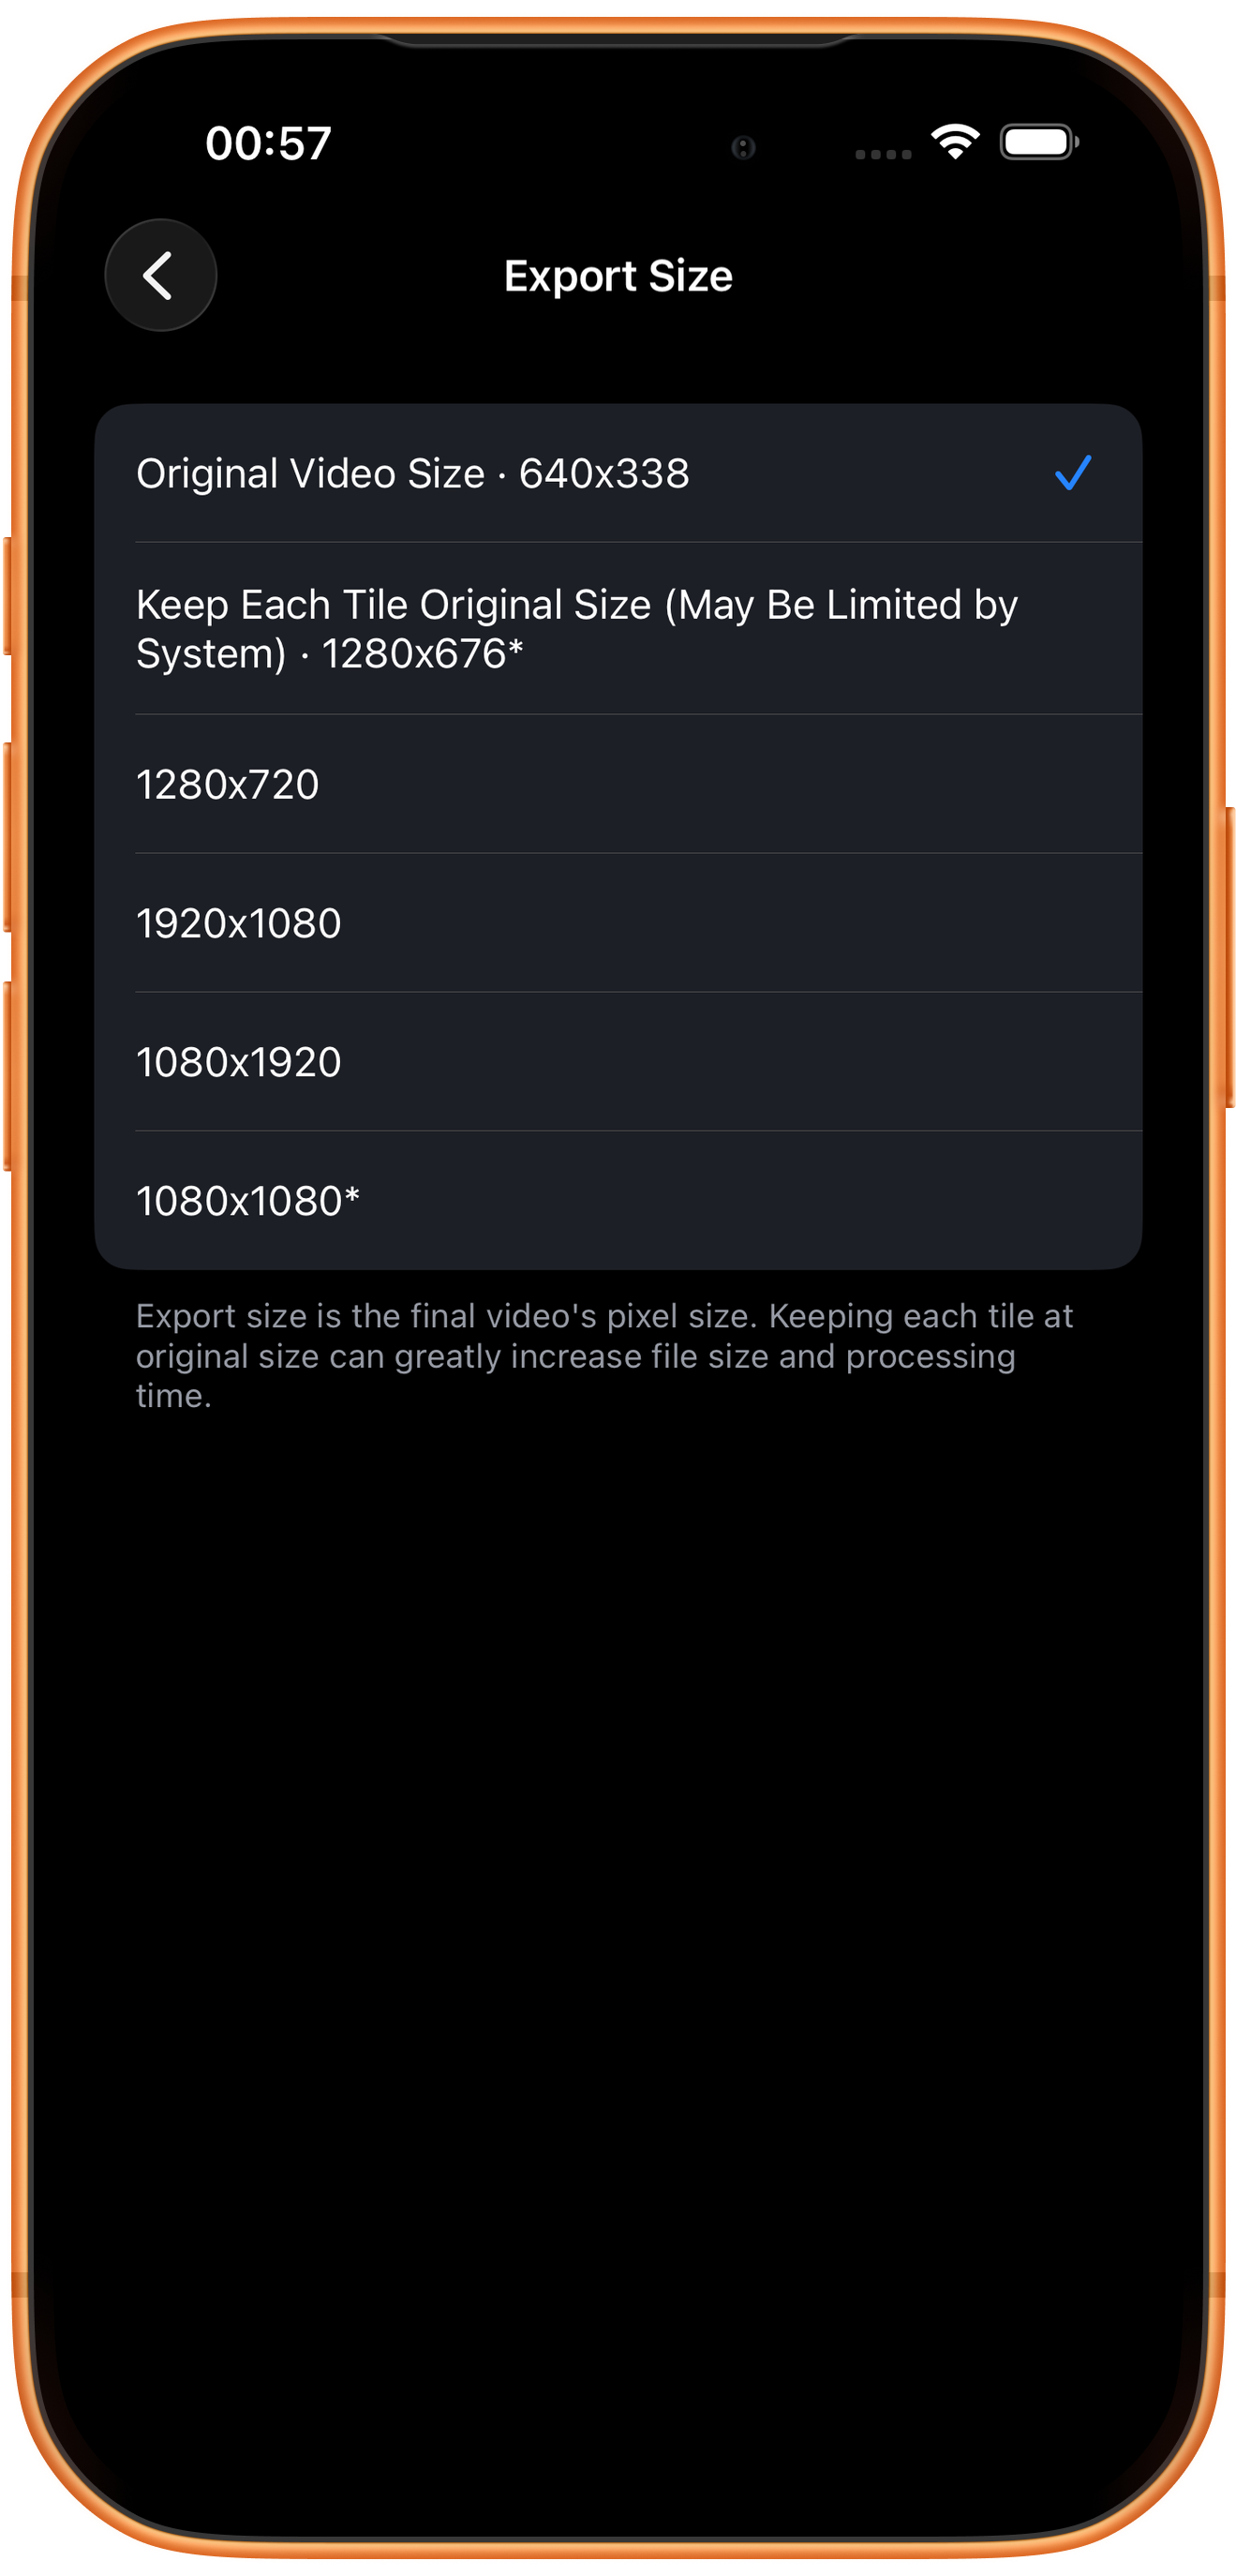
Open Export Size. This controls the whole output canvas, not the dimensions of one tile.
Original Video Size versus original size per tile
Original Video Size is 640×338 here, shared by all four tiles. Keep Each Tile Original Size shows 1280×676*. It preserves more pixels per tile and may substantially increase file size and processing time, subject to system limits.
Landscape, portrait, and square
The list also offers 1280×720, 1920×1080, 1080×1920, and 1080×1080*. Choose for your intended display and check each tile for clarity and cropping.
05Steps
Check the result, then save or keep processing
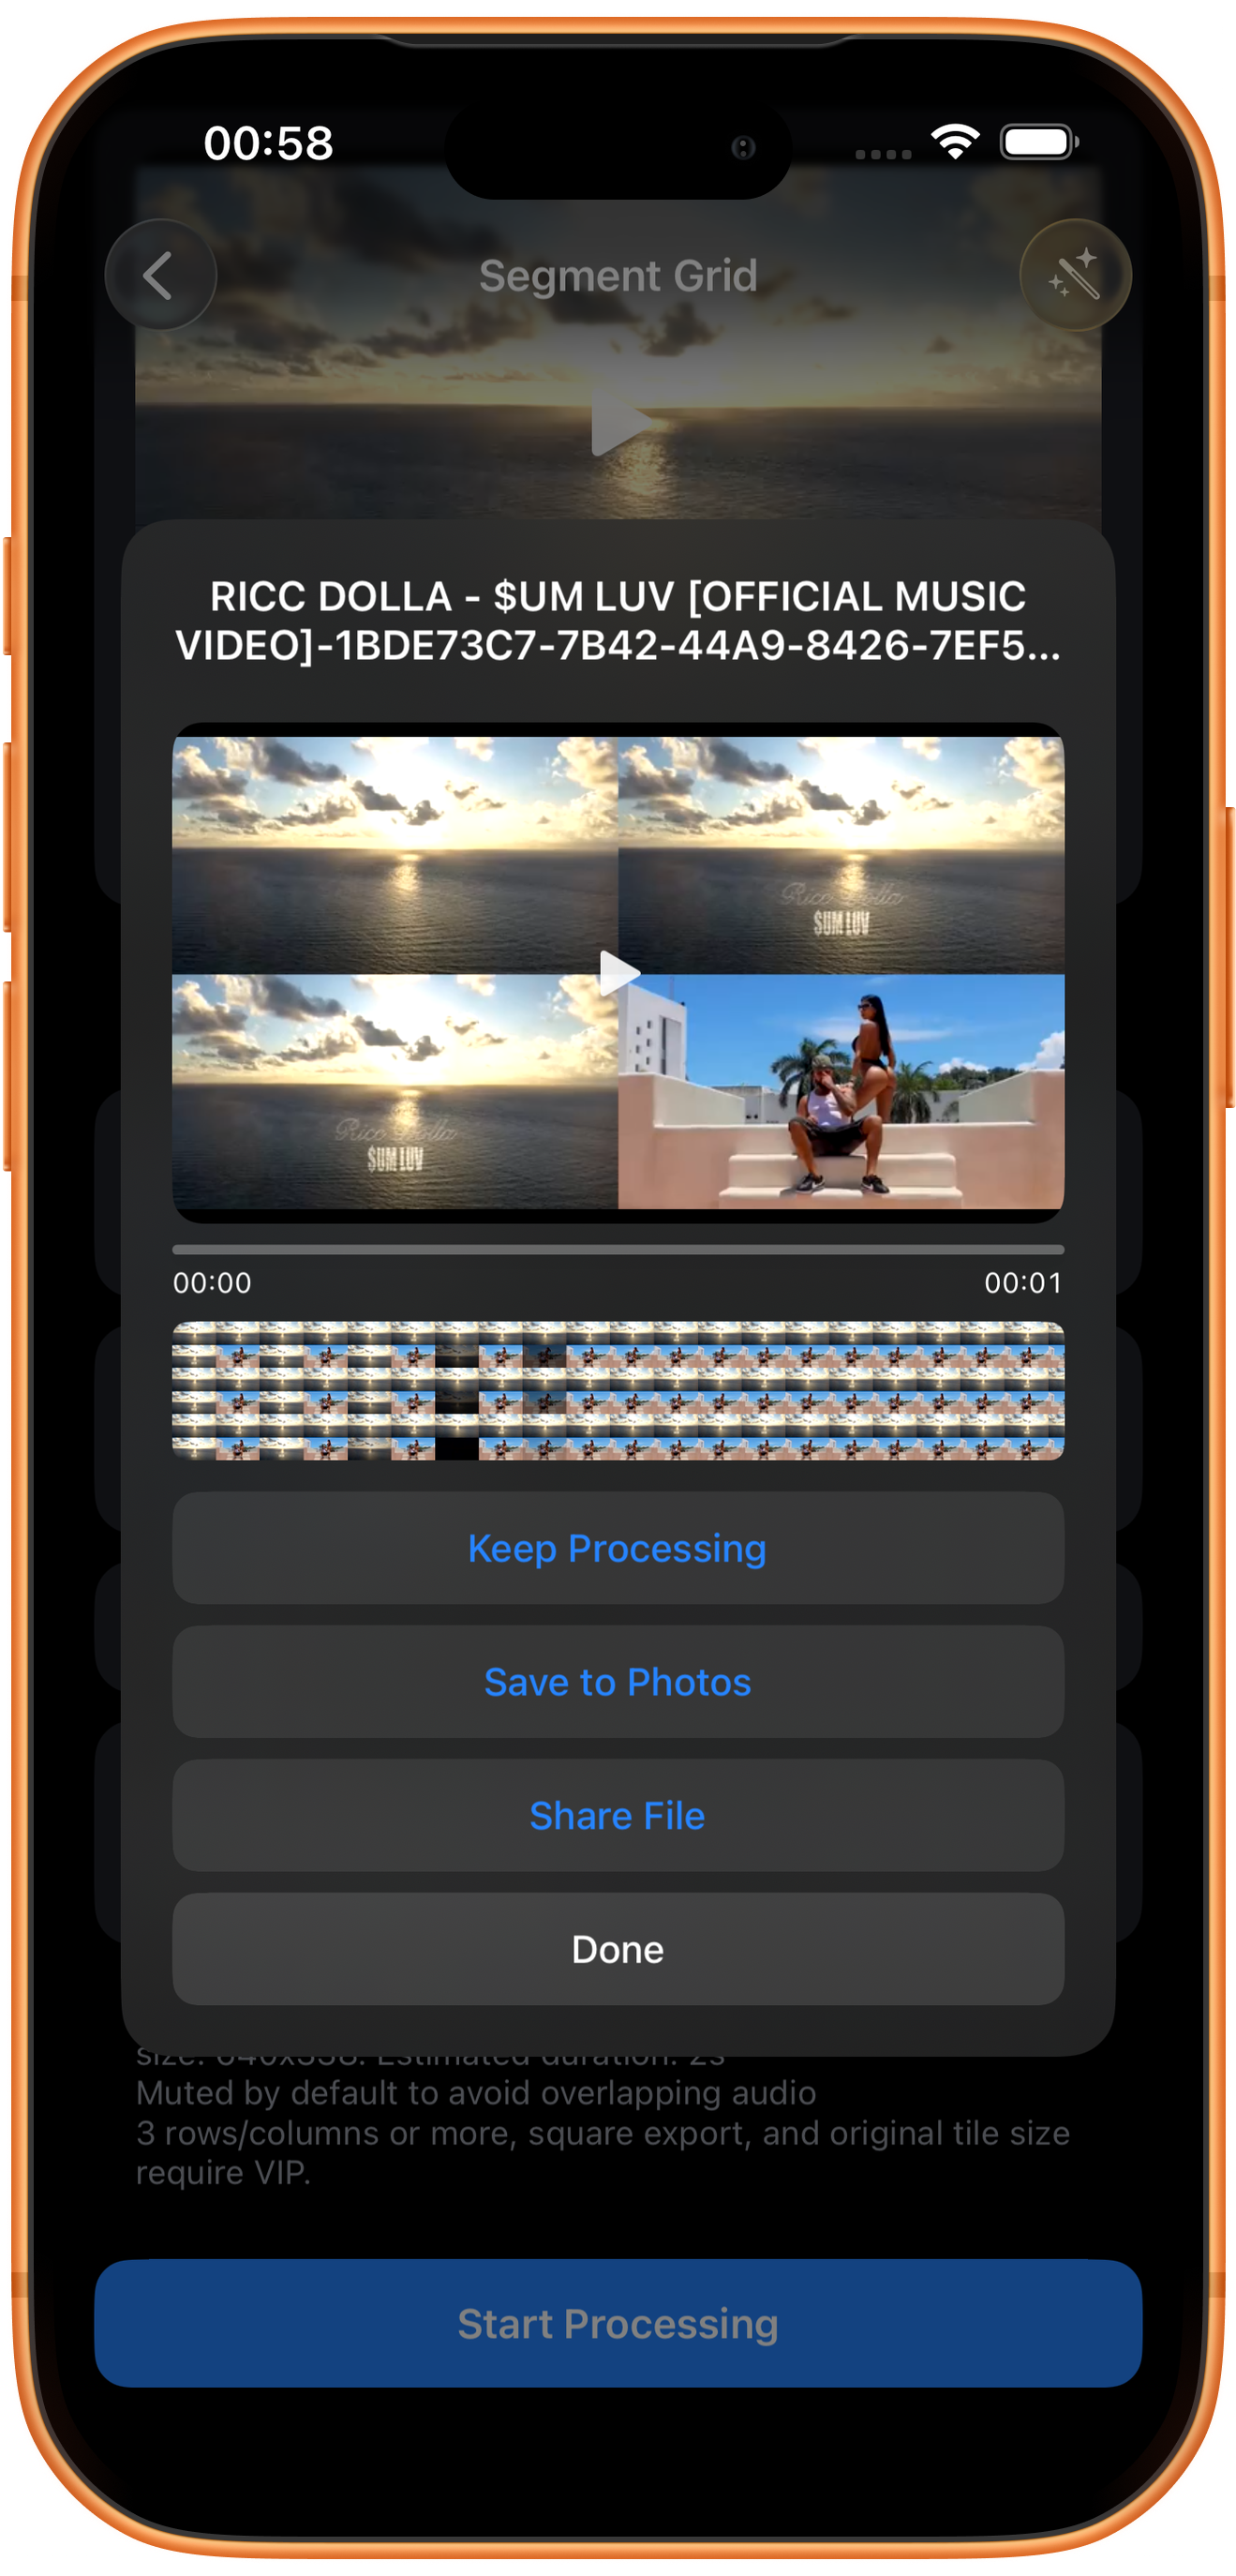
The output shows four time segments in a 2×2 grid. The input is about six seconds; the page estimates about two seconds, while the result’s whole-second display reads about one second. Play the output and do not treat rounded time labels as frame-accurate measurements.
Preview and save
Play the result and check picture, duration, and sound, then tap Save to Photos. The first save may require permission to add photos and videos. After the success message, check the file in Photos.
What the other buttons do
Keep Processing takes the result into tool selection. Share File opens sharing options. Done closes the result page; it does not save to Photos.
Troubleshooting
The tiles are too small to see clearly
At a fixed output size, more tiles leave fewer pixels for each. Reduce the rows and columns or choose appropriate final dimensions.
Frequently asked questions
Does this combine several separate video files?
This tool uses different time segments of one video. It does not show the additional-source list used by Stitch Videos.
Why is the default output silent?
Mute is selected by default to avoid overlapping audio. Choose First Segment Audio if appropriate.
Try it on your device
ClipDock is free to download, with in-app purchases. Features and available options depend on the current app version.
Download on the App Store