
01Steps
Open Stitch Videos in Process
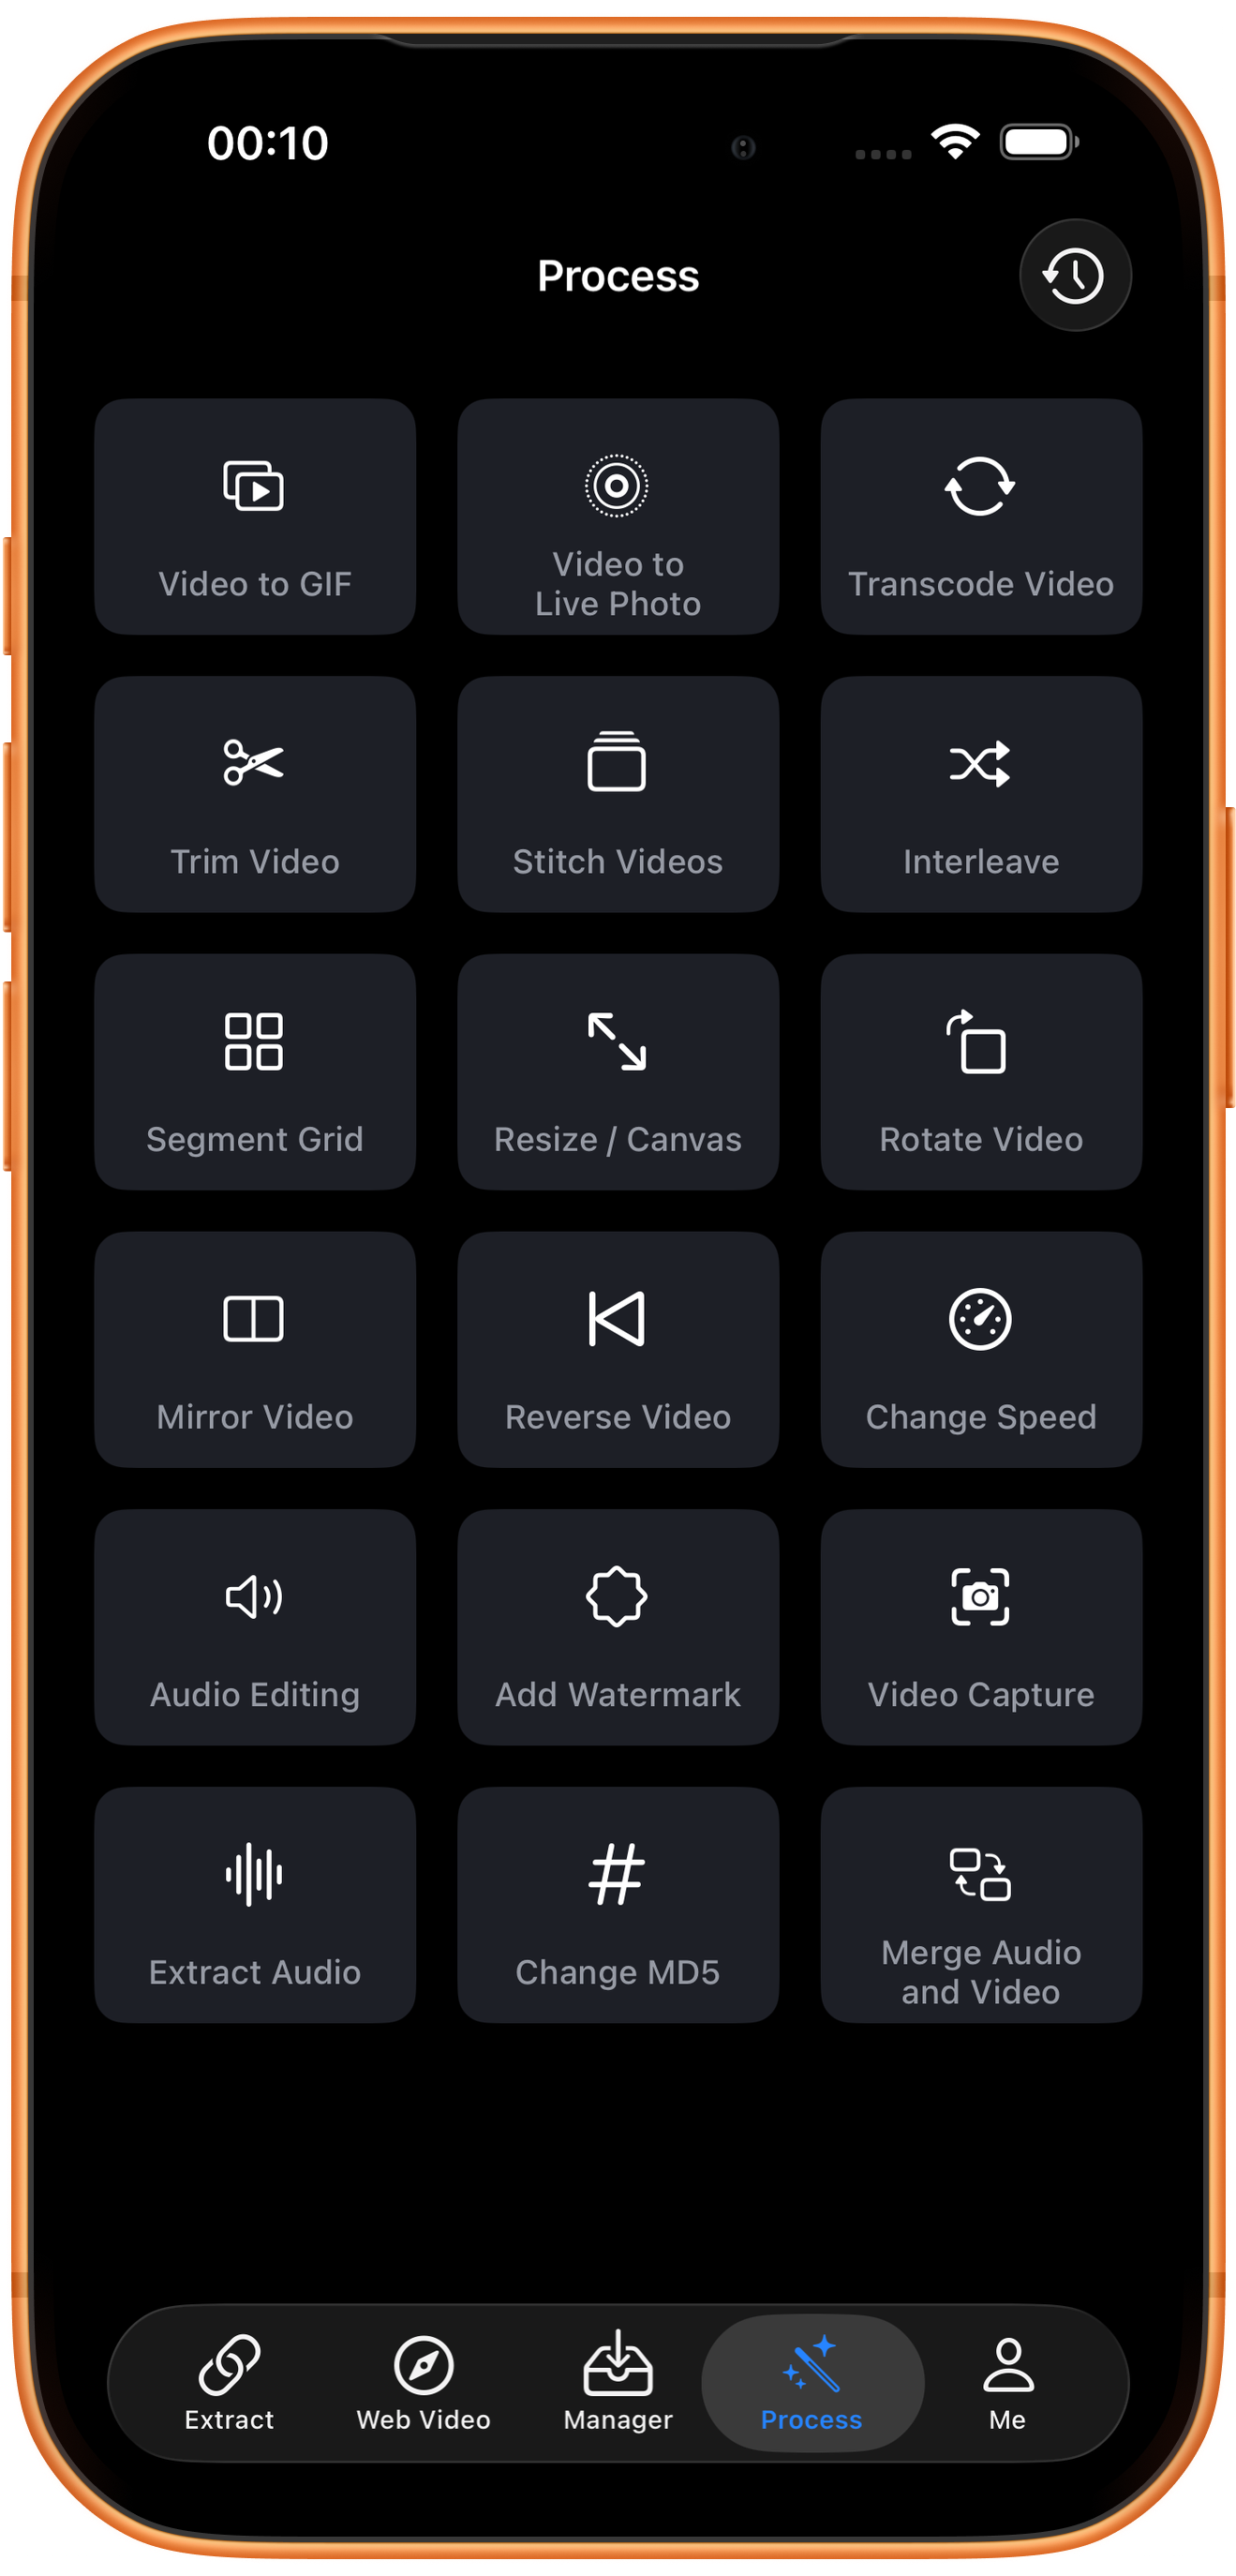
Tap Process in ClipDock and find Stitch Videos in the middle of the second row. The orange arrow and outline mark the tool.
02Steps
Choose the main video and read its preview
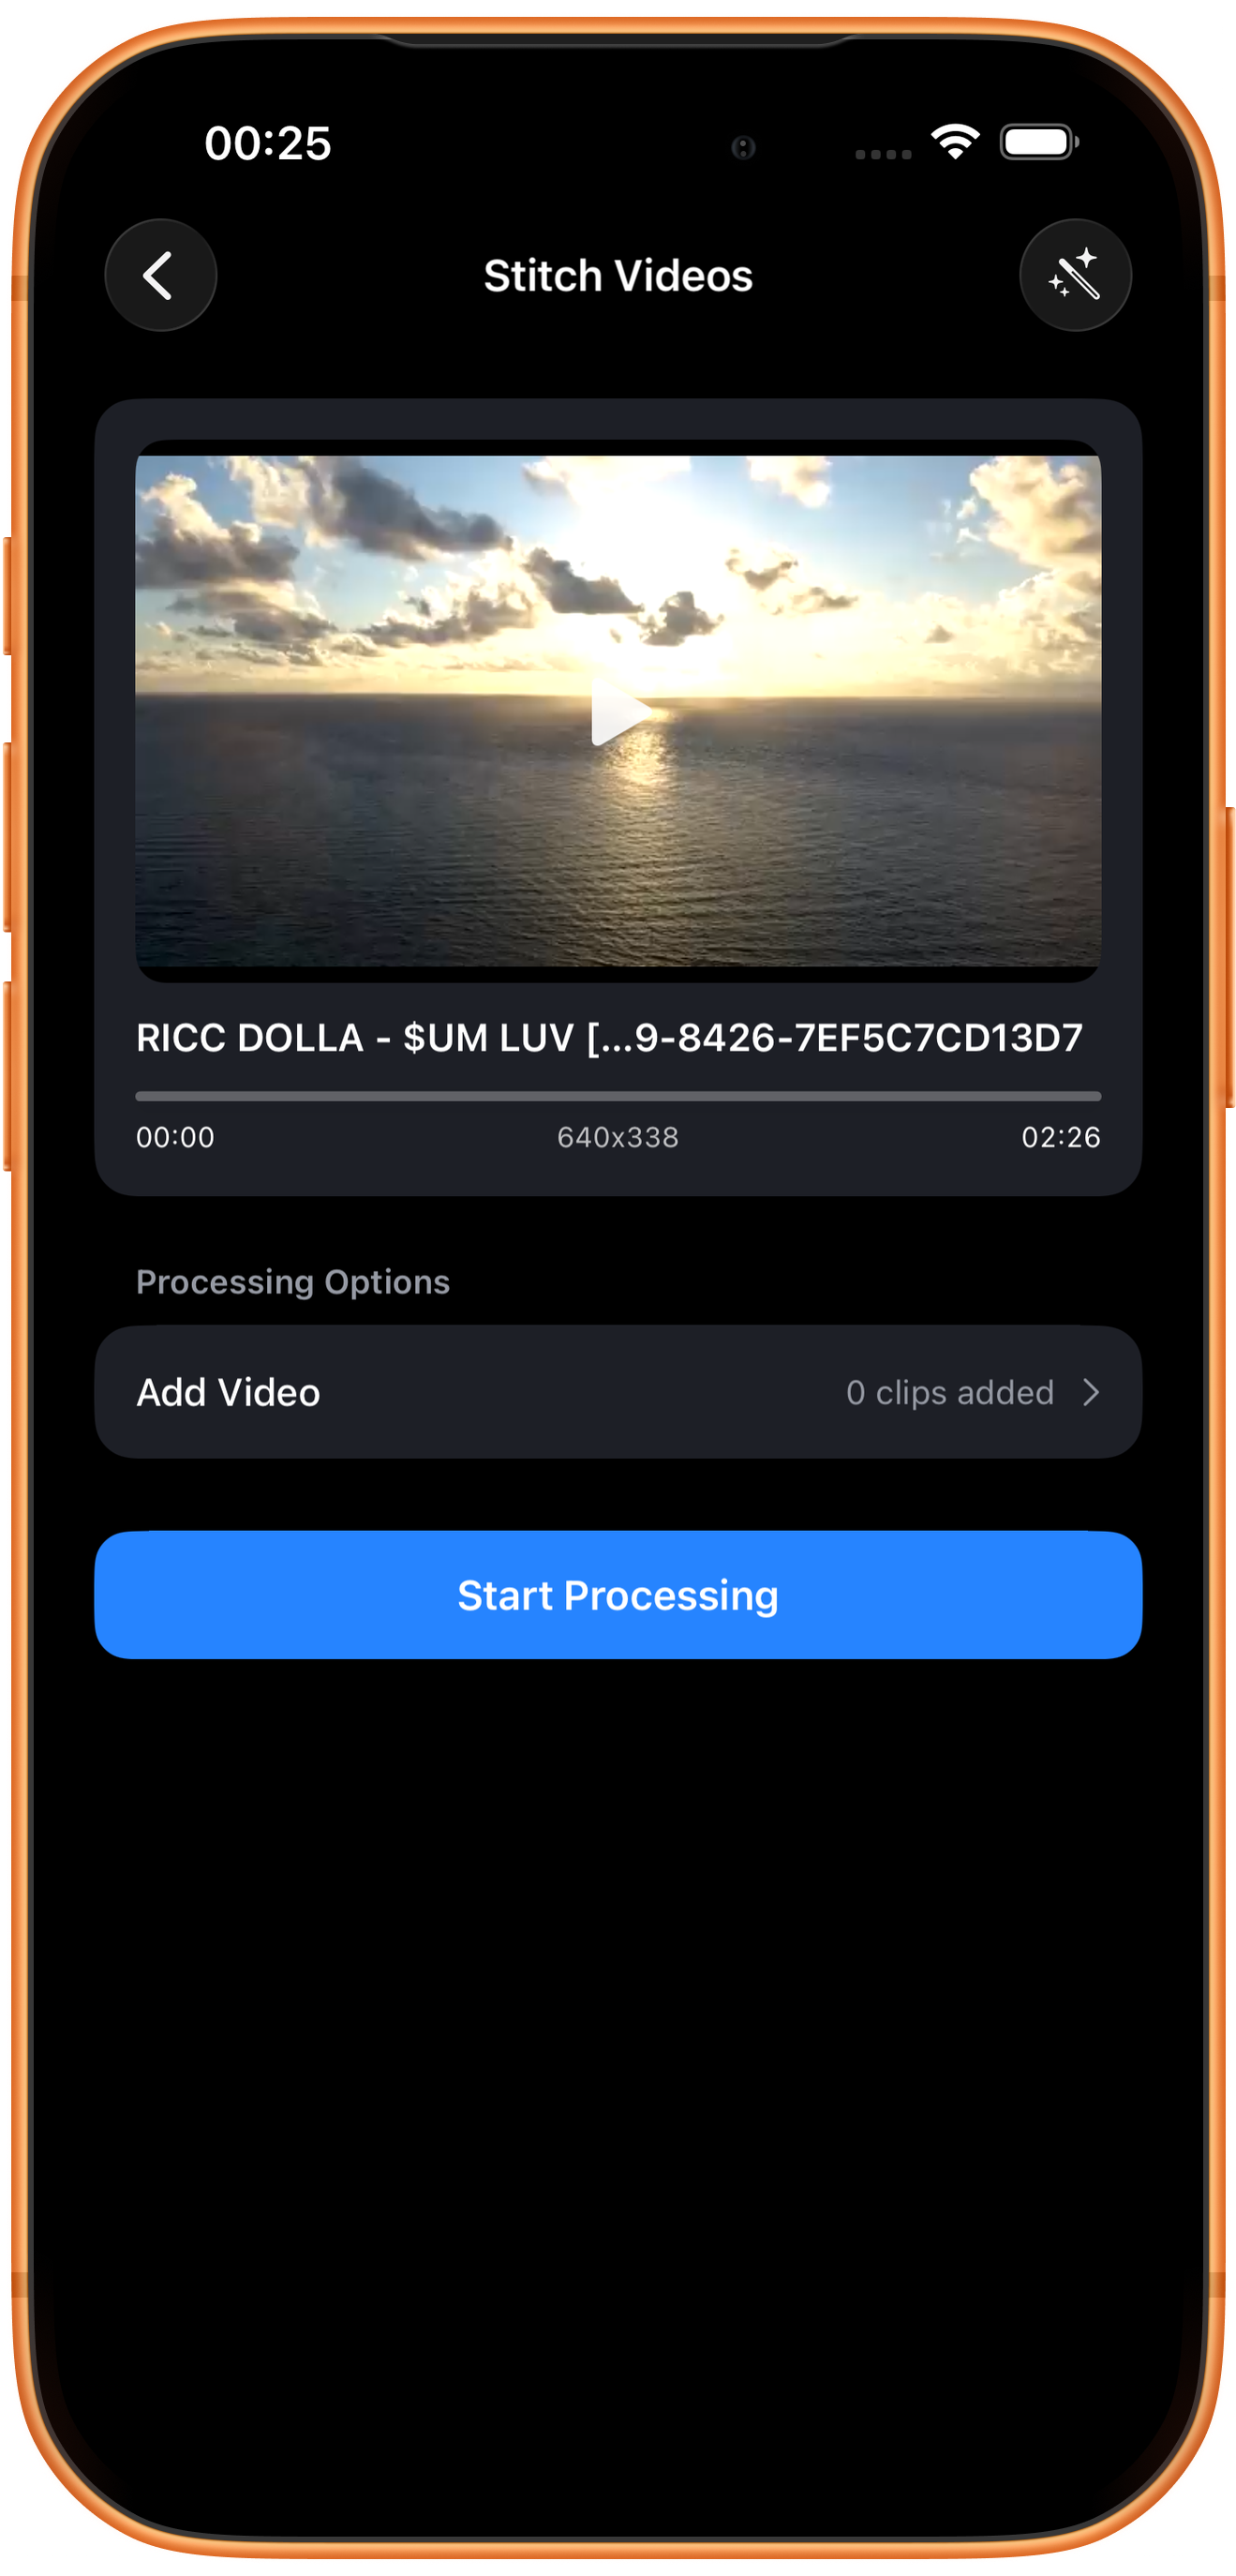
In Select Video, use Choose from Photos to select the first clip. This main video will be the opening of the result. Check the source when the settings page appears.
Preview, filename, and timeline
Play the main video with the center button. Its filename, current position, and duration help identify the correct version. The example shows 02:26, which is the main video’s duration, not the joined total.
What does 640×338 mean?
It is the current source’s pixel dimensions, rather than an output-size selector. This stitching page shows no independent resolution, frame-rate, or quality settings.
Why does it show 0 clips added?
The count includes only clips appended with Add Video, excluding the main video above. Zero means none have been appended yet. Add at least one more to join videos.
03Steps
Add the following clips
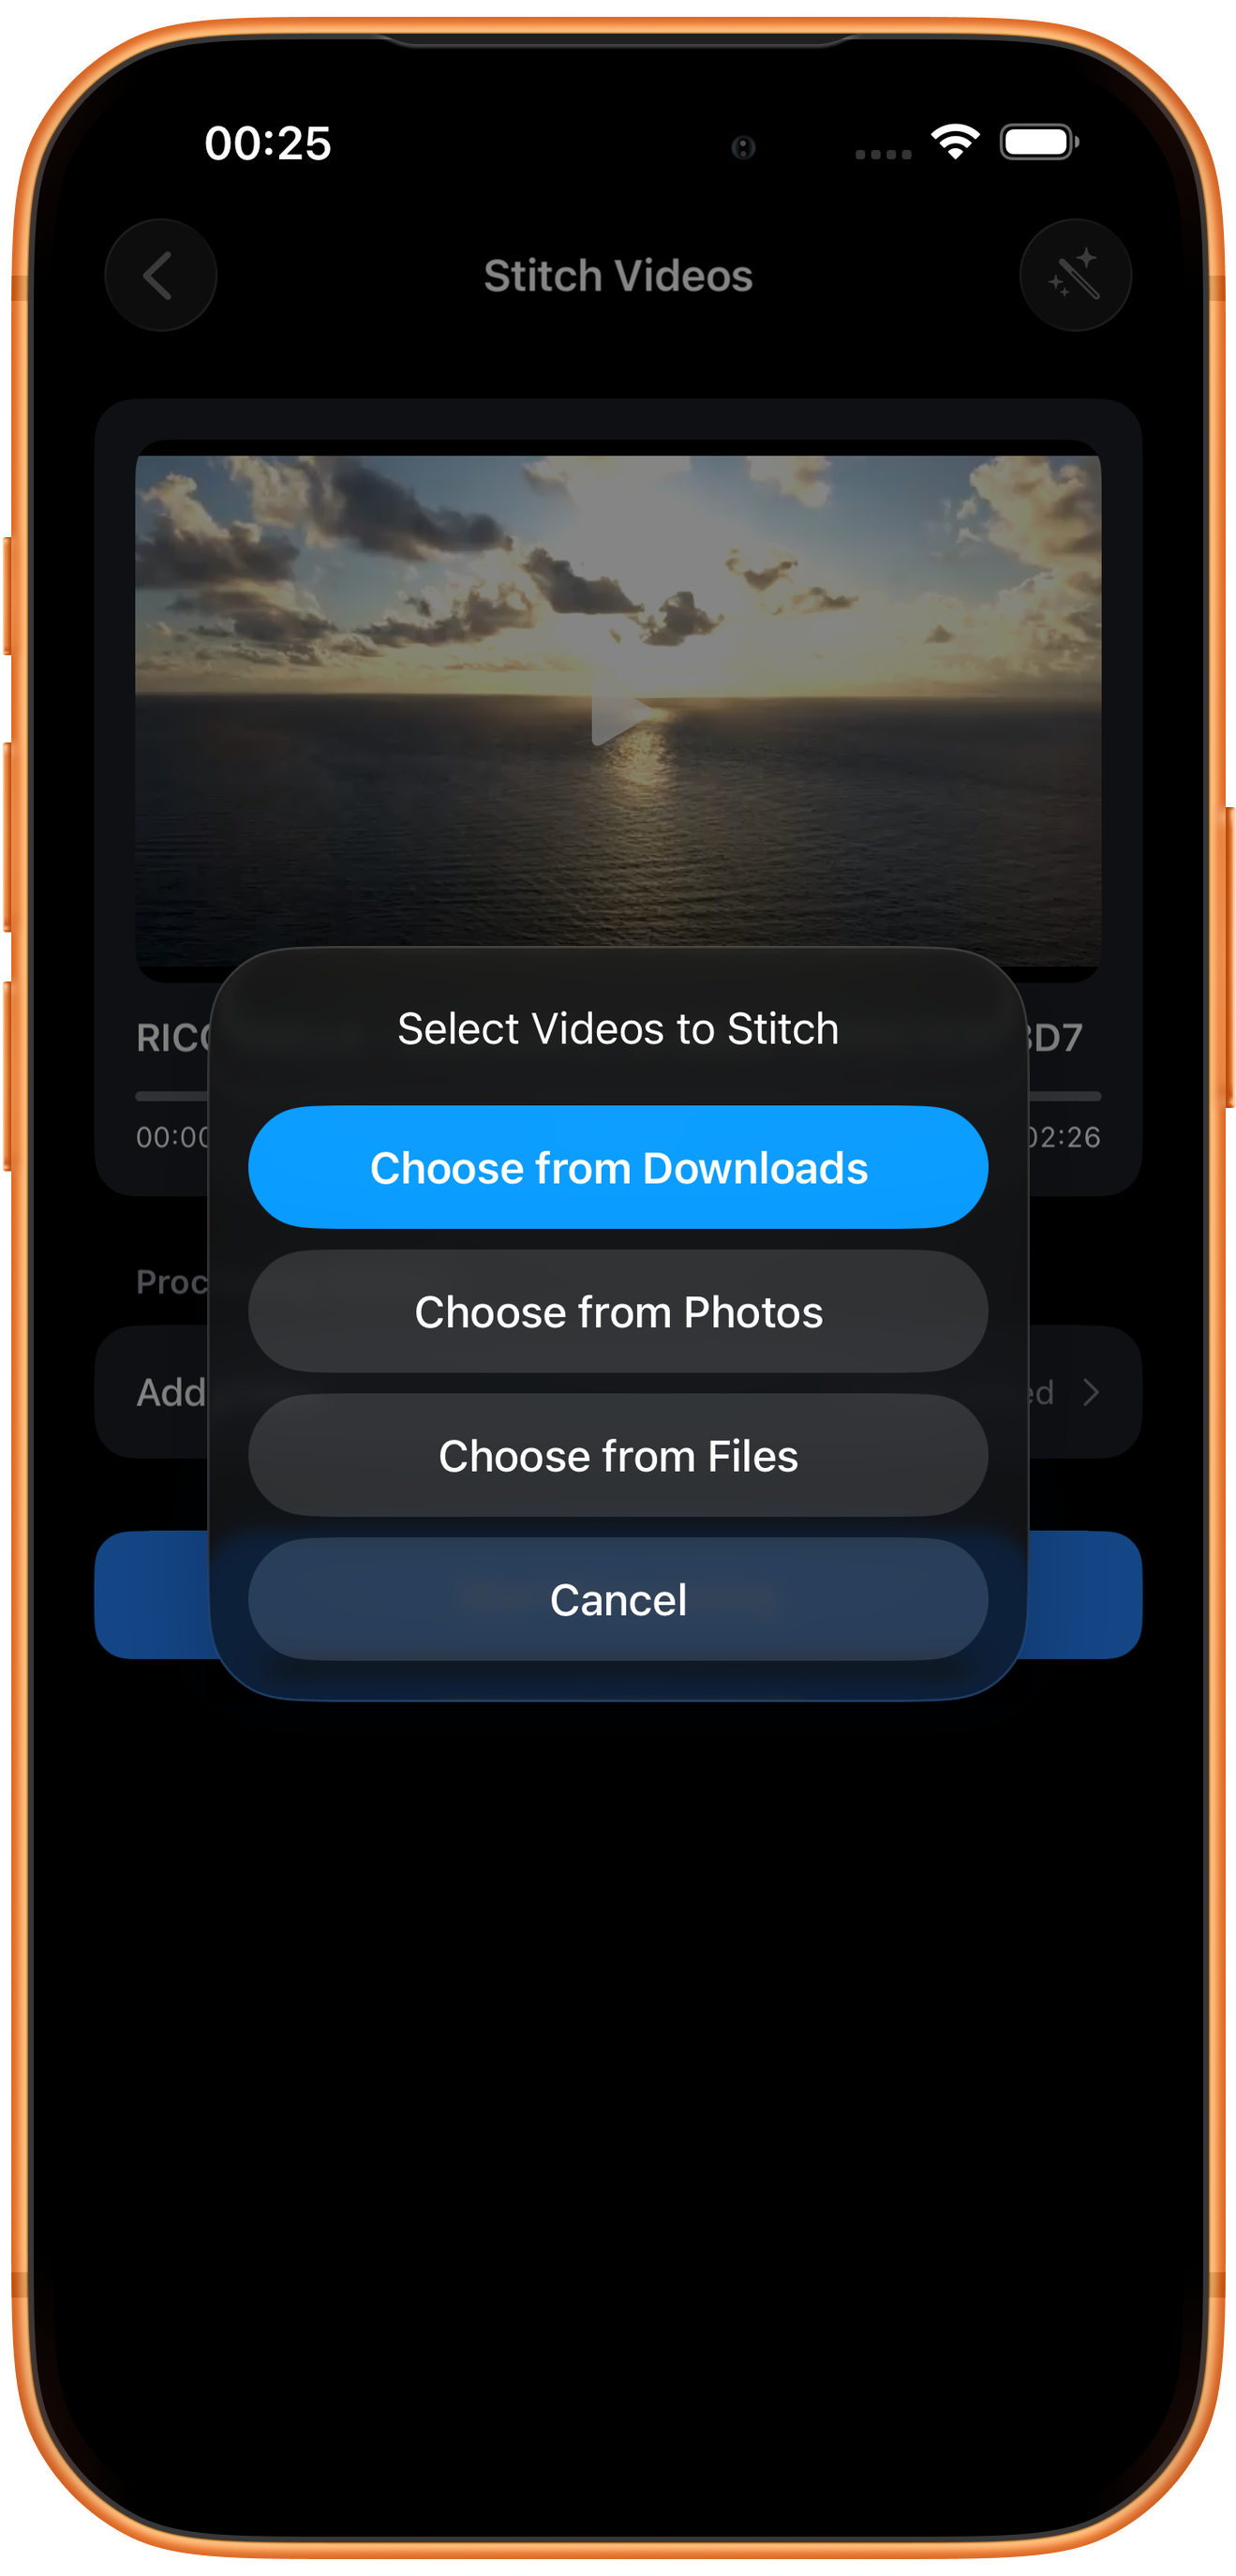
Tap Add Video under Processing Options and choose a source in Select Videos to Stitch. This example continues with Choose from Photos.
Choose among three sources
Choose from Downloads uses the app’s downloaded videos. Choose from Photos uses the system library. Choose from Files opens the file picker. Photos videos do not need to be downloaded again to be joined.
Select multiple Photos videos and confirm
Selected thumbnails show sequence numbers. Tap the blue checkmark at the upper right to import. Use Add Video again if needed. Check the list count afterward to avoid adding the main video twice.
04Steps
Check counts and reorder the added clips
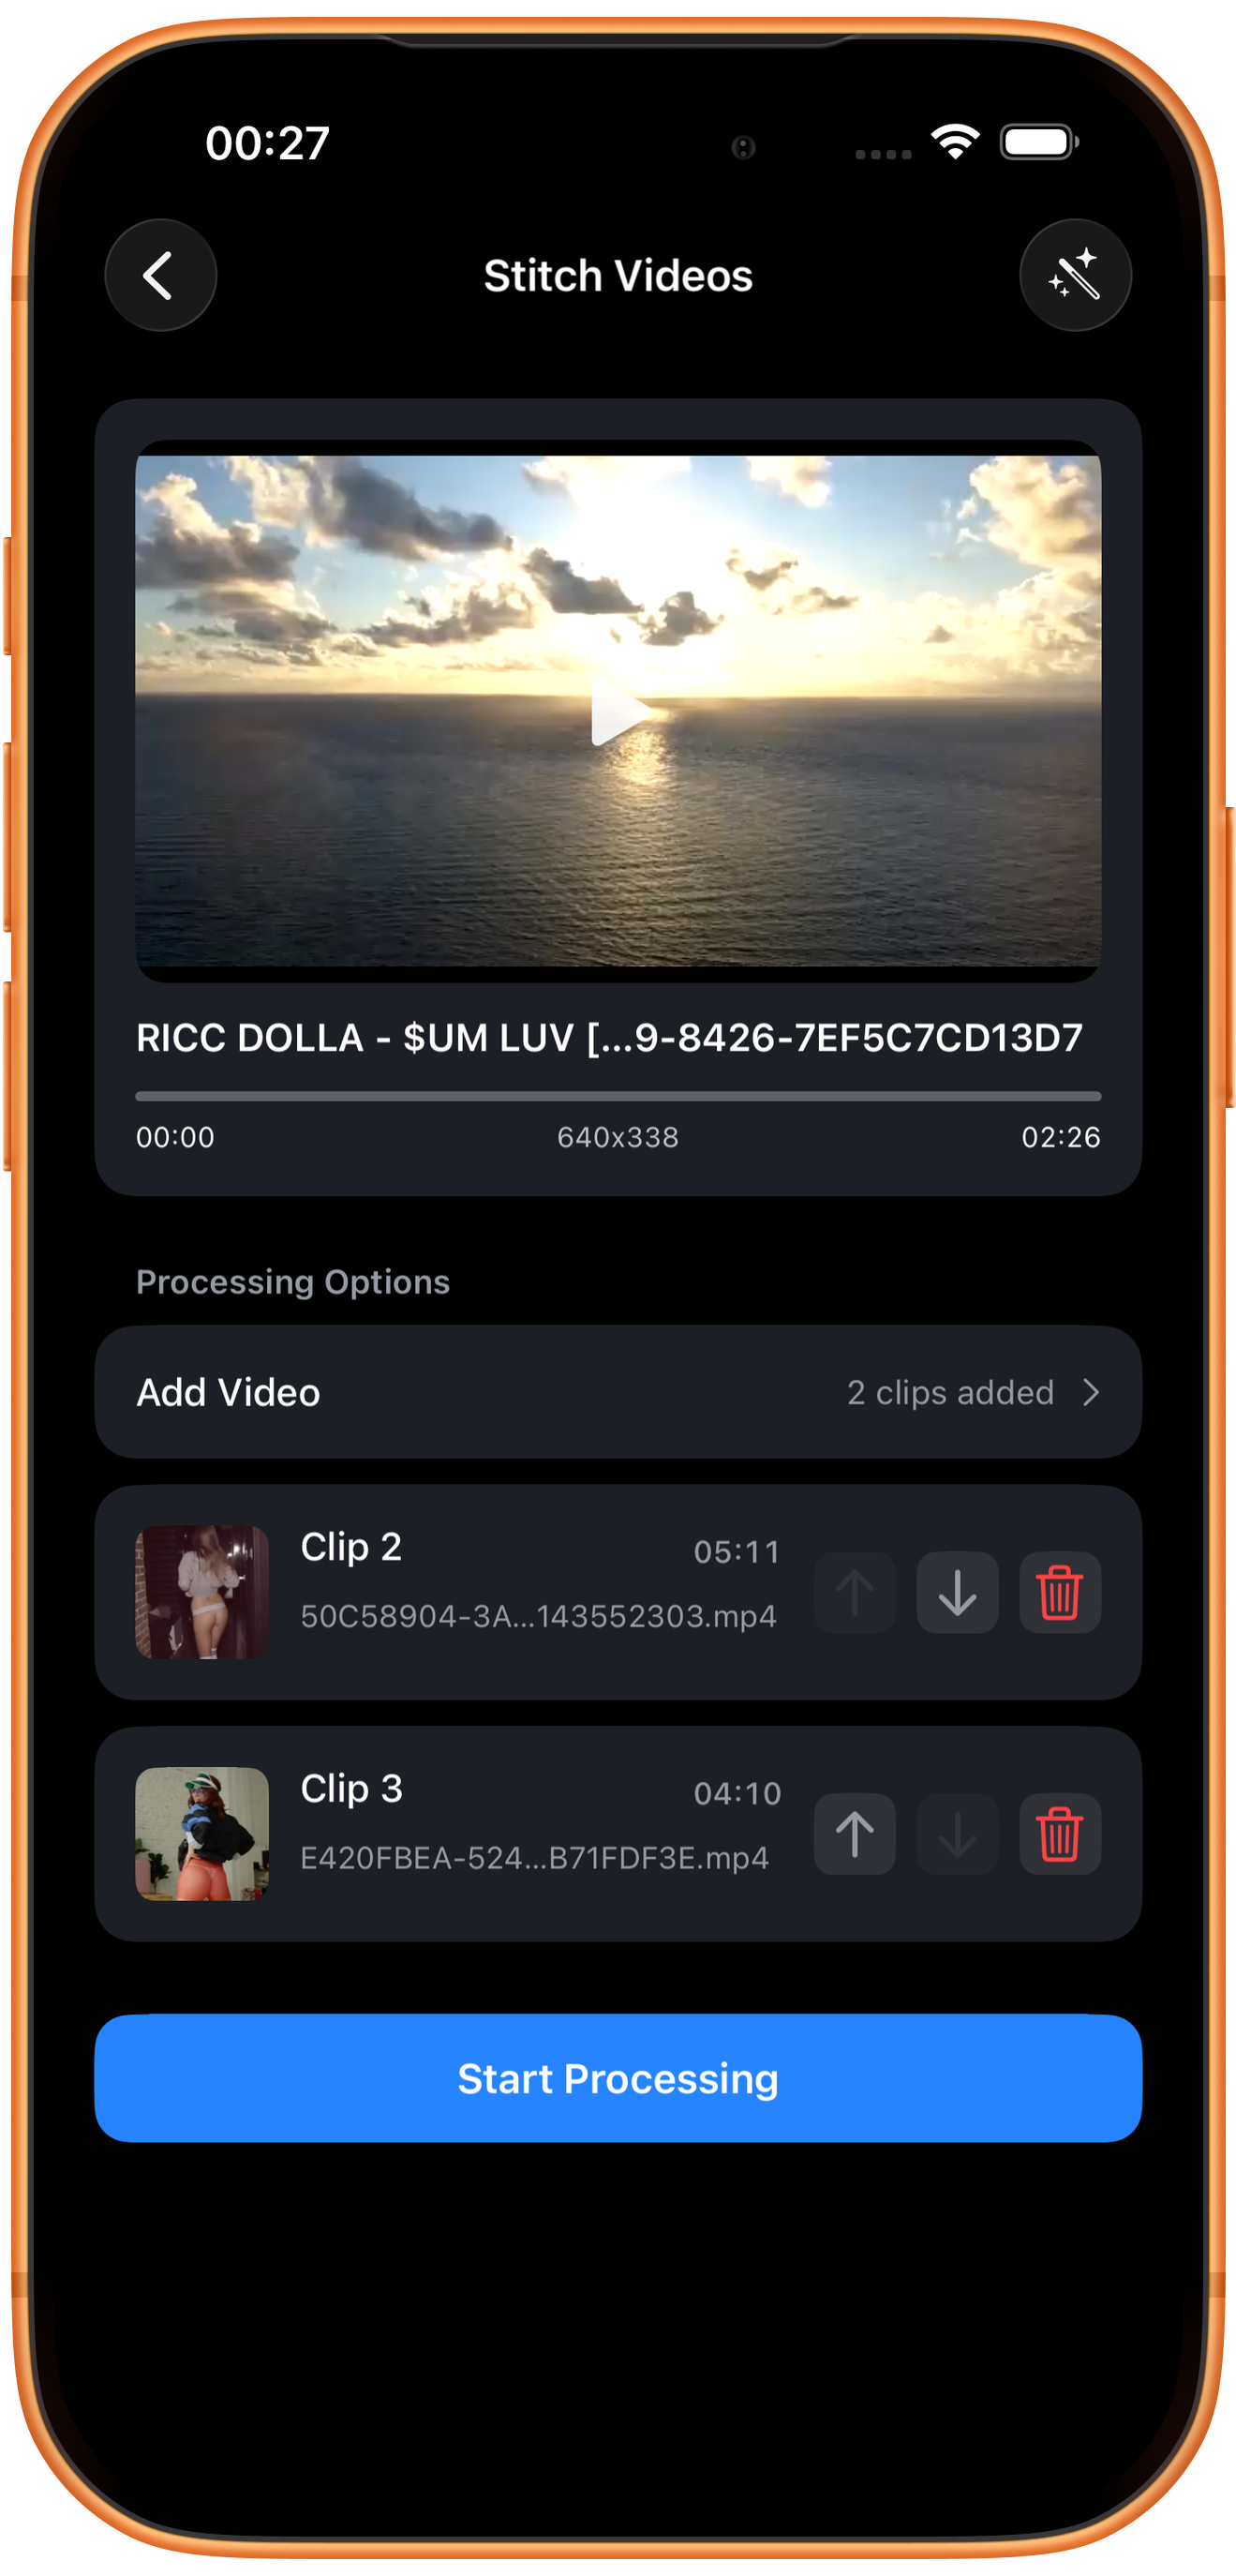
2 clips added means two appended clips plus the main one, for three in total. The added list begins with Clip 2, which follows the main video. Additional clips play from top to bottom.
Up and down arrows reorder appended clips
Use the arrows to move a clip. The recorded test moves the 05:11 clip before the 04:10 clip. The top item cannot move farther up and the bottom cannot move farther down, so those arrows are disabled. Both directions are unavailable when there is only one appended clip.
The main video stays at the beginning
The main video is not part of the appended sorting list. To change the opening clip, go back and choose a different main video, then add the following clips.
Thumbnails, duration, and removal
Use each row’s thumbnail, filename, and duration to identify it. The red trash icon removes that appended clip. Check order and duplicates. This example runs main video 02:26 → Clip 2 05:11 → Clip 3 04:10.
05Steps
Start stitching and follow progress
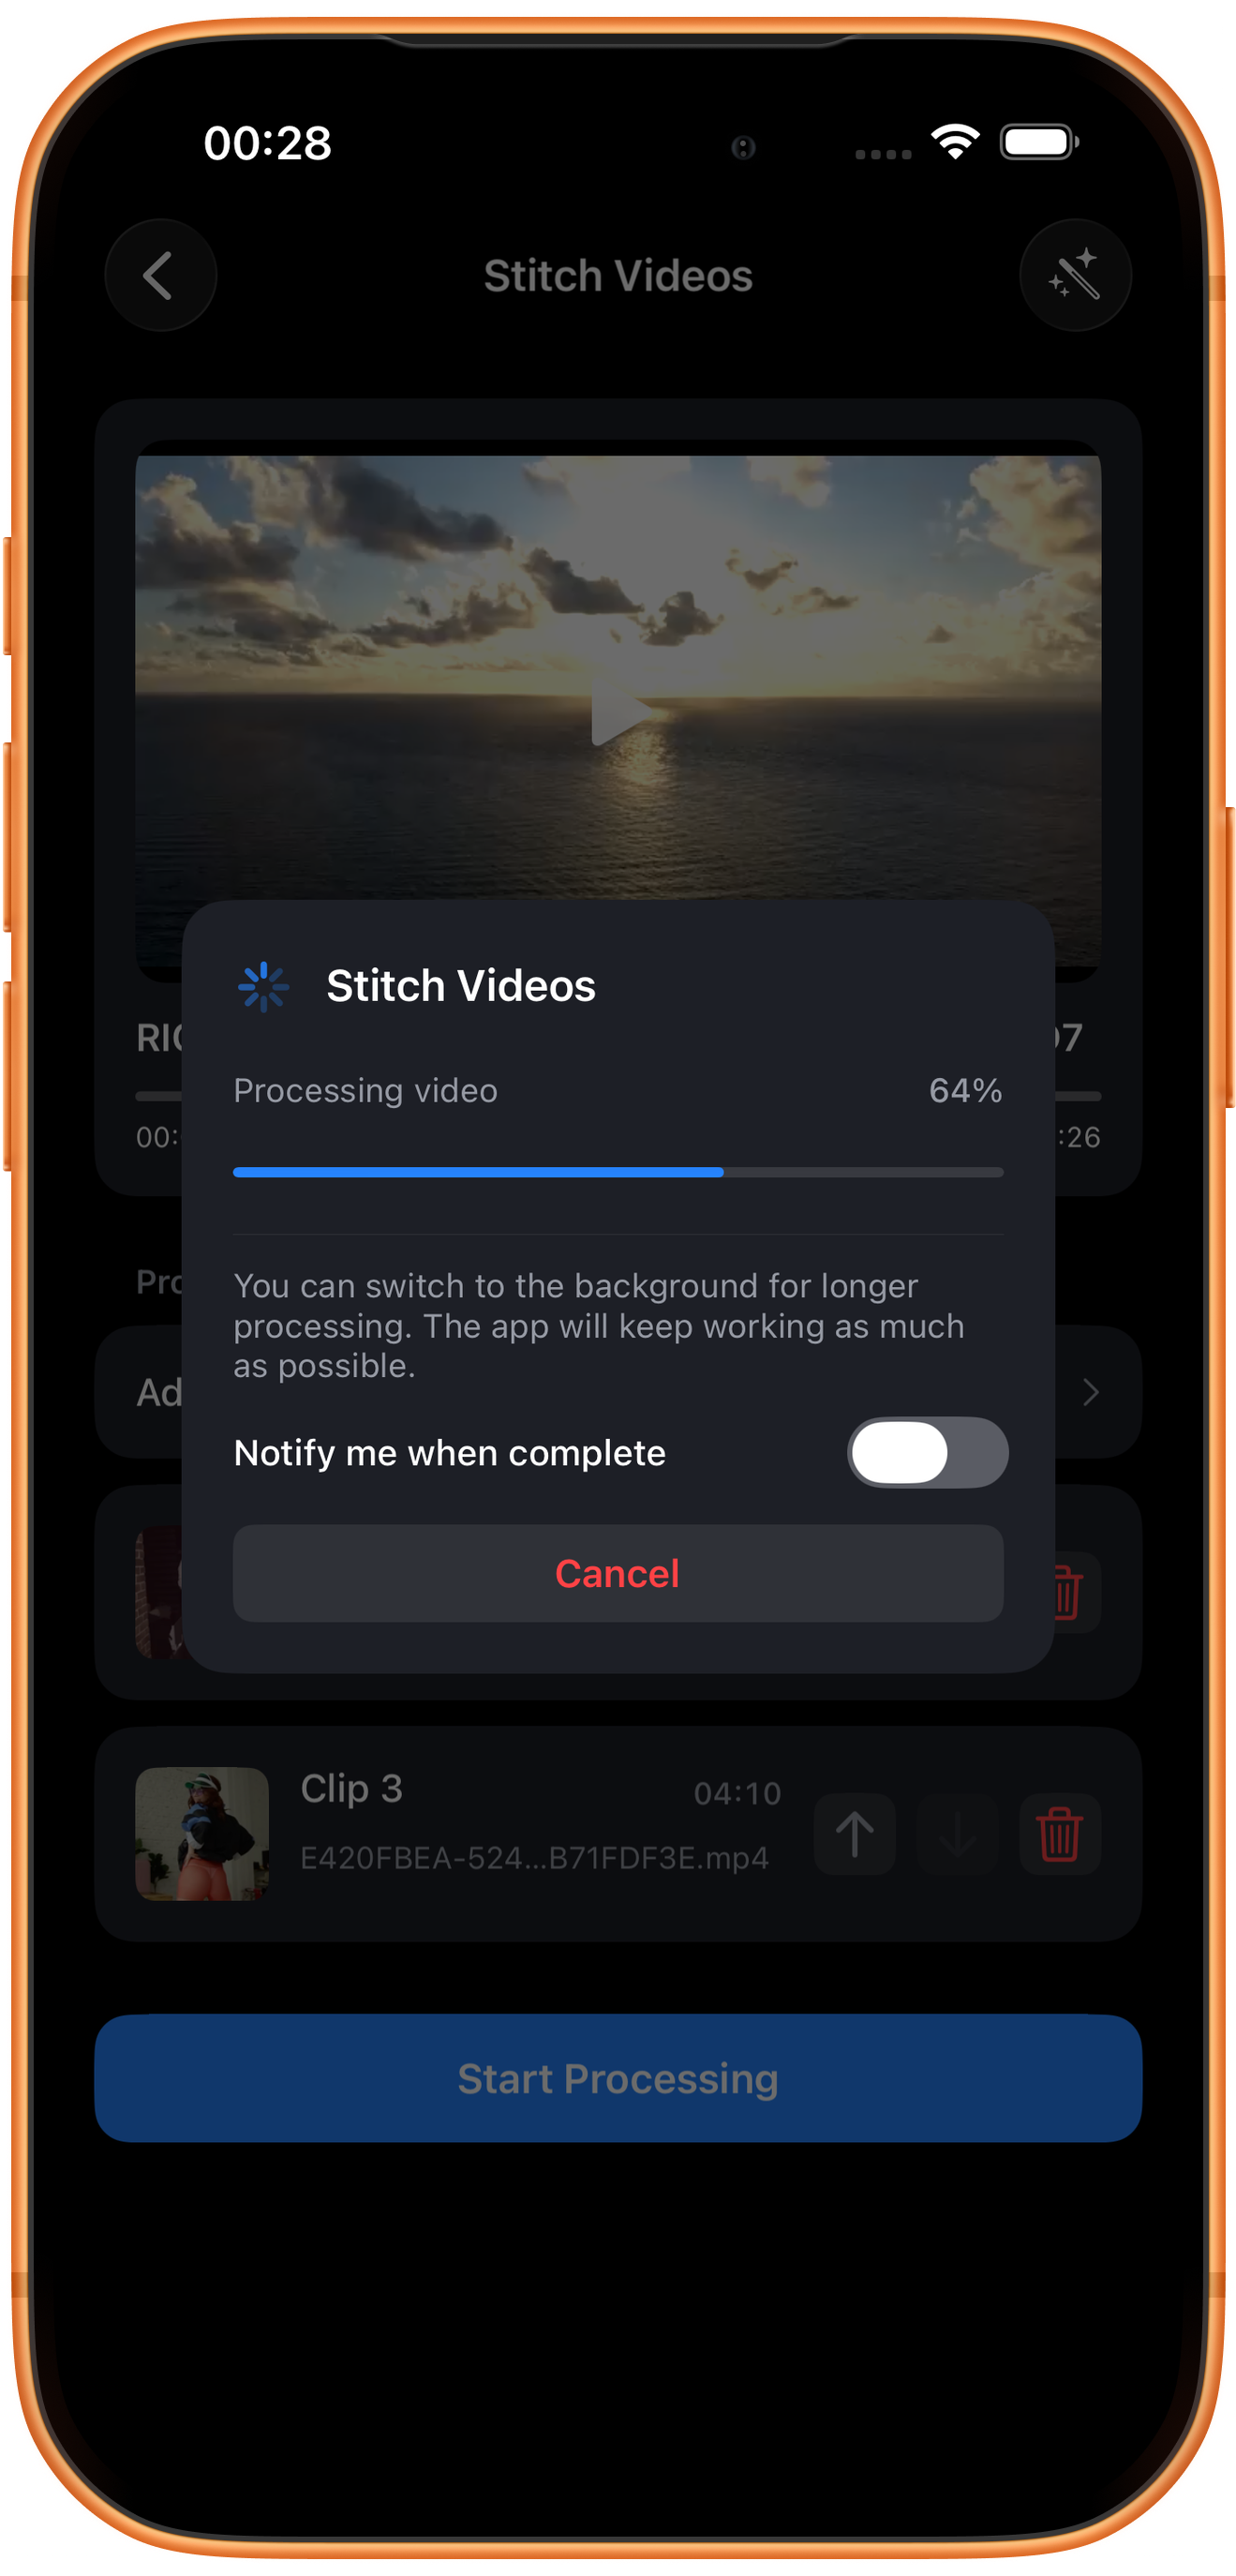
Tap Start Processing when the clips are ready. The dialog shows Processing video and a percentage. Wait for the result page.
Completion notifications and background processing
Longer jobs offer Notify me when complete. Enable it if needed and respond to system notification prompts. The dialog says you can switch to the background and the app will try to continue; it does not guarantee iOS will let it run indefinitely.
Cancel stops processing
Cancel stops the current job, rather than merely hiding the progress window. Keep the job running if you still need the output.
06Steps
Preview and save the joined video
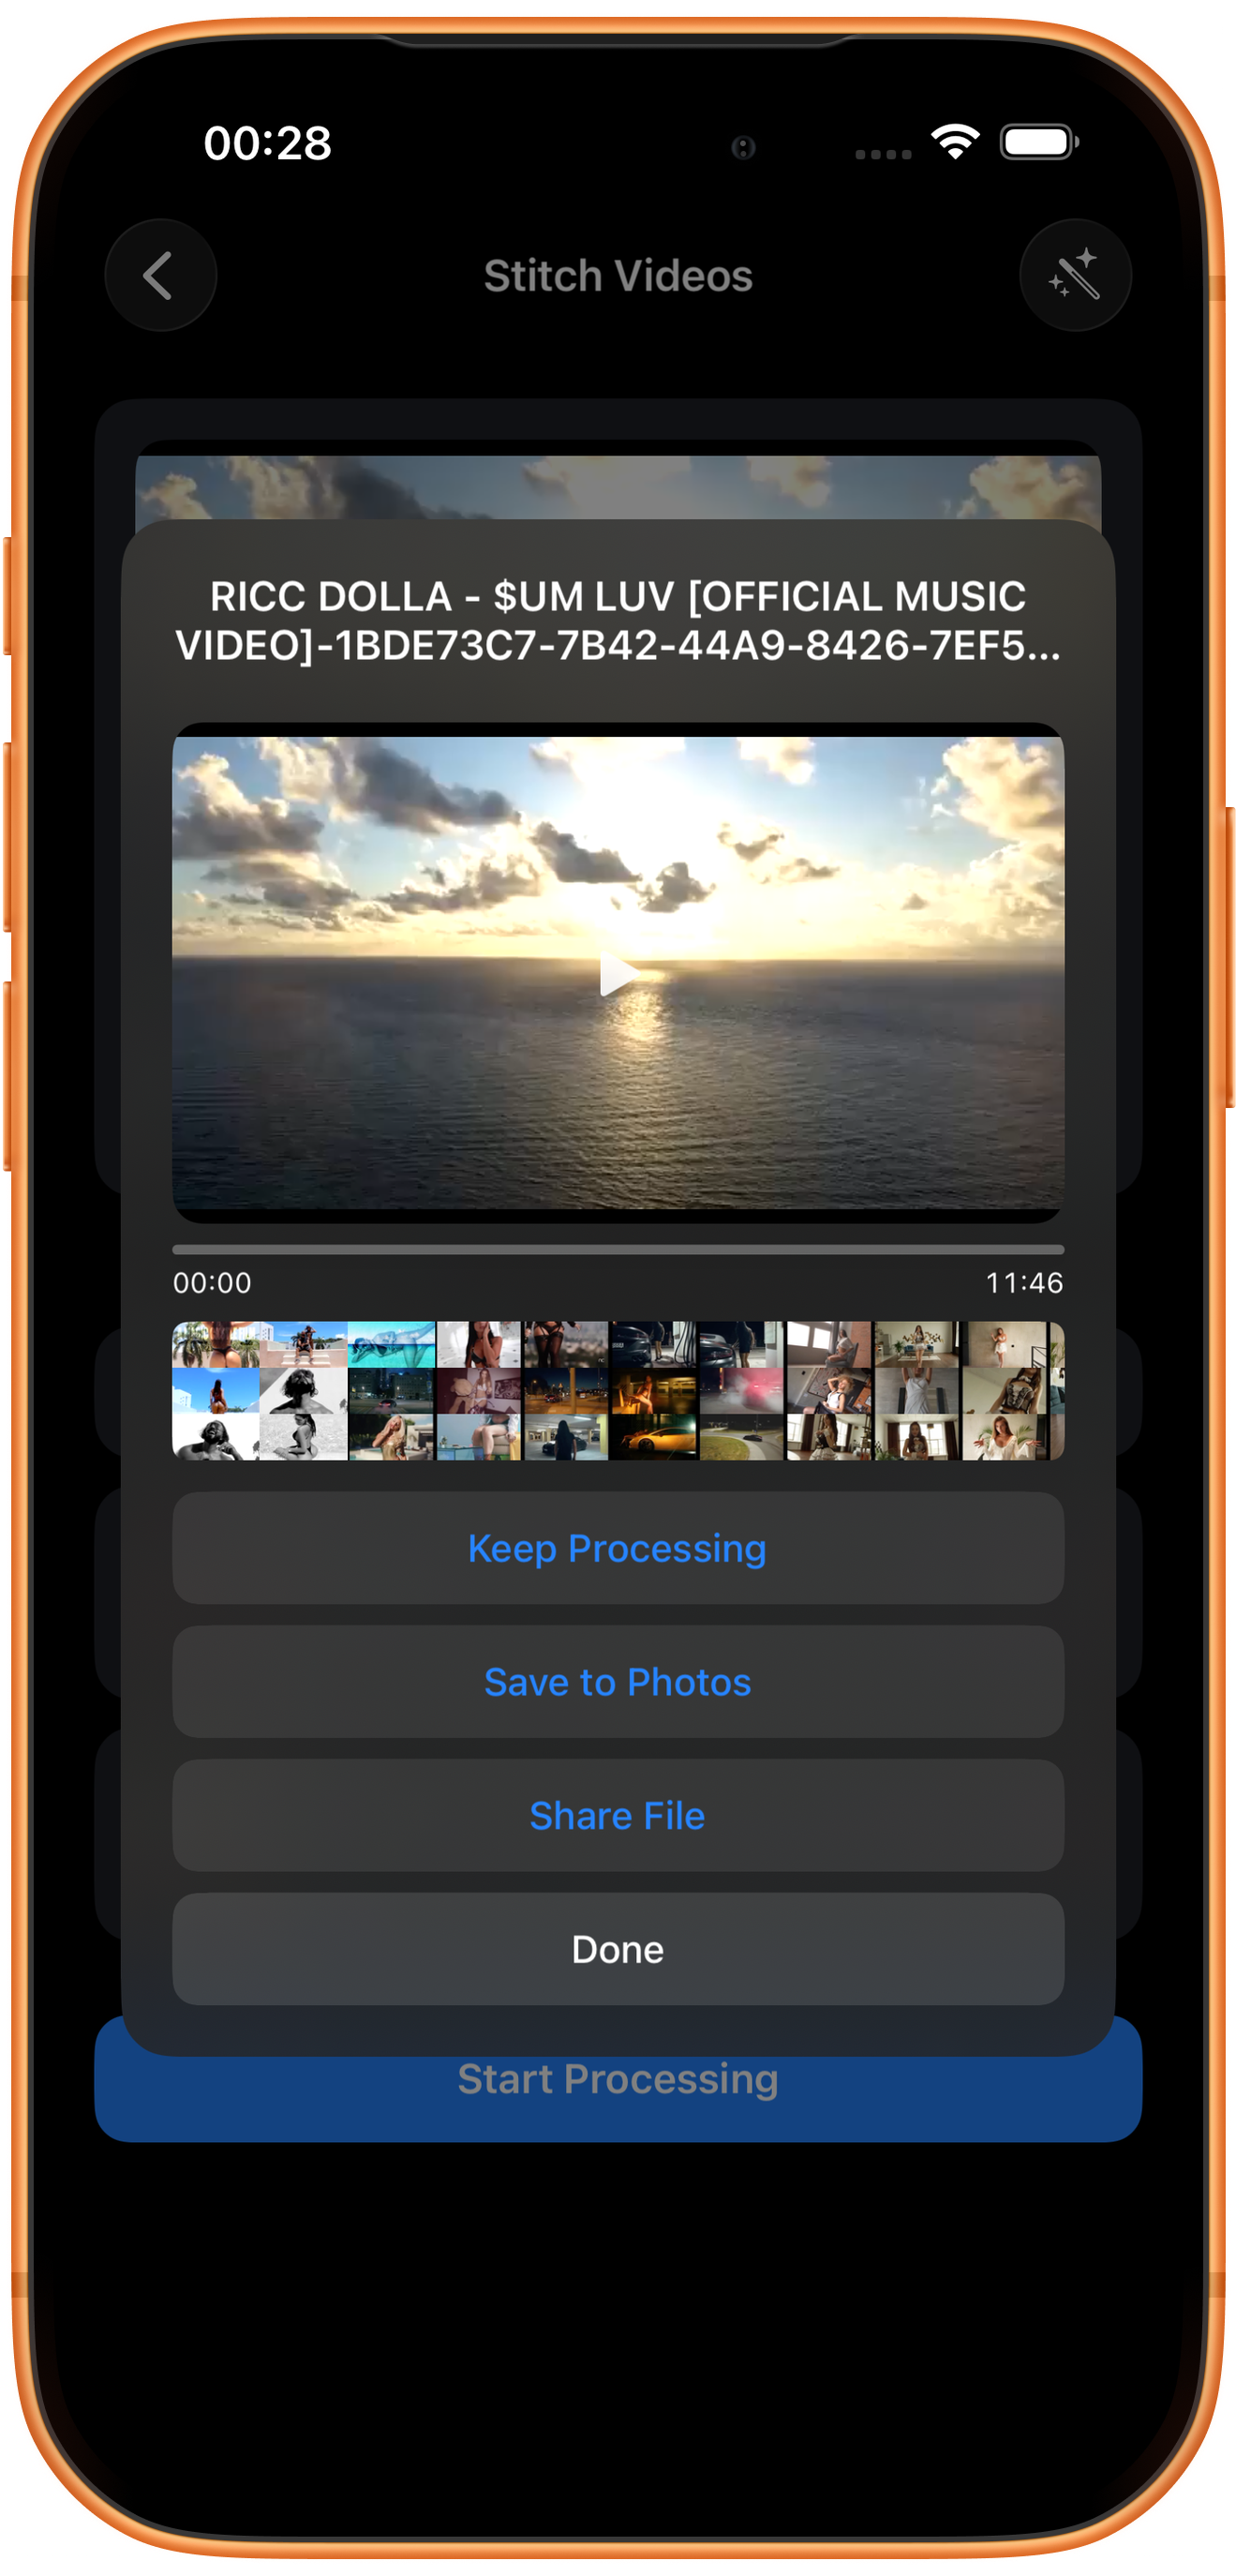
The result page displays the output, timeline, and thumbnails. This example produces _concat.mp4 with a displayed duration of 11:46, and playback was verified. Input durations are displayed in whole seconds; check the actual output for the total.
What to check before saving
Play the beginning, ending, and joins to check sequence, aspect ratio, and sound transitions. For this example, inspect around 02:26 and 07:37. Watch or listen through before deciding to keep the result.
Save to Photos
Tap Save to Photos and grant permission to add media if asked. The recorded test received Saved to Photos. Check the finished video in Photos afterward.
Keep processing, share, or finish
Keep Processing opens further processing. Share File opens file sharing. Done closes the result. Save to Photos is the action that retains a system-library copy; Done is not a save button.
Troubleshooting
The sources have different orientations or dimensions
This stitching page has no separate canvas, crop, or padding settings. Use Resize / Canvas or an appropriate tool to prepare sources when aspect ratio matters, then stitch and inspect the output.
Avoid leaving an already arranged setup
The magic-wand control opens Quick Edit for the main video. In the test, returning to Stitch Videos through it reset the added count to zero. Start processing directly after arranging clips, or recheck the appended list after switching tools.
Frequently asked questions
Why does 2 clips added produce three clips?
The count excludes the main opening video: one main clip plus two appended clips is three.
Can I move an added clip before the main video?
The arrows only reorder the appended list, and its first up arrow is disabled. Reselect the main video to change the opening.
Can I set transitions, background music, or output quality here?
Those options are not shown on the tested stitching page. It previews the main video, adds clips, and changes their appended order. Use the corresponding tools for other effects.
Why is the video missing from Photos after Done?
Done only closes the result. Use Save to Photos separately and confirm the success message and permissions.
Try it on your device
ClipDock is free to download, with in-app purchases. Features and available options depend on the current app version.
Download on the App Store