
01Steps
Open Video to Live Photo in Process
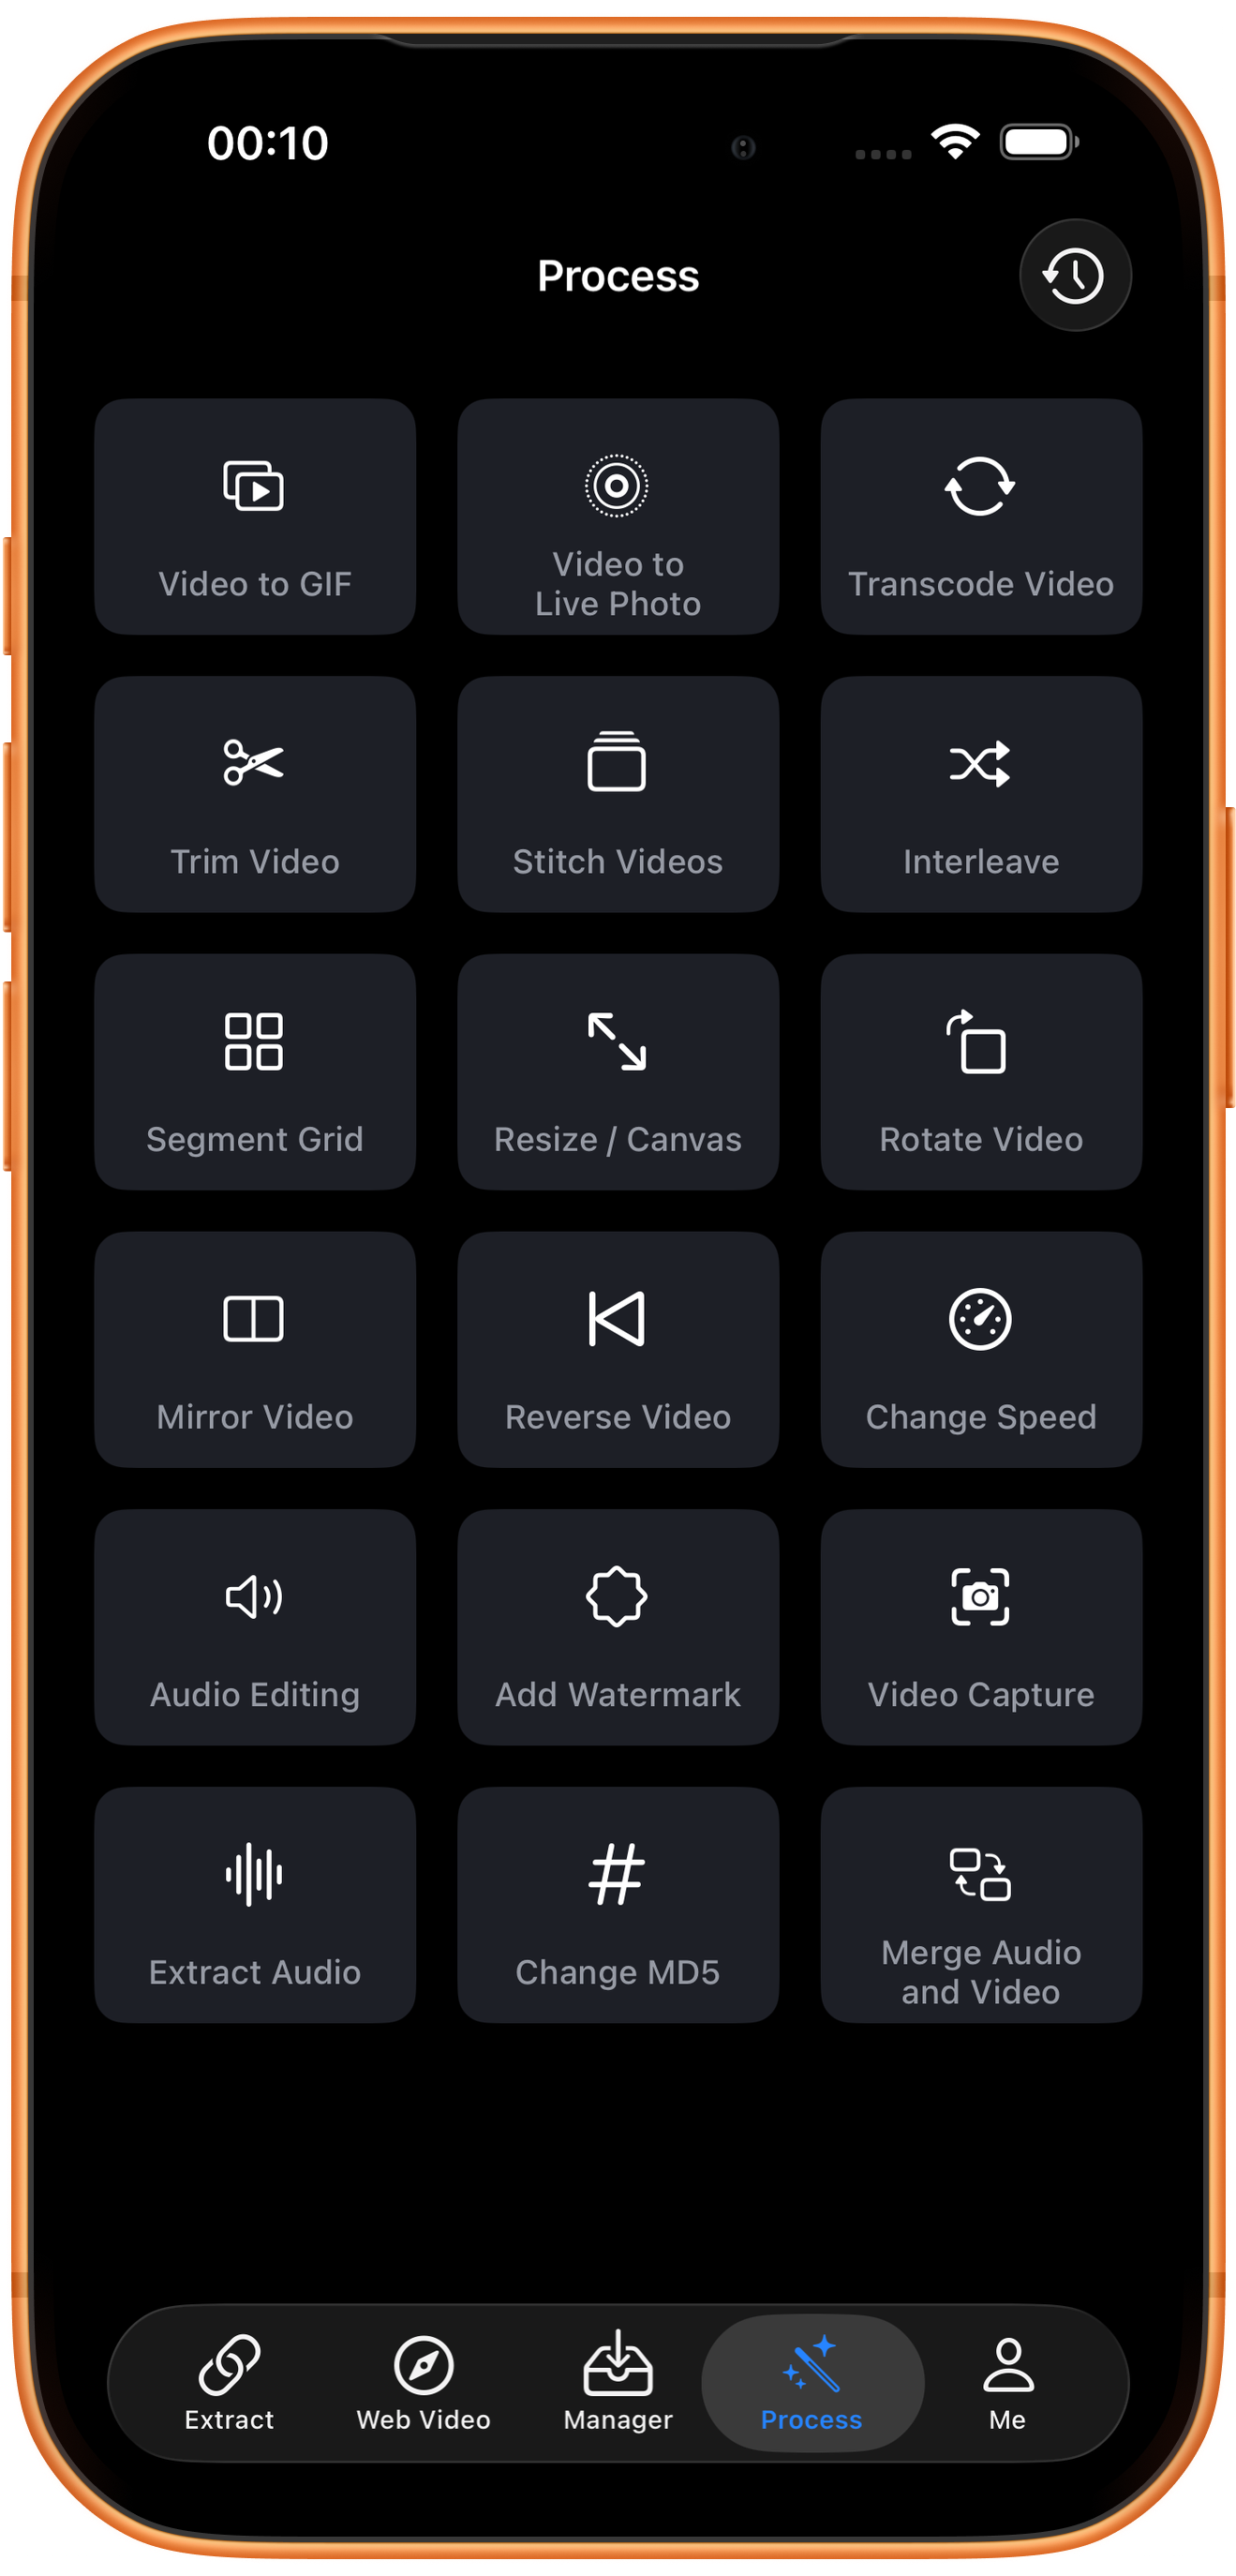
Tap Process in the bottom navigation. Find Video to Live Photo in row 1, in the middle column, and tap the entry marked by the arrow.
02Steps
Choose the video to process
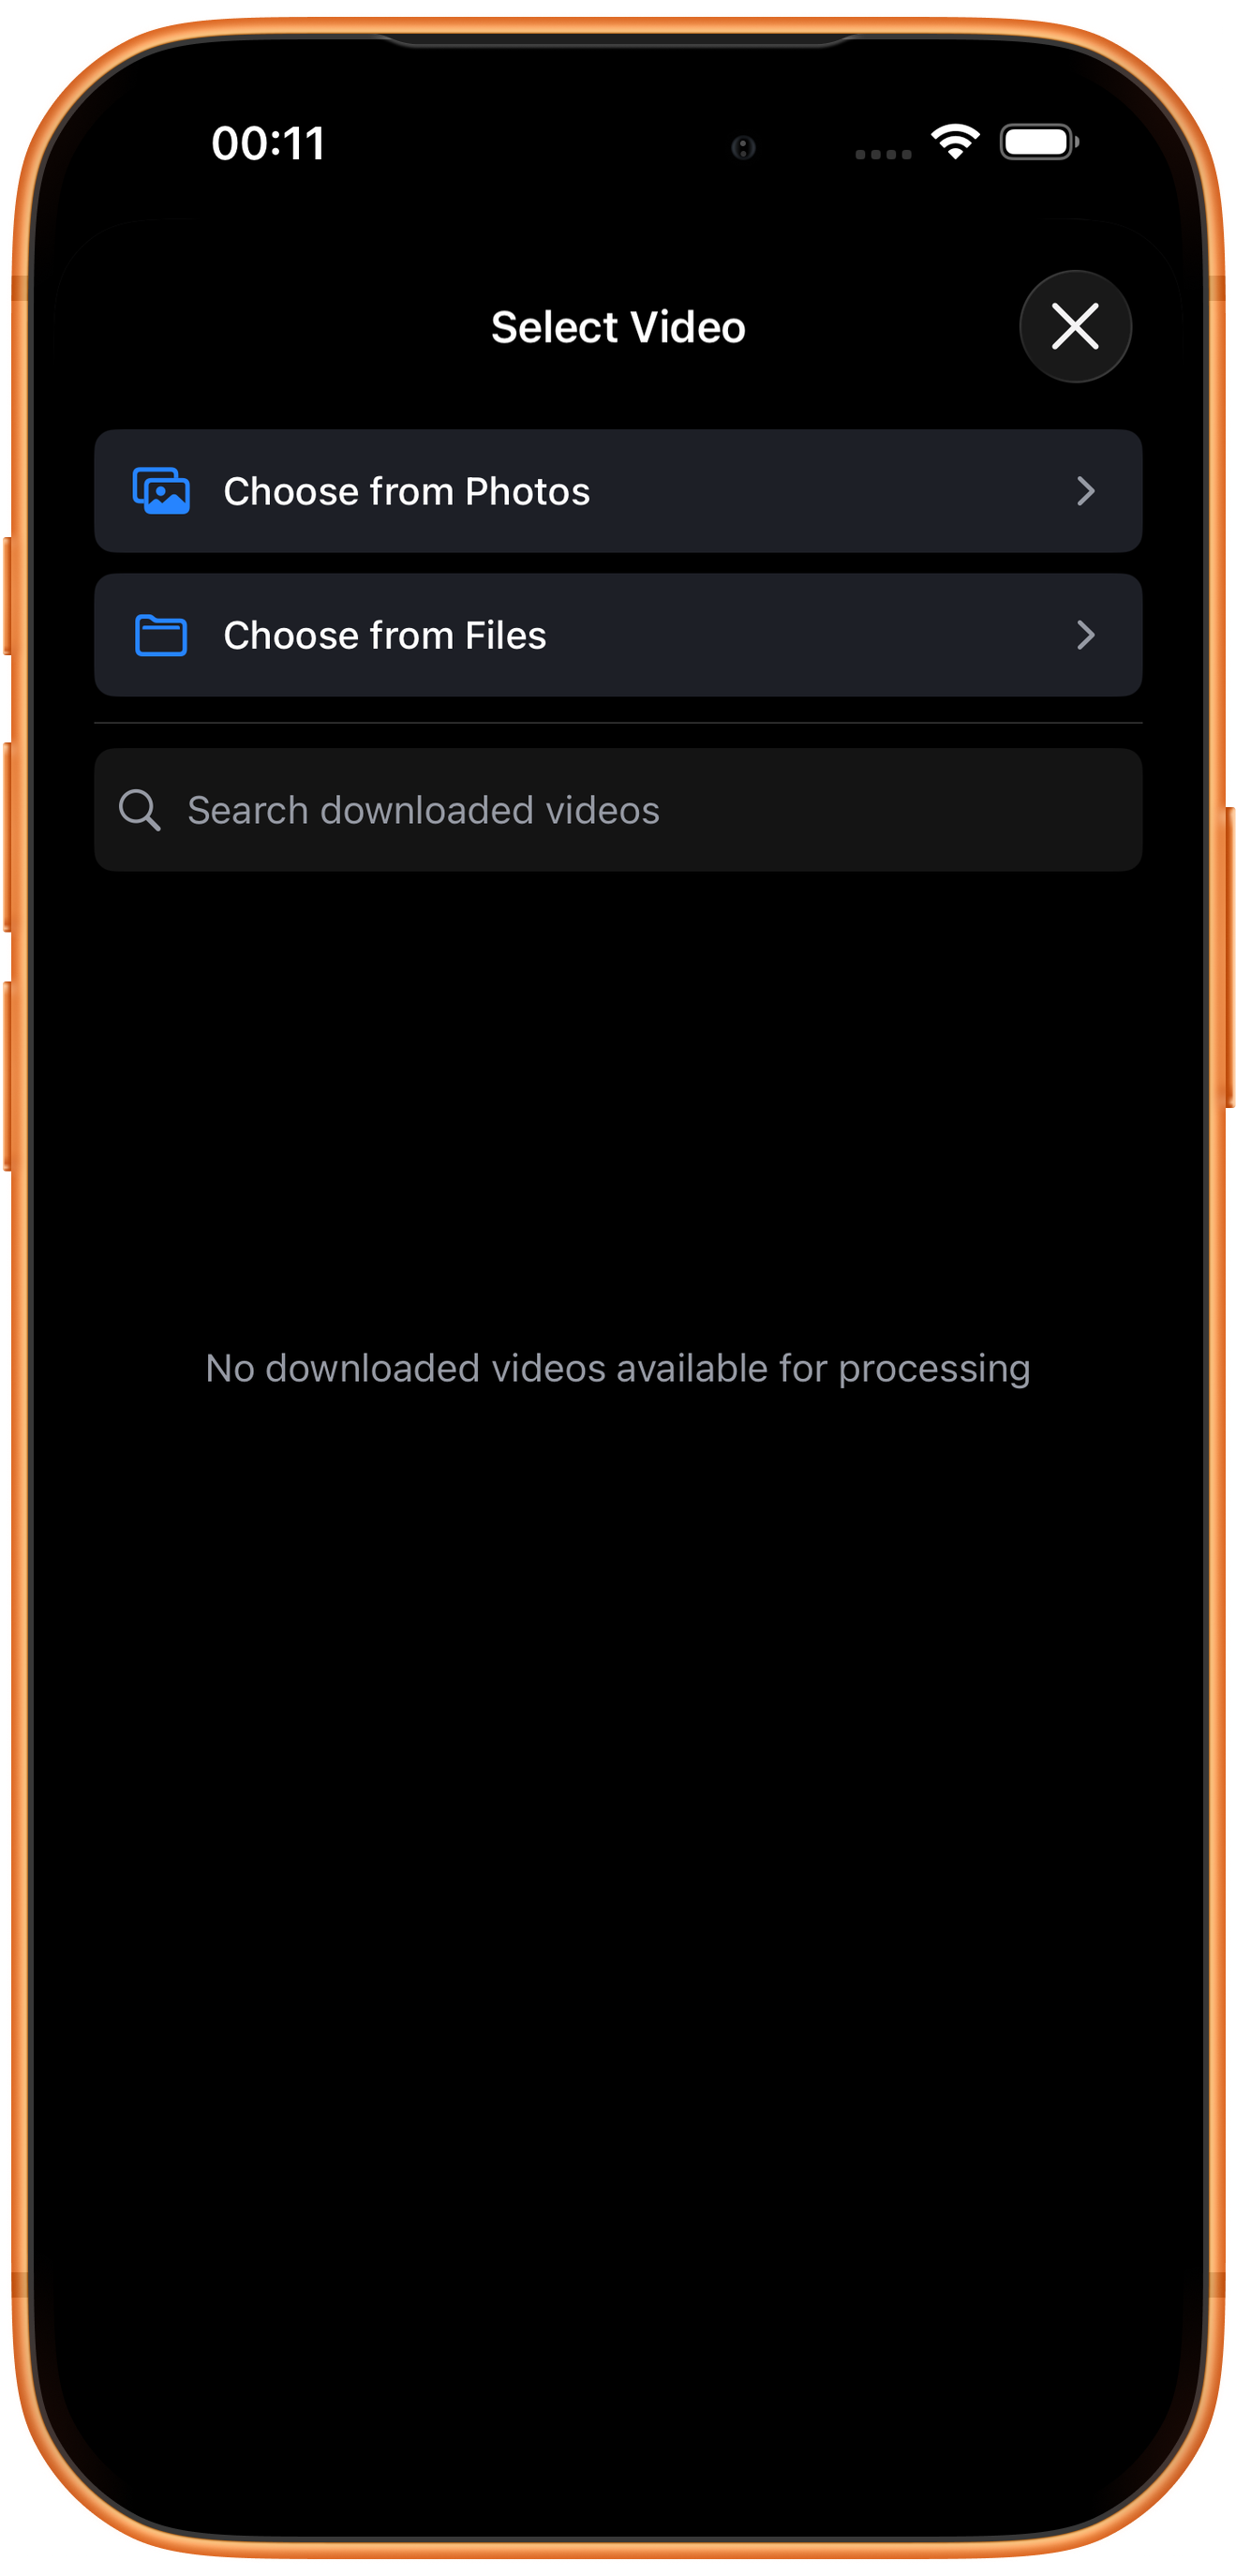
In Select Video, tap Choose from Photos and pick your source. Use Choose from Files for media stored in Files. An empty download list does not prevent importing from Photos. Some examples reuse a previously trimmed clip of about six seconds; you can prepare a short sample with Trim Video.
03Steps
Choose the motion range and cover
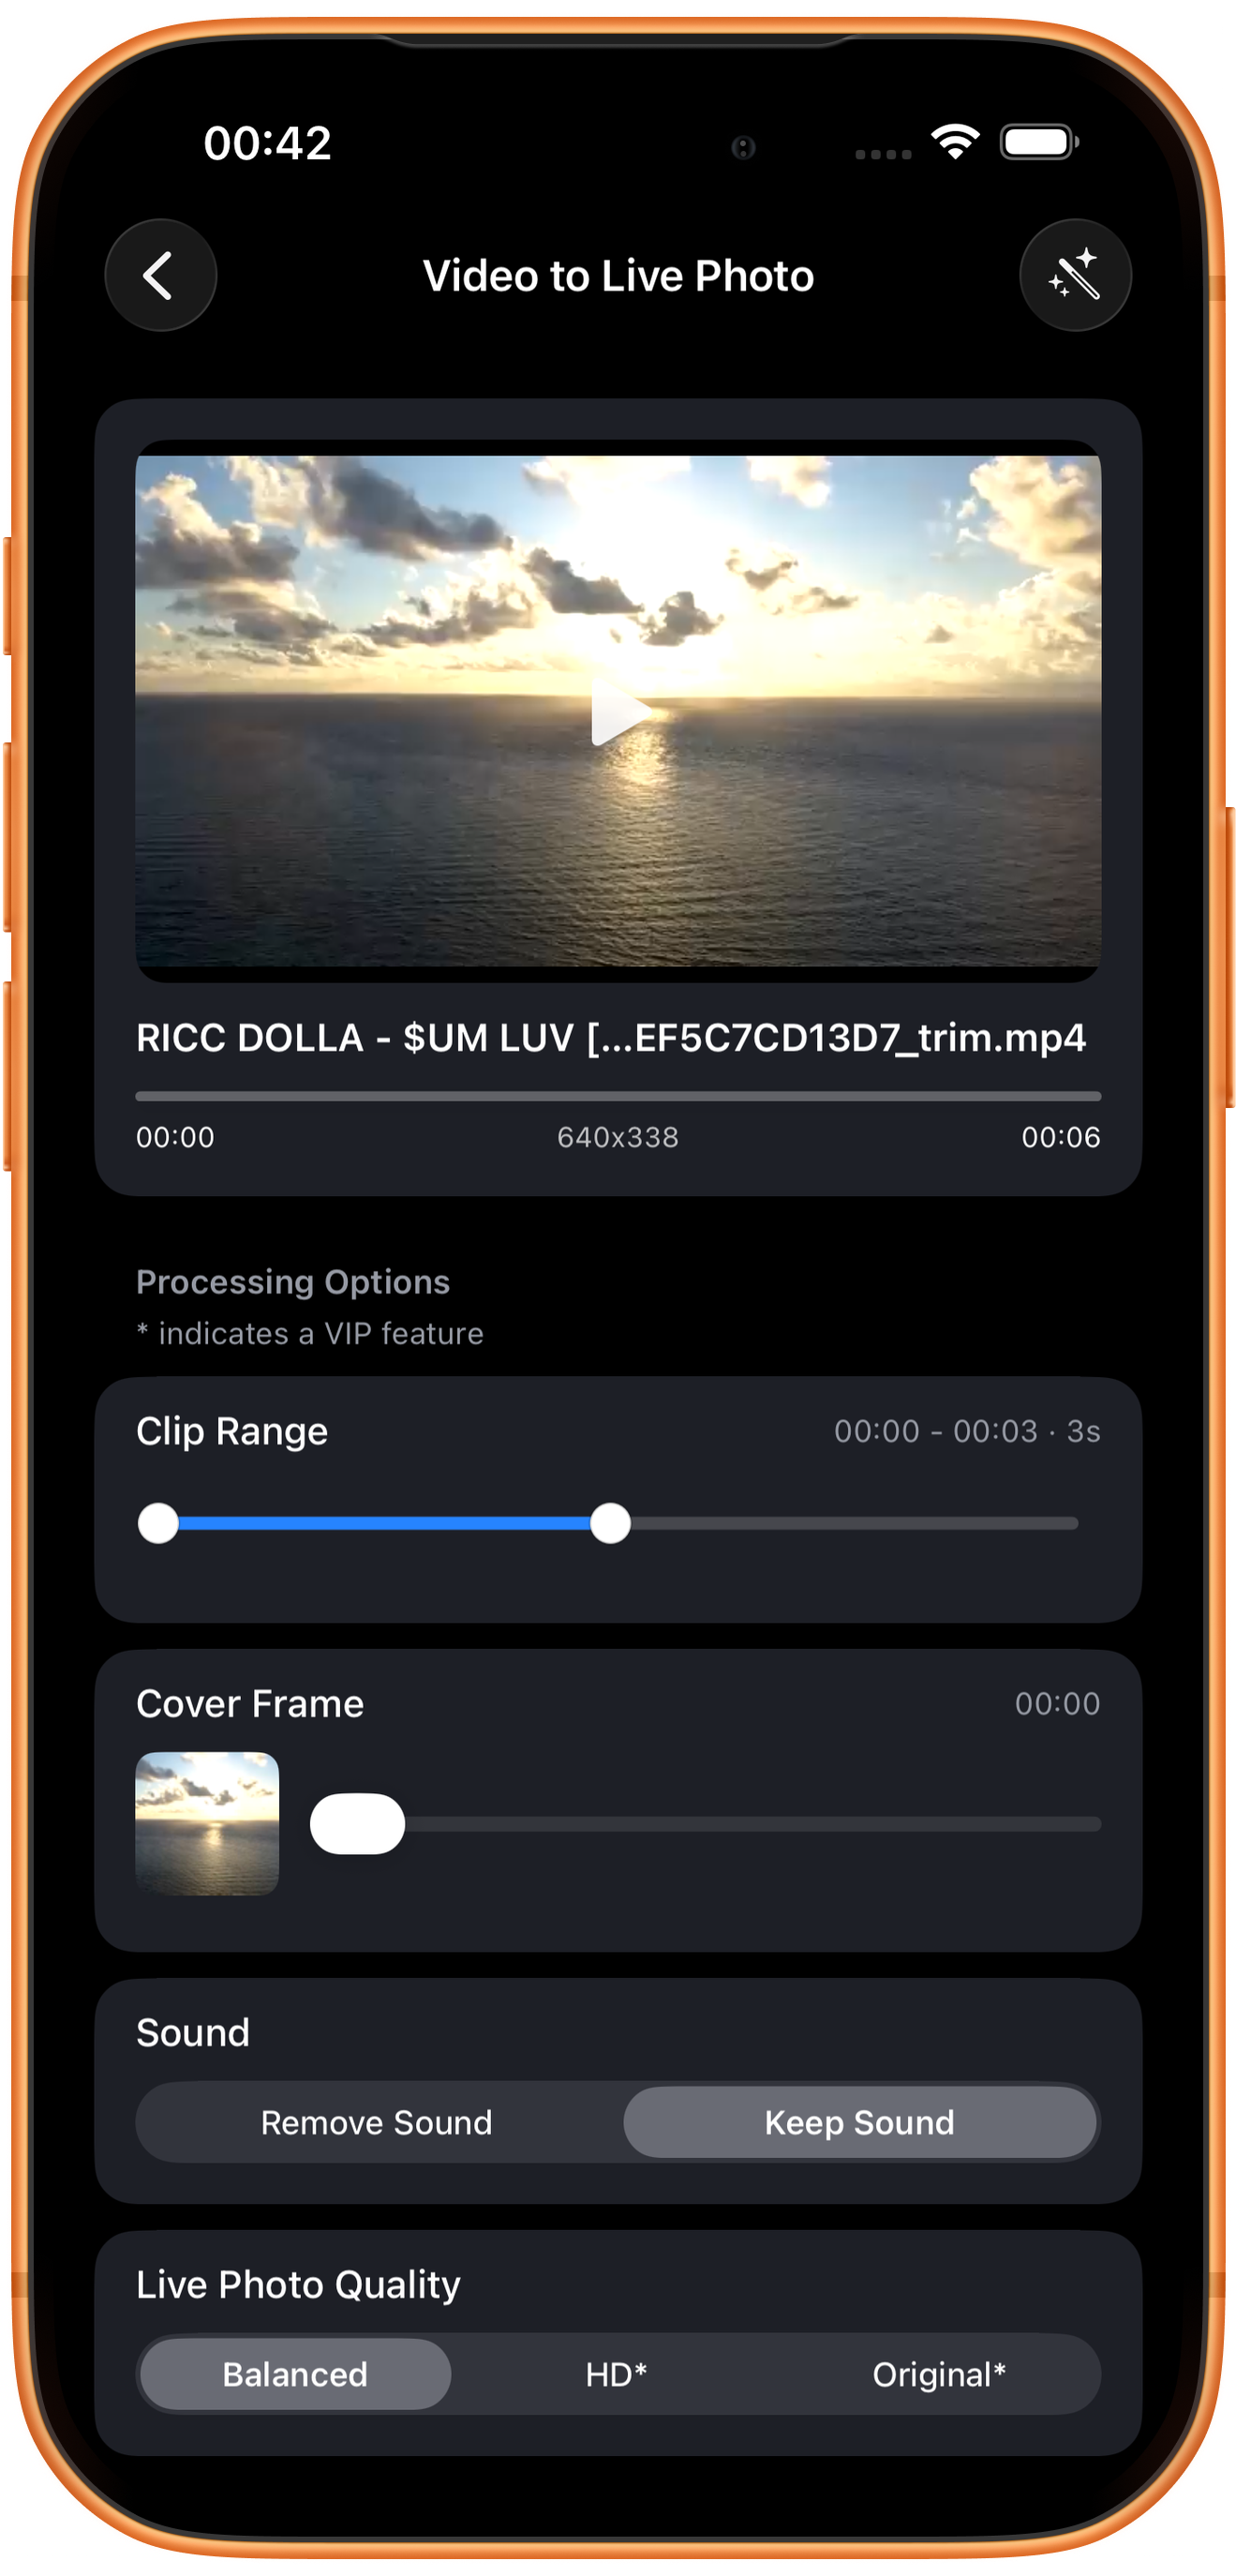
After importing, choose the action with Clip Range and set Cover Frame. This example selects 00:00–00:03.
Clip Range: choose which moment to keep
The handles set the start and end, with duration shown above. Choose a short range around the action. The page states that clips over three seconds require VIP.
Cover Frame: choose the still image
Move the cover slider and check the thumbnail and time. Choose a clear subject and natural expression, avoiding closed eyes or motion blur. The still cover and motion range are separate settings.
04Steps
Choose sound and quality
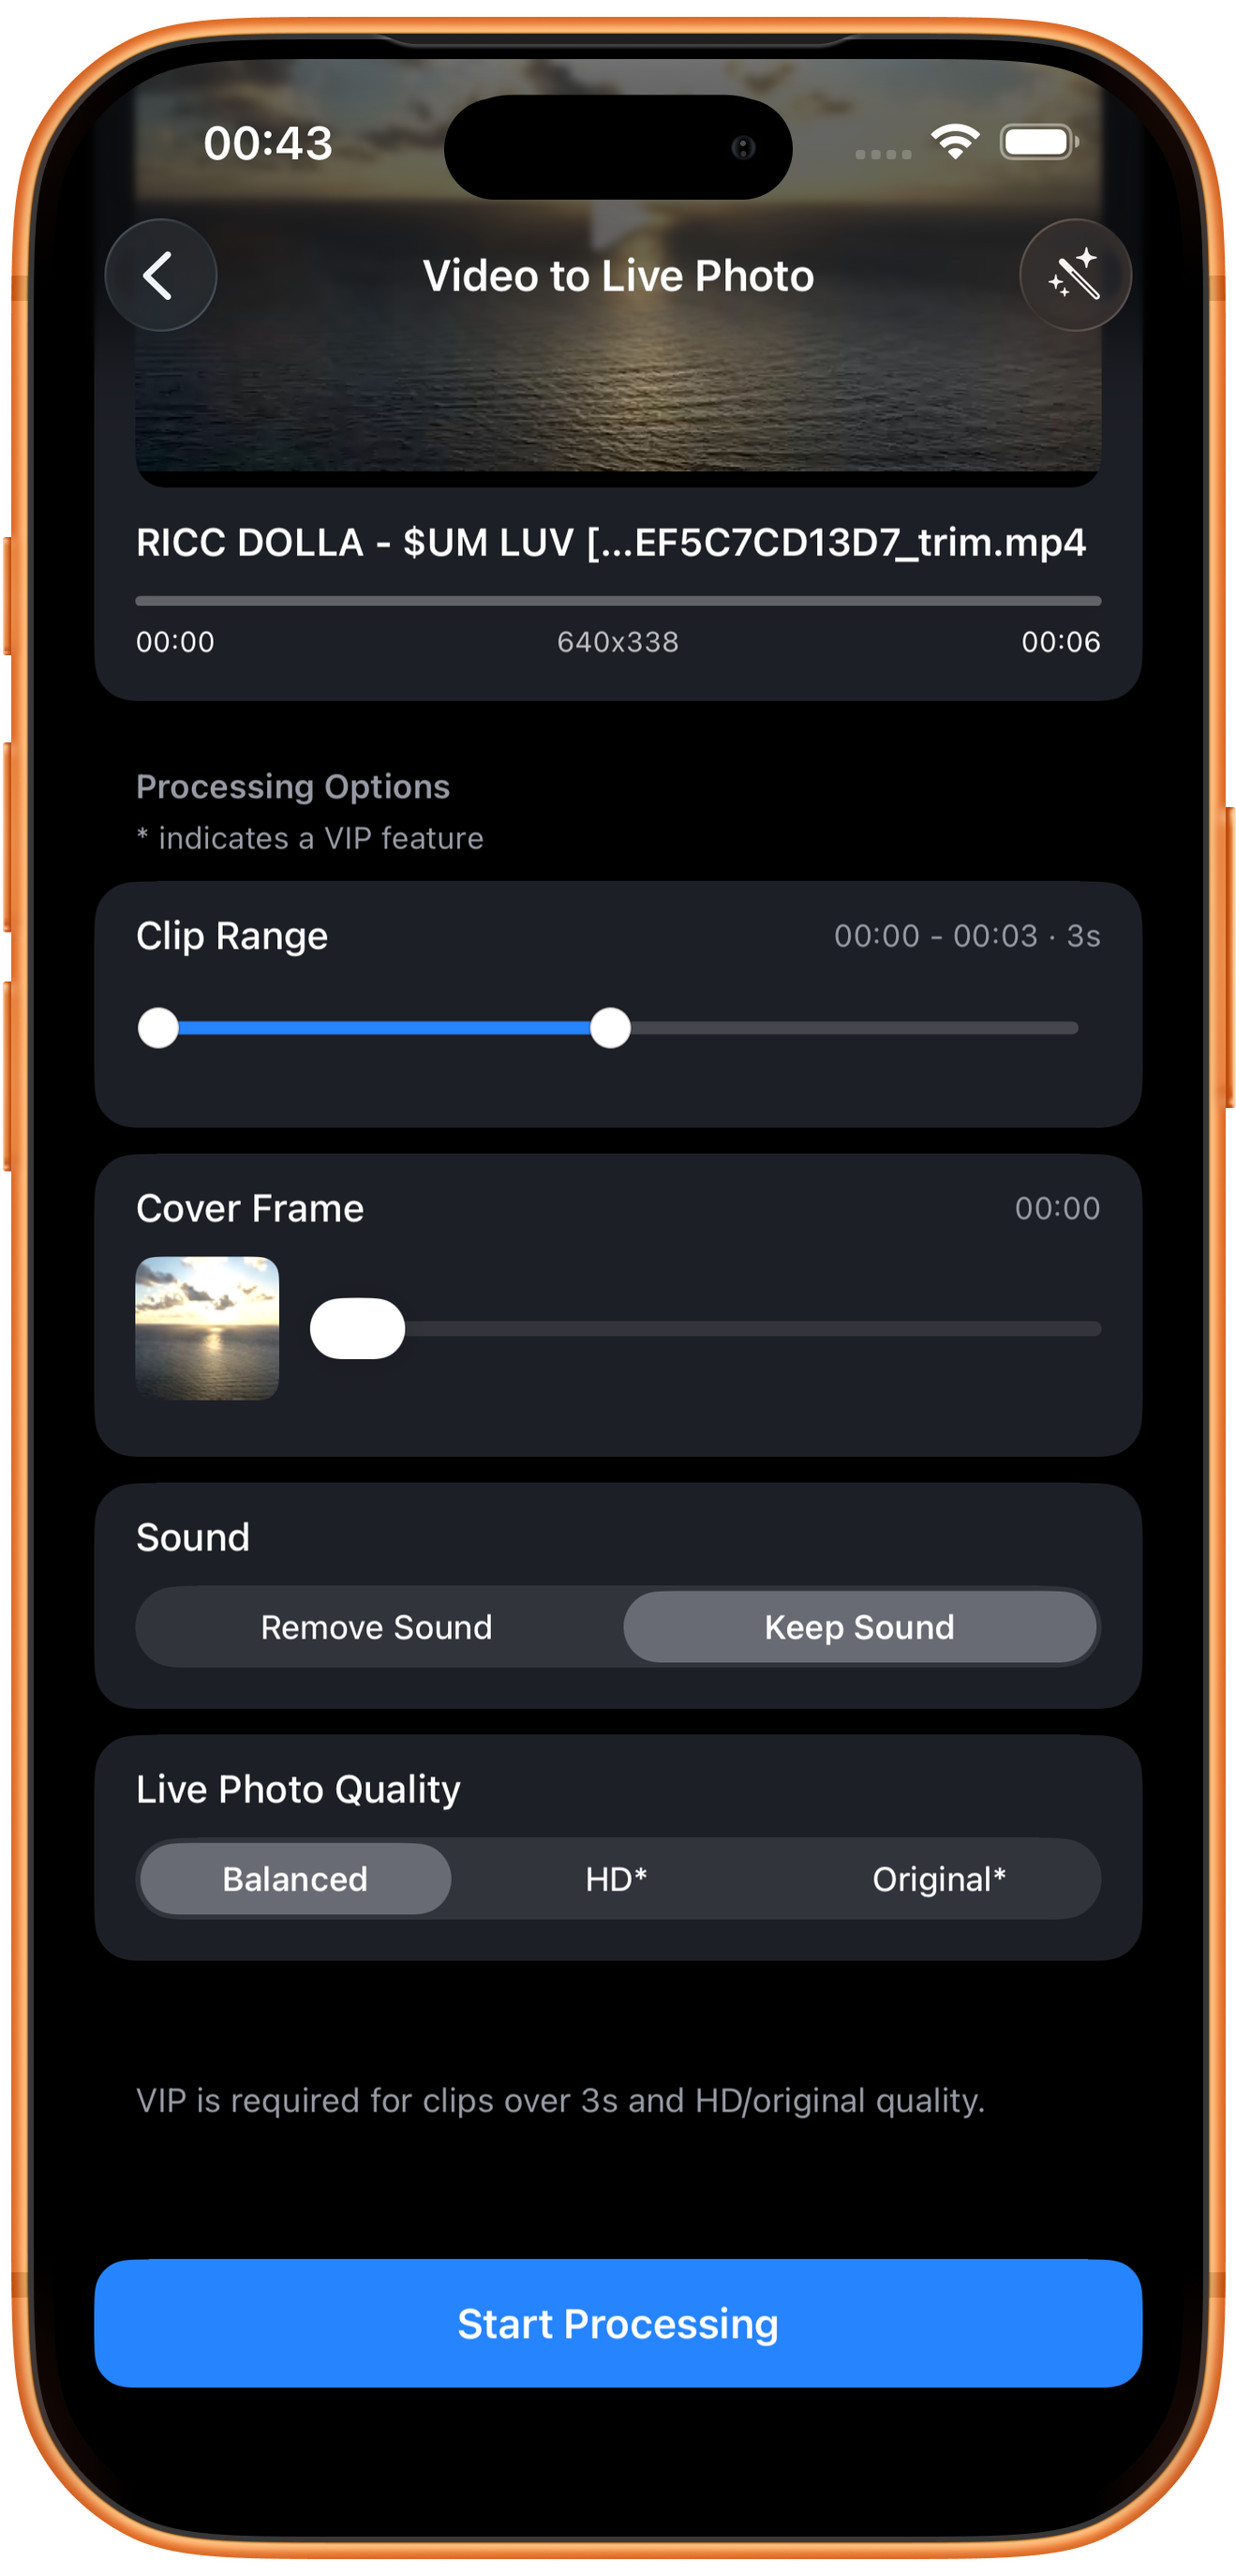
Scroll to Sound and Live Photo Quality, then tap Start Processing. The example keeps sound and uses Balanced.
Remove Sound and Keep Sound
Remove Sound mutes the clip; Keep Sound retains its audio. Choose based on whether the moment needs its original atmosphere.
Balanced, HD*, and Original*
Balanced is the tested choice. HD and Original are marked VIP. A quality setting cannot add details that were absent from the source.
05Steps
Check the Live Photo in Photos
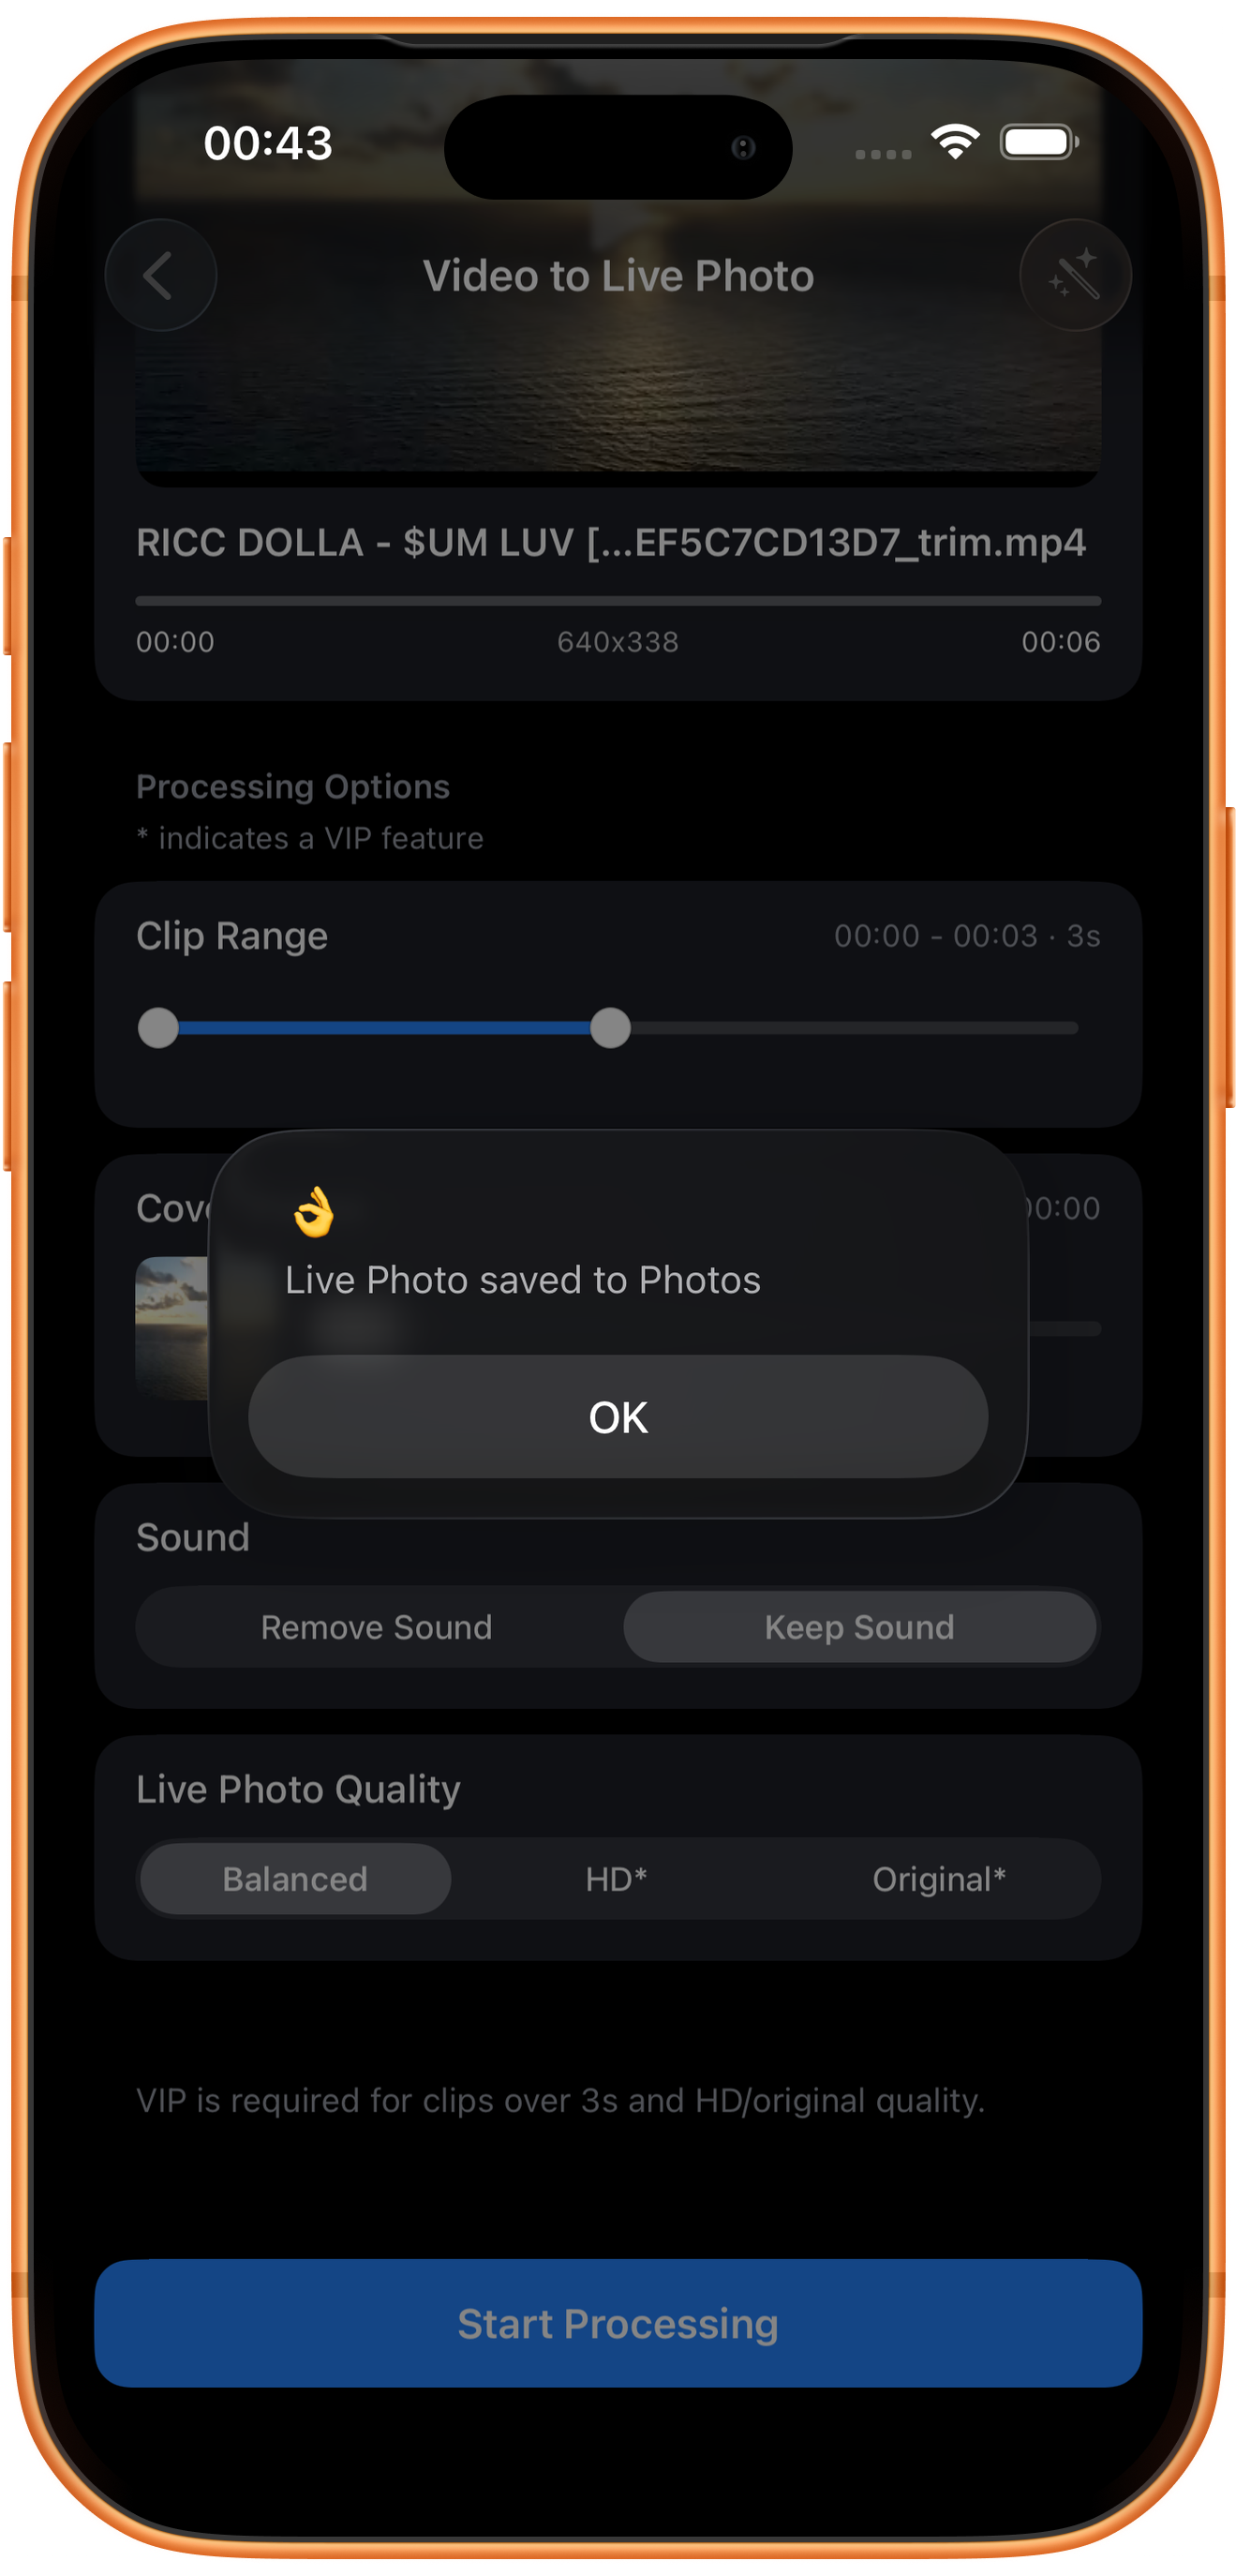
The app displays Live Photo saved to Photos, reporting a successful save. Tap OK, then open Photos and inspect the Live Photo badge and playback. The recorded test verified the app’s save confirmation; the screenshot does not replace a hands-on long-press playback check.
Troubleshooting
Check the cover and motion separately
A good cover does not guarantee the whole clip looks right. Check the start, end, sound, and still cover after saving. Share in a way that preserves Live Photo data.
Frequently asked questions
Can I use it directly as a live wallpaper?
Creating a Live Photo and lock-screen wallpaper compatibility are separate. Support also depends on the device and system. This guide does not treat conversion success as proof of wallpaper support.
How is it different from GIF?
The formats and sharing behavior differ. Live Photos can keep sound; GIFs are animations without audio.
Try it on your device
ClipDock is free to download, with in-app purchases. Features and available options depend on the current app version.
Download on the App Store